


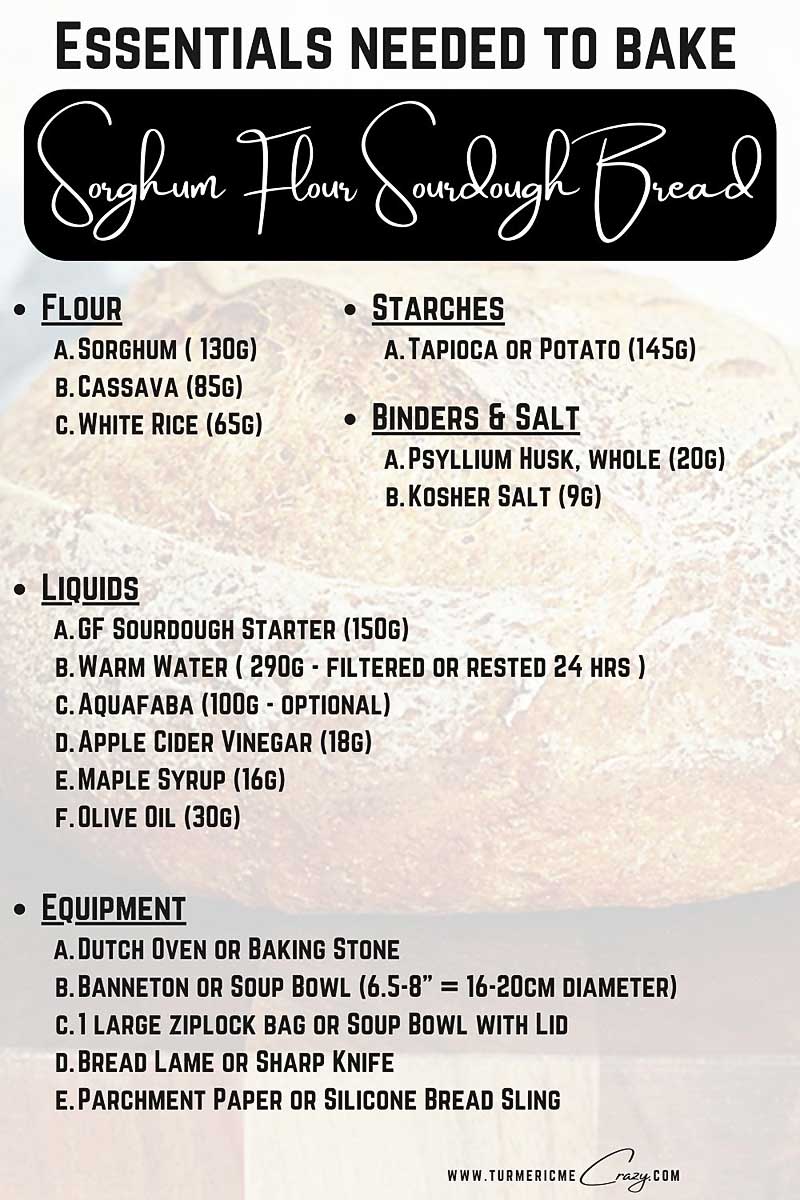
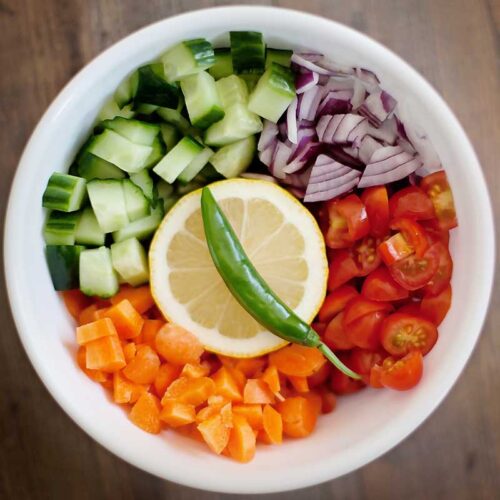
3. Materials List
The essentials you need to bake gluten free sorghum flour sourdough bread.
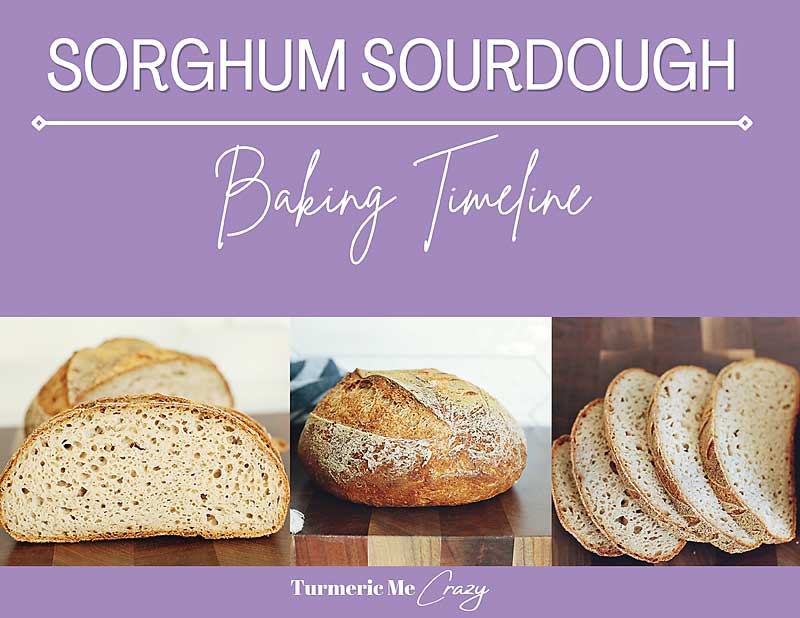
4. FREE Baking Timeline

You’ll love how easy making this bread becomes with my FREE BAKING TIMELINE & follow-along videos. Please contact me in the comments below or on my contact page if you have any questions at all. I believe we are a community, lets help one another in our gluten free sourdough journeys!
5. Lets BAKE: 7-Steps to Gluten Free Sourdough Bread
I like to break things down into easy to remember parts when creating a recipe. So I have created an easy 7-STEP process to making my gluten free sourdough bread with 4 components (bolded below) that make up the dough. I’ll go into detail of how to do each of these steps & components below.
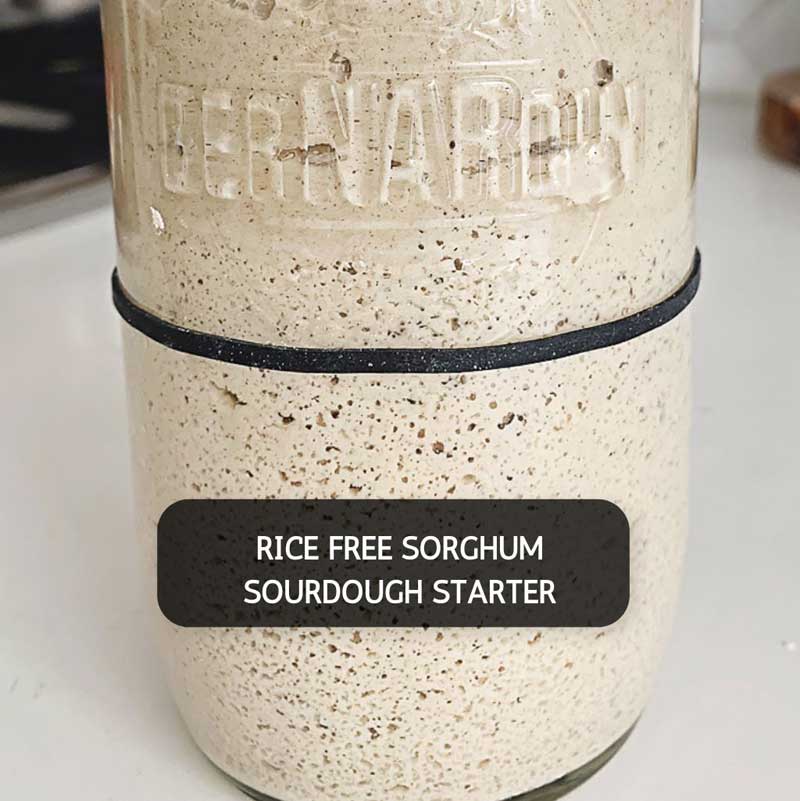
- REACTIVATE & REPLENISH STARTER
- MIX LEAVEN
- MIX SOAKER & GEL
- ADD STARCHES & MIX DOUGH
- SHAPE & CHILL DOUGH
- PROOF DOUGH
- SCORE & BAKE
7. Frequently Asked Questions (FAQ)
Can’t find the answer to your question? Please feel free to contact me anytime in the comments below or privately on my contact page.


Print Recipe
Pin Recipe
Rate Recipe
Tried this recipe?Mention @Turmeric_Me_Crazy or tag #turmeric_me_crazy!
Servings:
Equipment Needed
- 1 Stand Mixer optional
- 1 Dutch Oven or Baking Stone
- 1 Banneton (6.5-8" = 16-20cm) or Soup Bowl with lint free towel
- 1 Bowl with lid or Ziplock bag fits banneton or soup bowl inside
- Parchment Paper or Bread Sling optional
- 2 Ice cubes or spray bottle with water optional
- 1 small clear container with lid optional - for the sample dough
INGREDIENTS
To REACTIVATE your starter
- 75 g Sorghum Flour to feed your starter
- 75-85 g Warm Water (tepid or slightly warm to the touch) filtered or sat on counter 24 hours
- 15 g Gluten Free Sourdough Starter can be cold or room temp
For the LEAVEN
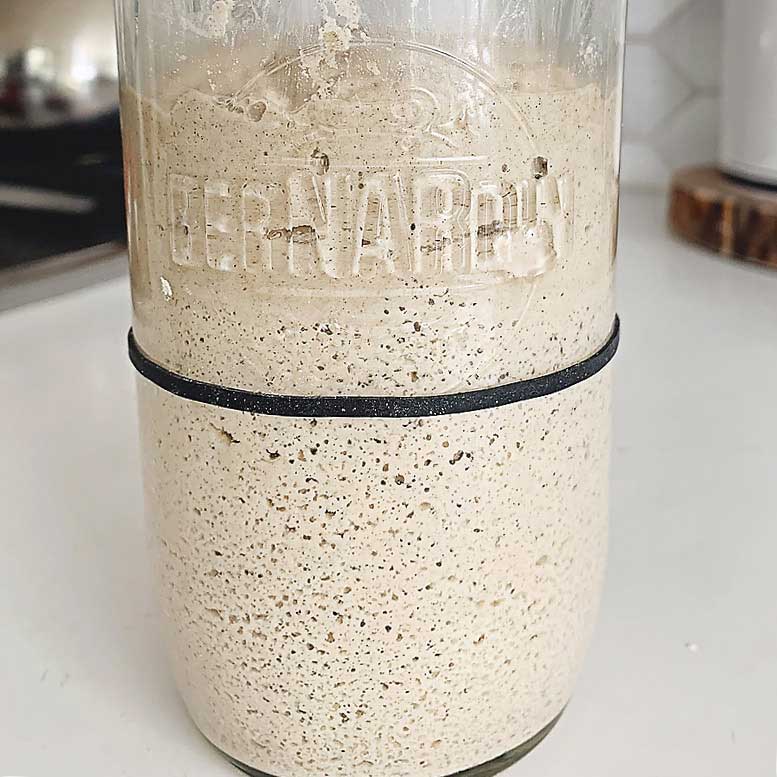
- 150 g Active Gluten Free Sourdough Starter @ PEAK see post for details
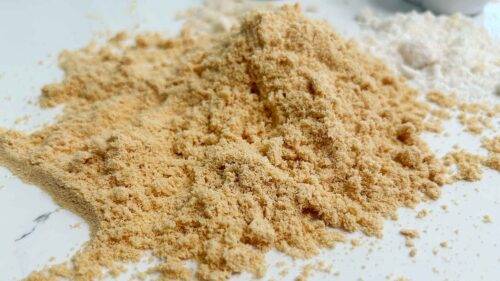
- 75 g Sorghum Flour
- 90 g Warm Water (tepid or slightly warm to the touch) filtered or sat on counter 24 hours
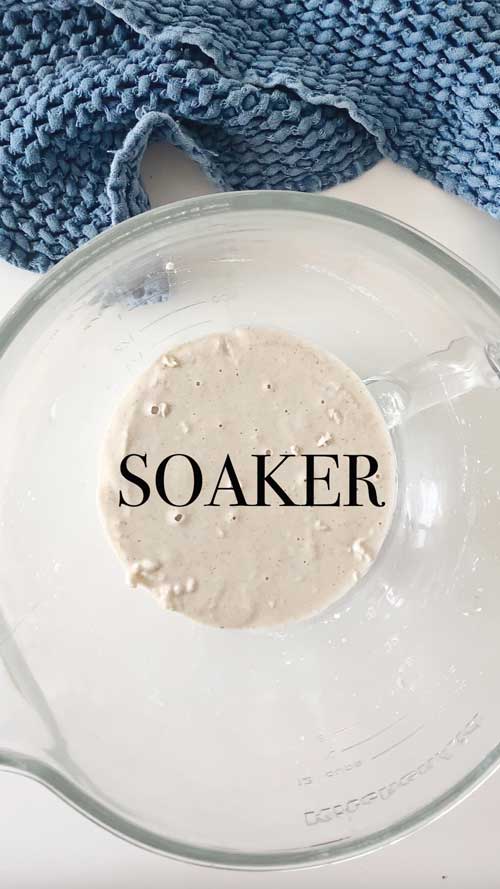
For the SOAKER
- 55 g Sorghum Flour
- 50 g Cassava Flour
- 65 g White Rice Flour see notes for substitution options
- 200 g Warm Water (tepid or slightly warm to the touch) filtered or sat on counter 24 hours
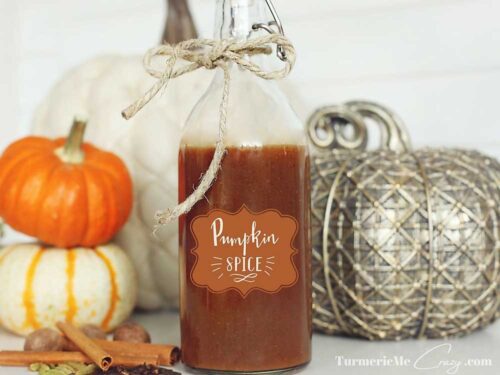
For the GEL
- 100 g Aquafaba (or water - see post for details)
- 30 g Extra Virgin Olive Oil (or water - optional see post for details)
- 18 g Apple Cider Vinegar
- 16 g Pure Maple Syrup
- 9 g Kosher Salt or Sea Salt
- 20 g Psyllium Husk (whole)
For the STARCHES
- 145 g Tapioca Starch or Potato Starch aka Tapioca Flour
INSTRUCTIONS
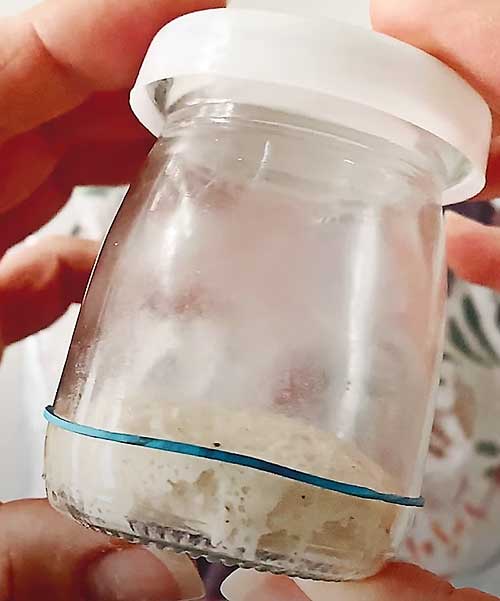
REACTIVATE STARTER - EVENING BEFORE YOU BAKE
- Feed your gluten free starter (either cold from refrigerator or room temp) a ratio of 1:5:5. Then discard all but 20g of starter. Feed 100g brown rice flour (or sorghum flour), 100g water (105-110g if feeding sorghum flour). Ensure you keep more starter to replenish! Either set aside 10-20g of starter to replenish it now, or replenish later while you mix your leaven. See post for details.
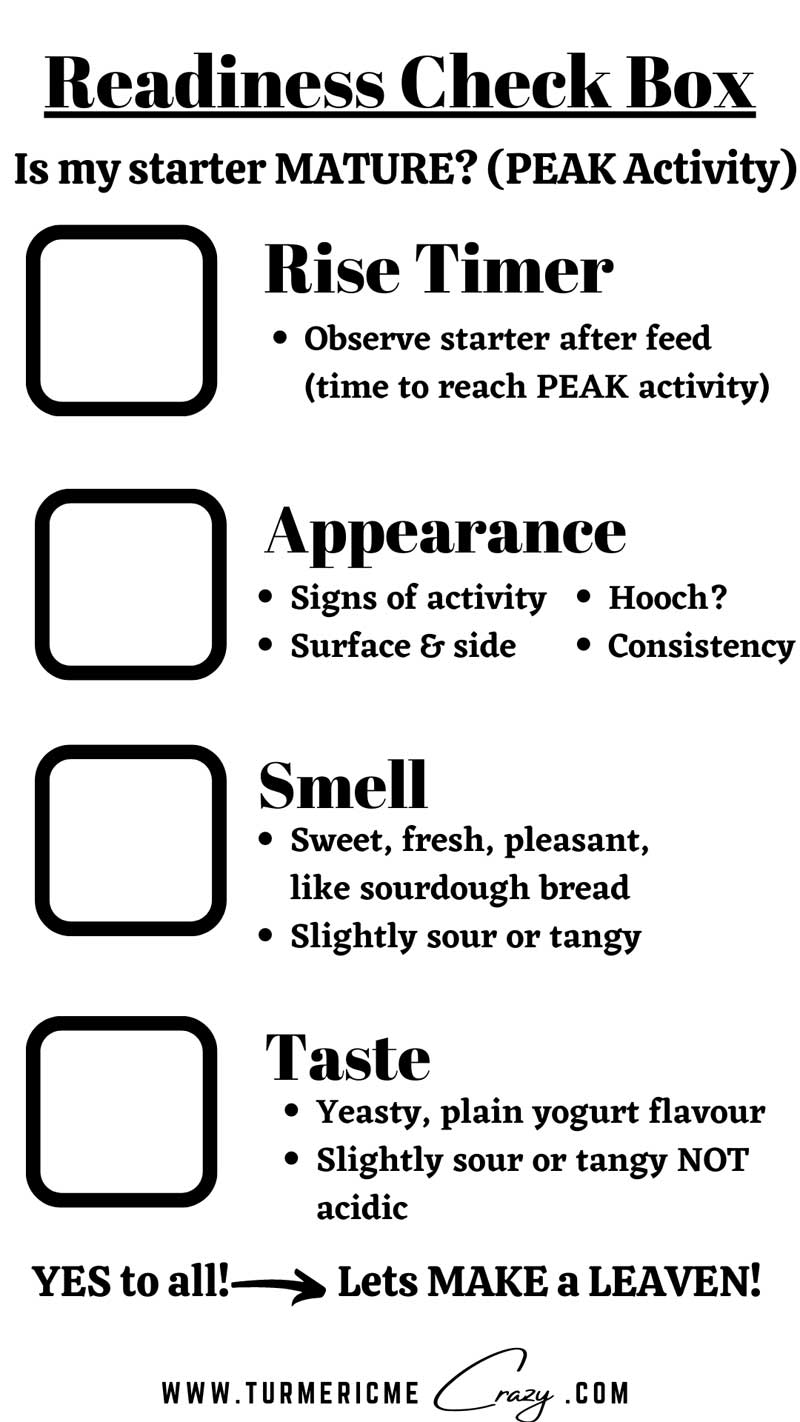
- Leave fed starter in a warm place (near ideal temp 24°C or 75°F) until it reaches peak activity (usually 8-12 hours after feed) (see post for more details on how to tell when starter peaks).
MIX LEAVEN - when STARTER reaches PEAK activity (Next day)
- Mix peaked starter (active), water & sorghum flour until well incorporated. This is your LEAVEN (aka preferment or active starter) that will be used to leaven (rise) the dough.
- Leave leaven in a warm place (near ideal temp 24°C or 75°F) until it reaches peak activity (see post for more details on how to tell when leaven peaks). Usually this will take between 2-4 hours but can take up to 8-10 hours if starter is past it's peak activity when leaven is mixed.
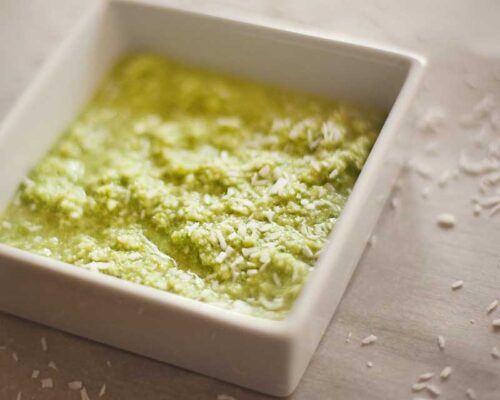
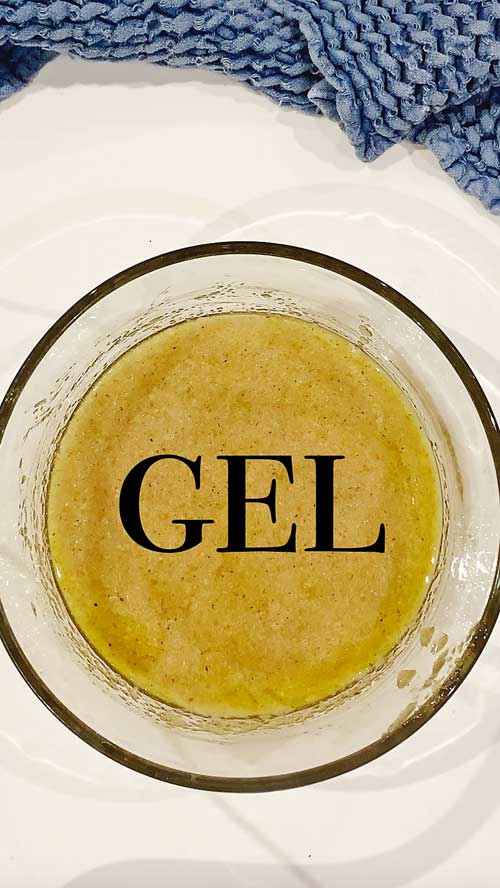
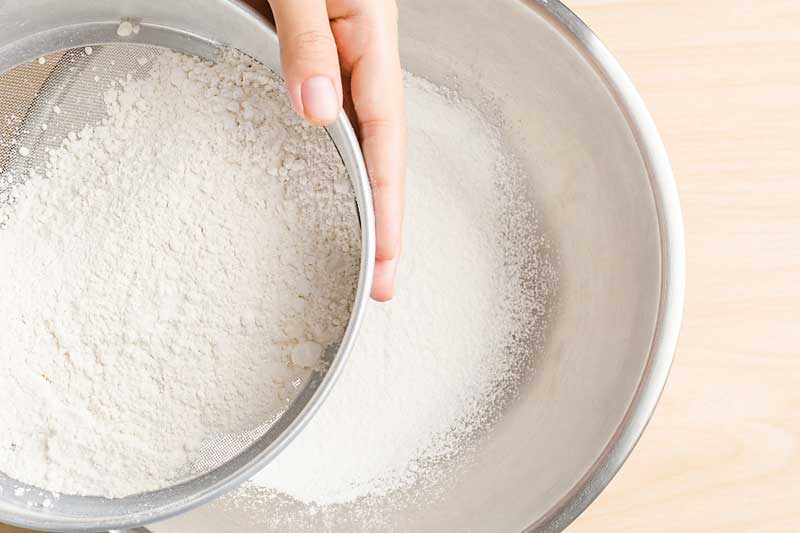
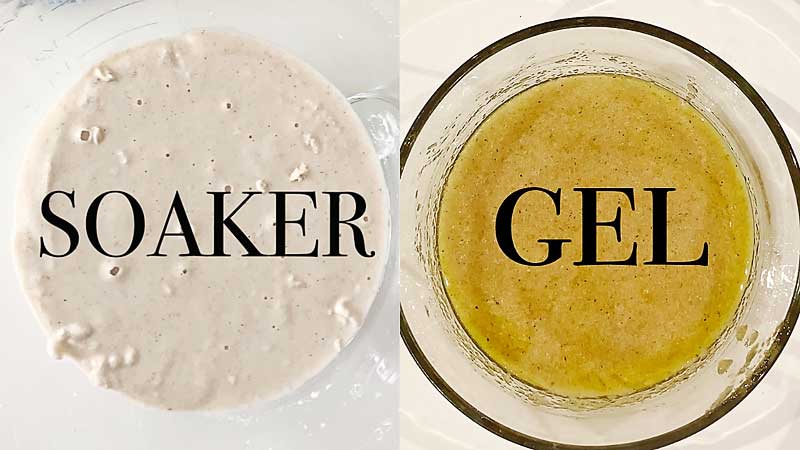
MIX SOAKER & GEL
- After mixing leaven. Sift flours together & mix together all ingredients for soaker. Set aside in a warm place.
- Mix your gel. Mix all ingredients in the gel together & set aside.
ADD STARCHES & MIX DOUGH - when LEAVEN reaches PEAK activity (2-4 hours after mixing)
- Add peaked leaven, gel & sifted starches to your soaker (in the bowl of a stand mixer). Mix on low-medium for 2 mins until combined. Then increase speed to medium-high for another 5 mins until dough comes together nicely.
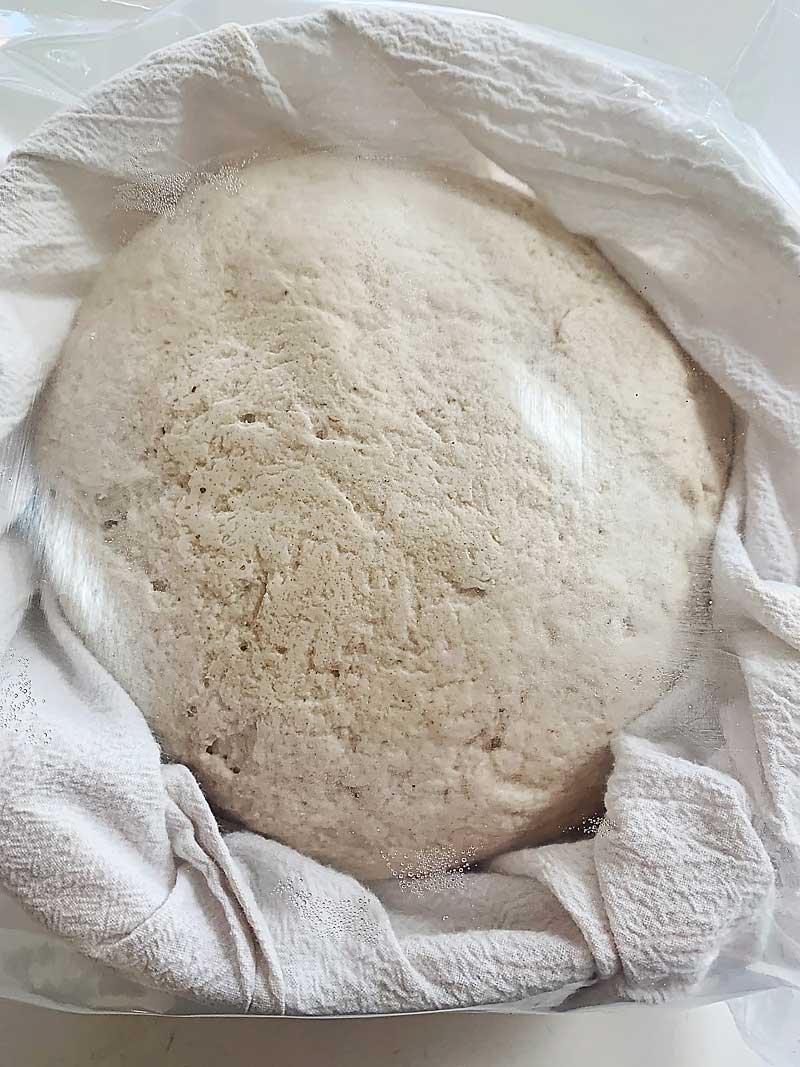
SHAPE DOUGH & PLACE INTO BANNETON OR BOWL
- Very lightly dust countertop with brown rice flour. Use a spatula or a bench scaper to make a dough ball & then transfer to countertop. Gently shape dough into a ball ensuring to close all seams. Remove a small piece of dough for your sample (see post & video for more details).
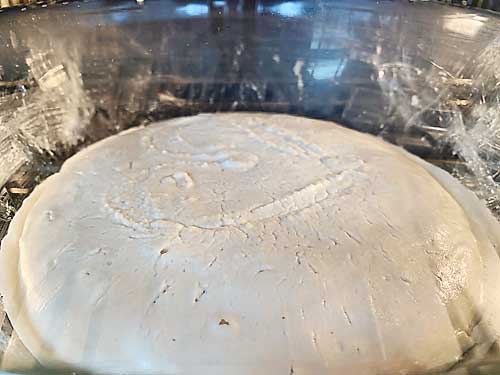
- Gently flip dough into banneton (dusted with rice flour) or soup bowl (no need to dust) top side down. Place banneton or bowl into an airtight container or ziplock bag.
CHILL
- CHILL your dough (aka cold ferment) covered in the refrigerator overnight.
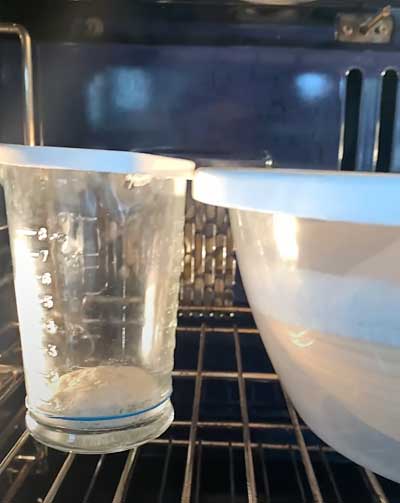
PROOF DOUGH (NEXT MORNING OR AFTER WORK)
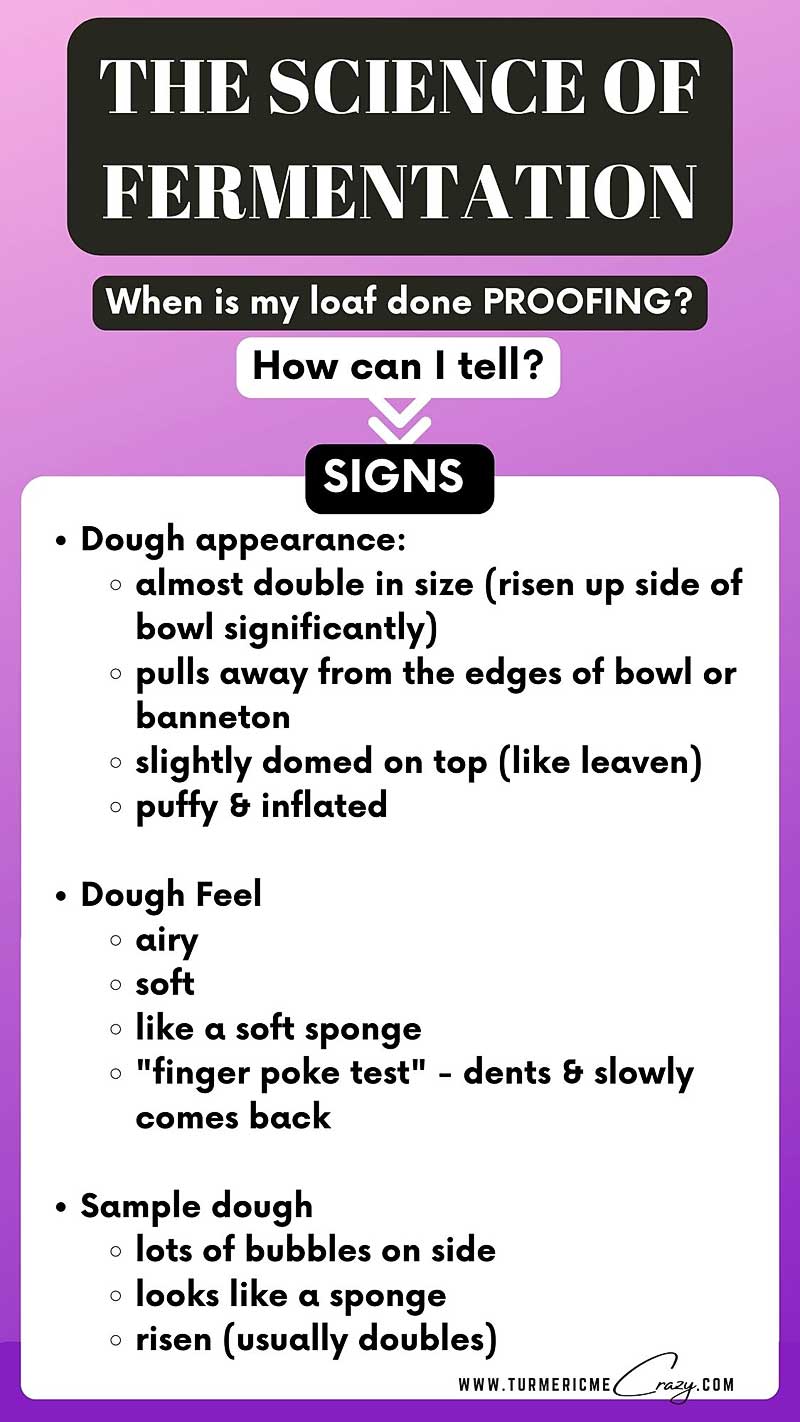
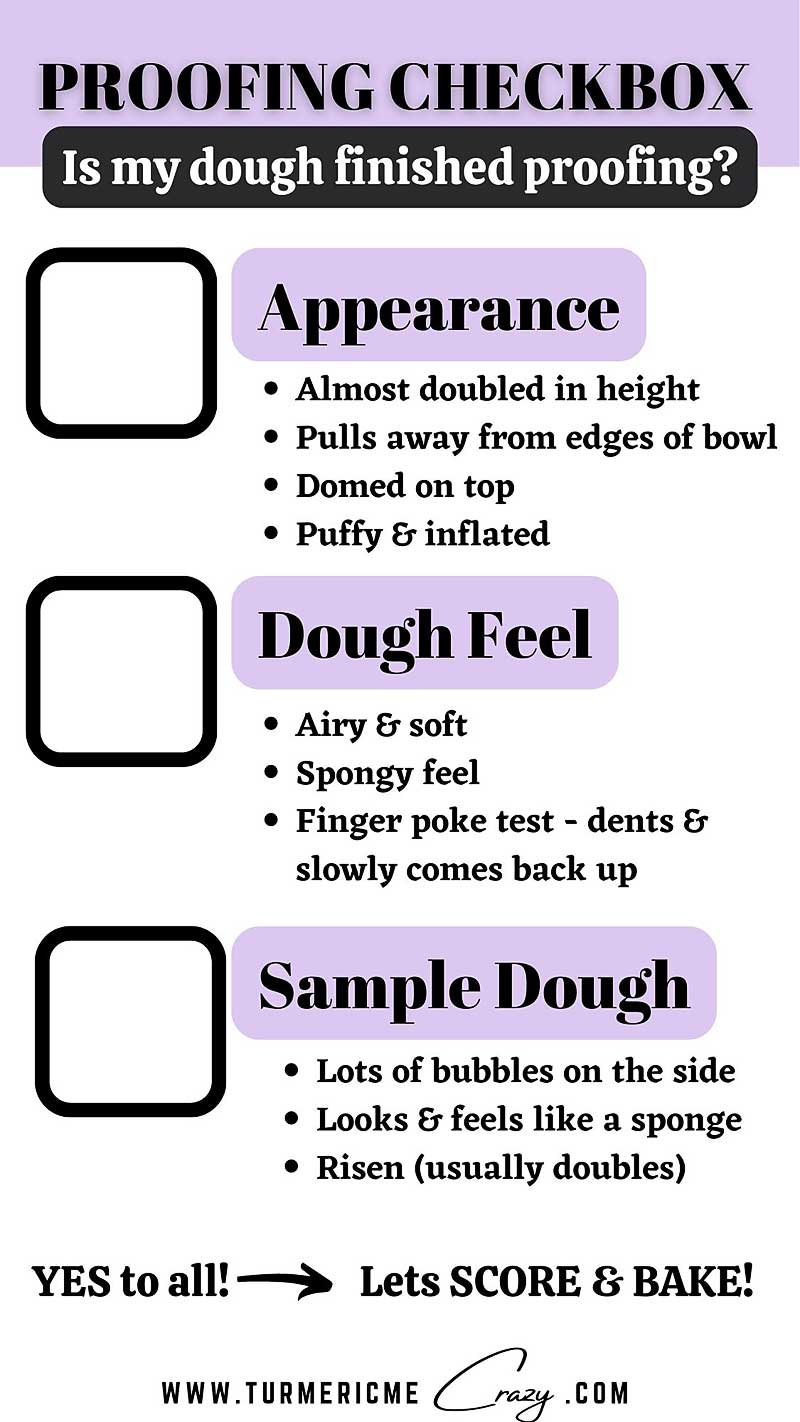
- Place the dough in the oven with the light on (or in a warm spot) for 1.5-2 hours, then remove it to room temperature to continue proofing while oven heats up. Watch for signs proof is finished to avoid over-fermenting your dough!
PREHAT OVEN
- Preheat oven with dutch oven or baking stone inside, to 450°F (232°C) convection setting, for 30 mins. No convection? Increase temp (475°F or 246°C) & or increase bake time slightly.
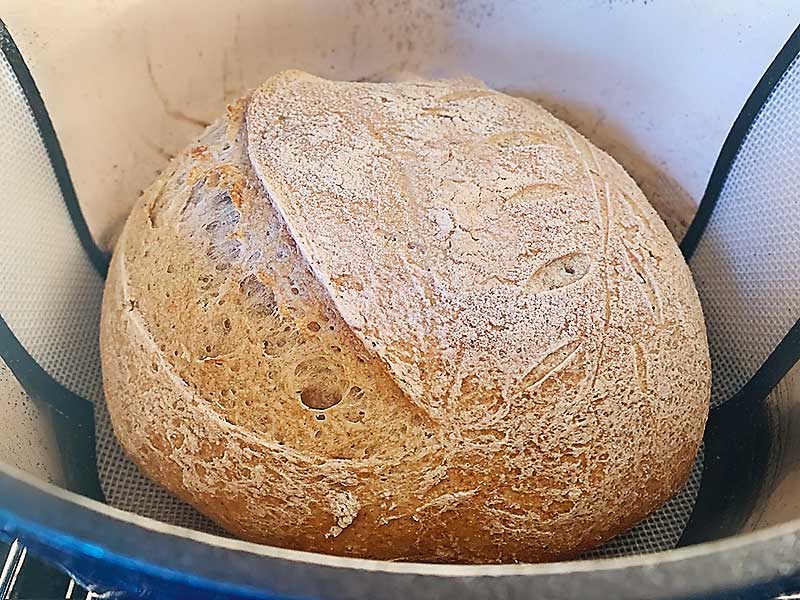
SCORE & BAKE
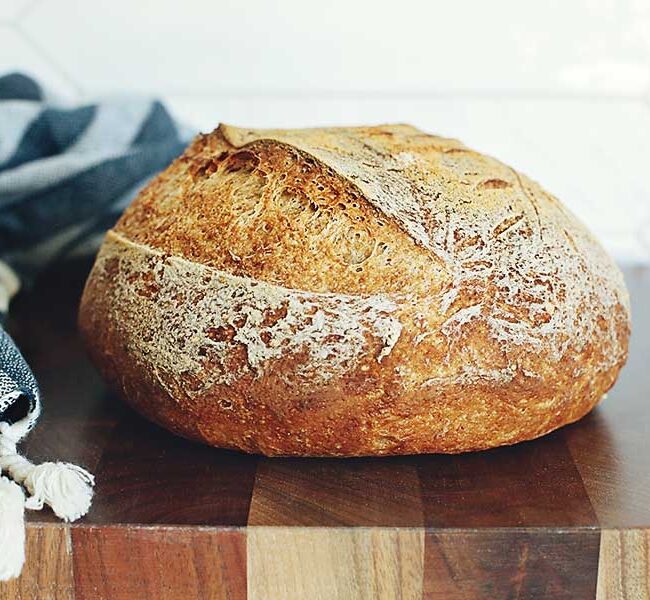
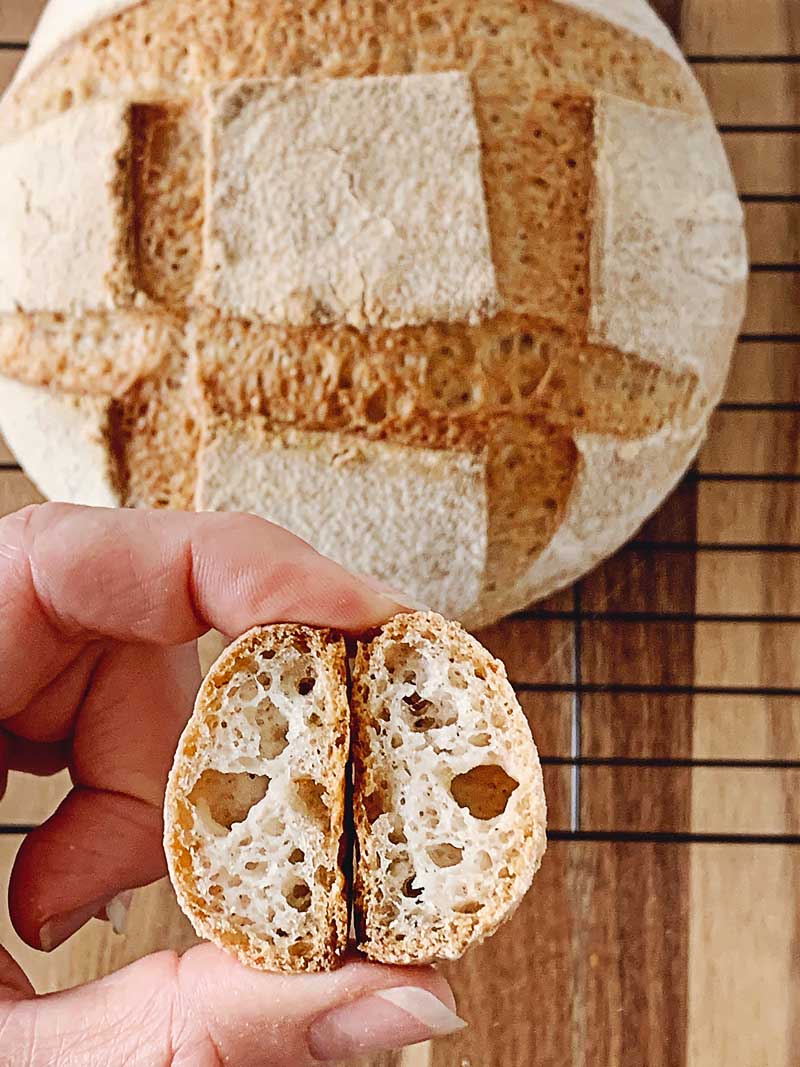
- Once oven has preheated for 30 mins, and dough is finished proofing (see post for checklist), use parchment paper or a silicone baking mat to gently flip dough out and onto countertop (top of loaf now facing up).
- Spray loaf with a little water (optional) then dust generously with rice flour if desired. Score loaf at a 45° angle to the surface. See video for more details. Remember to score your sample too!
- Gently lift dough into the dutch oven, cover & place on centre rack. TURN OVEN DOWN to convection 425°F (218°C) & BAKE covered for 35 mins. No convection (450°F or 232°C).
- Bake your sample dough on a baking stone or tray for about 15-20mins. Remove, cool for 5-10 mins, and enjoy!
- After 35 mins, uncover dutch oven, turn dutch oven 355°F (180°C) & bake for another 30-35 mins uncovered.
COOL THEN ENJOY
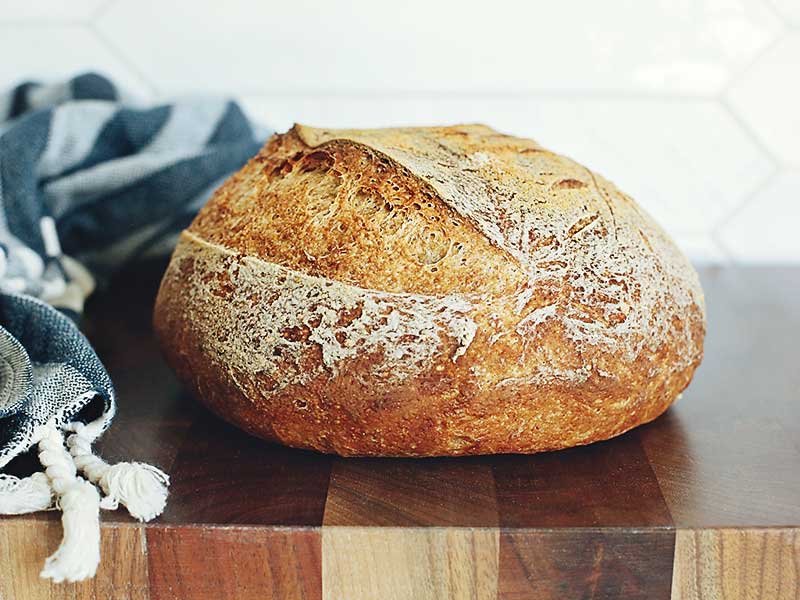
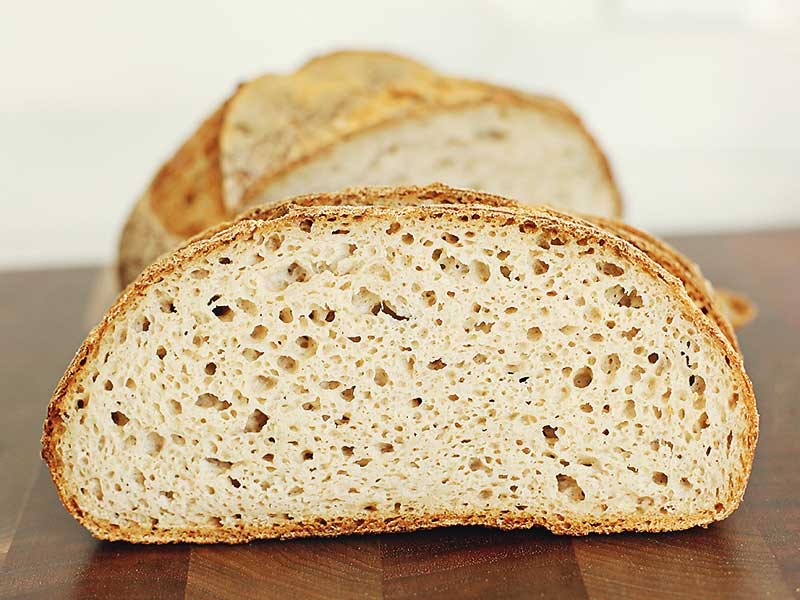
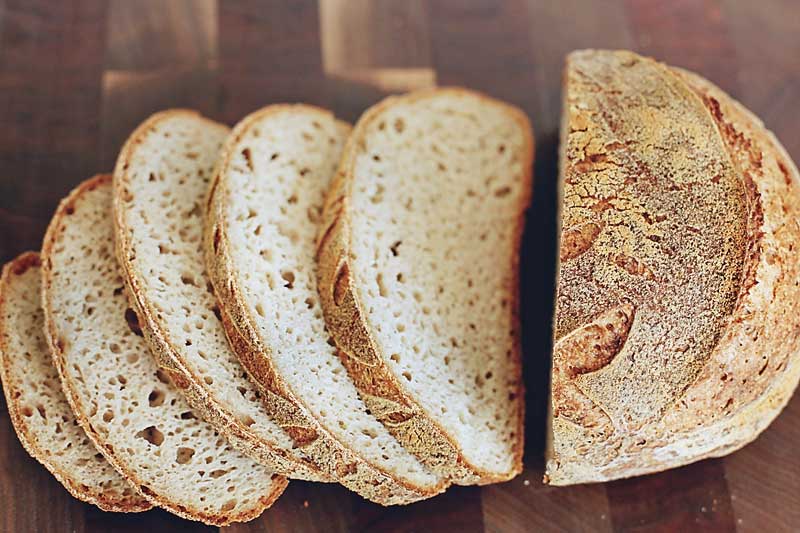
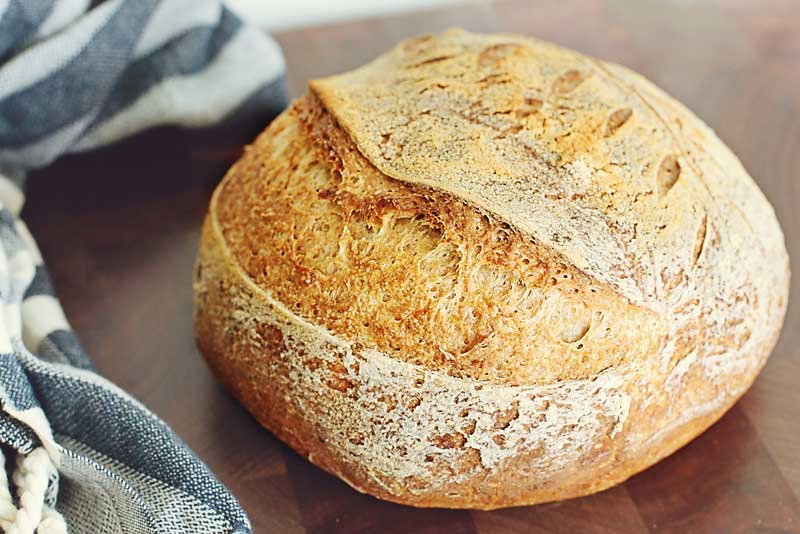
- Make sure to let your beautiful artisan loaf cool for at least 2-3 hours before cutting into it. The gluten free sourdough needs to completely cool in order to set fully.
Notes
- Stand mixer is very useful for this recipe but not essential. You can mix by hand but just make sure to mix well until ALL the ingredients are well incorporated & dough comes together nicely (10-15mins).
- This gluten free sourdough is best slightly warm. I always give mine a slight toasting and it tastes like it came directly out of the oven!
- HOW DO I MAKE THIS TOTALLY RICE FREE?
-
- Millet Flour
- Cassava Flour
- Oat Flour
- Tapioca Flour (aka Tapioca Starch)
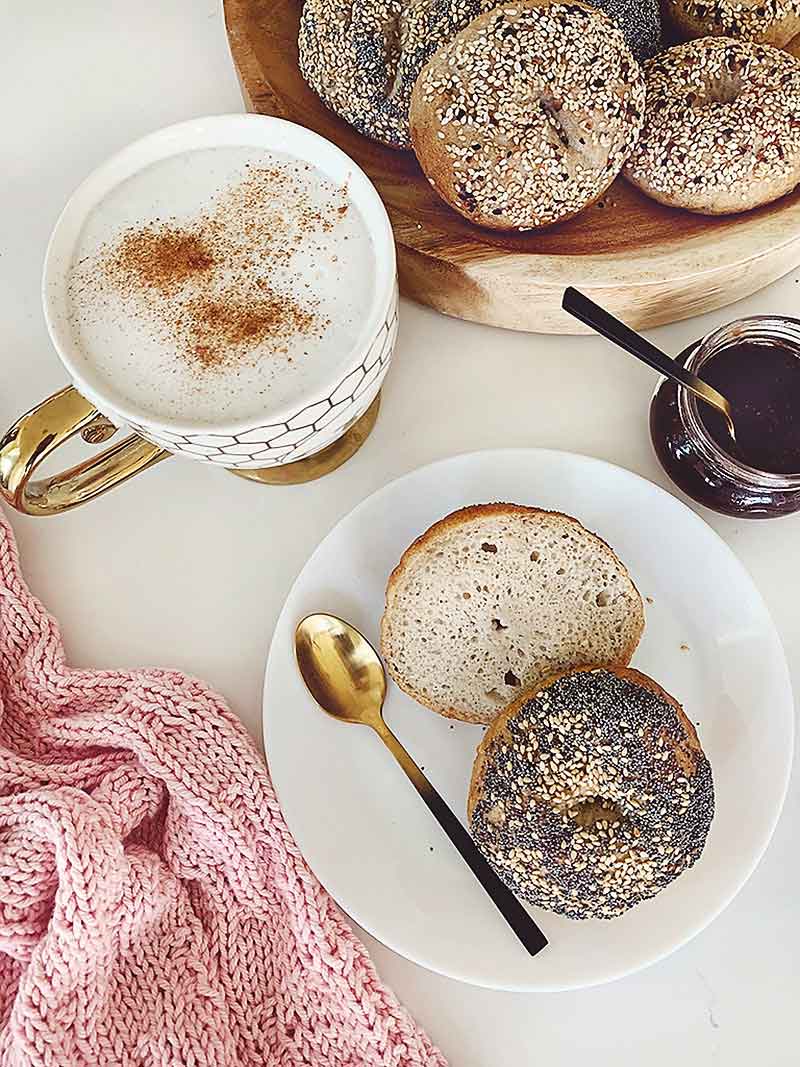
- CAN I FREEZE MY LOAF? Absolutely! As with most sourdough bread, gluten free sourdough is best in the 1st 2 days and can be left at room temperature in a brown paper bag or wrapped in a towel. However, if you won't consume it within 2 days please do slice it up & freeze it! TO FREEZE: Once fully cooled, slice the loaf and wrap each slice in either parchment or plastic wrap before placing in an airtight container and freezing. This will prevent freezer burn & should stay fresh for a good 2 weeks or longer! TO THAW: Simply take individual slices out of freezer and thaw on counter overnight. I find it best to toast them slightly to gain the best taste & texture. You can also pop them directly into the toaster from the freezer, you'll likely need to toast it twice!
Nutrition
Nutrition Facts
Sorghum Flour Sourdough Bread - Gluten Free & Vegan
Serving Size
1 slice
Amount per Serving
Calories
166
% Daily Value*
Fat
3
g
5
%
Sodium
312
mg
14
%
Potassium
5
mg
0
%
Carbohydrates
33.4
g
11
%
Fiber
3.6
g
15
%
Sugar
4.1
g
5
%
Protein
2.4
g
5
%
Calcium
4
mg
0
%
Iron
1
mg
6
%
* Percent Daily Values are based on a 2000 calorie diet.
Tried this recipe?Please comment to let us know how you liked it!!


12 Responses
Hi Trish,
I would like to know if there is any substitute for the Cassava flour?
Thank you.
Amal
Yes there absolutely is. I am working now on adding a section to this recipe that explains alternate flours for you. It should be updated shortly. In short, I would sub 50% of it with sorghum flour & 50% with either tapioca starch, potato starch or arrowroot powder. This will maintain structural + starch balance. This is also the topic most asked for so I am planning to shoot it as my next gluten free video. I hope this helps.
Hugs,
Trish
Hi Trish,
Thank you so much for getting back to me regarding the Cassava flour. I came across a website by Tamara Rubin (safe lead mama) and she has been testing food products for years. I was very concerned to see how high Cassava flour was in heavy metals (across many popular brands). This is the main reason I am trying to move away from using Cassava/Tapioca as best as I can. I will include the link to her website, just in case you want to take a look.
https://tamararubin.com/2025/11/cassava-flour/
https://tamararubin.com/lab-reports/
Thank you.
Amal
Thank you so much for sharing! I will take a look. I find I switch up my flours a lot and thank goodness it is easy to do.
I am about to mix leaven, gel, soak and starch. It’s only 11 am and you say to cold proof overnight. Do I have to cold proof that long? I was hoping to cook today
Hello Lori,
I’m sorry for my delay in responding to your question. I sure do hope that your cook worked out! You do not have to cold ferment overnight. In fact, you don’t have to cold ferment at all if you don’t want to. The cold ferment is to allow the dough to develop flavour so if you skip this the flavour profile will not be as rich. Please let me know if you have any further questions. I have flagged your message so I can hopefully get to it much sooner 🙂 If you have a more pressing question please feel free to email me at [email protected] and I’ll do my absolute best to reply in a timely manner. I hope this helps.
Hugs,
Trish
I have a question:
On the instructions for Sourdough ‘Reactivate’ instructions as listed above, the 1:5:5 of Starter, Flour & Starter listed at 20g / 100 / 110 : is different from the download ‘time-saving’ instructions to Reactivate, which also state the ratio of ingredients, as 1:5:5, but listed as 15g Starter / 75g Flour / 75g+ Water.
I’m not sure which one is accurate.
Thank you.
Hello Debra,
Thank you for the note, I am sorry for the confusion. I hope I can help clarify. Both are accurate as they both use the ratio of 1:5:5, however, feeding 15g of starter will give you exactly the amount you need for to mix your leaven and make your loaf. Feeding 20g is a general recommendation as this allows you to have some active starter to replenish and place back into the refrigerator (I call this the “mother starter”. I hope this helps!
Sincerely,
Trish
Just started making GF sourdough but wanted to use sorghum flour so that’s why I’m here.
I signed up for ‘Timing Table’, thanks for that!
I’ll let you know how it goes. I already have a starter to use.
BTW: LOVE the name of your website – brilliant and funny!!
Take good care.
Hello Debra! I am so glad you found me and thank you so much for your kind comment 💜! I’d be very happy to hear how yours turns out and please let me know if you have any questions at all! Take good care.
Hugs,
Trish
I tried this recipe today and I loved it!
Thanks so much for the comment Mike. So glad you love it!