


(Zero Waste Sourdough Starter)
(VIDEO GUIDE INCLUDED)
Whether you’ve had your gluten free sourdough starter for years or just created it with me (in my Ultimate Video Guide to making a Gluten Free Sourdough Starter), I’ll show you exactly how I maintain a sourdough starter. All of these principles apply to both gluten free & wheat sourdough starters.
This video series will take you through all you need to know to maintain a sourdough starter & to get it ready to bake any of your favourite sourdough & gluten free sourdough recipes!
I MADE MY STARTER – NOW WHAT?
If you’re feeling a little unsure of what to do with your gluten free sourdough starter after you’ve created it, fed & cared for it for 2 weeks…you’re not alone! Don’t worry, it is easy to maintain your starter in the refrigerator & I’m going to share with you my method that will help you have zero waste! So lets get to it shall we!

WHAT’S THE DIFFERENCE BETWEEN REPLENISH, FEED & REACTIVATE
(TO MAINTAIN A SOURDOUGH STARTER)
When I talk about the terms REPLENISH, FEED & REACTIVATE they are not the same thing. So what do they mean?
REPLENISHING a starter is giving the starter a feed to keep it active & healthy while it is resting in the refrigerator. The ratio that we chose to feed our starter & the amounts we feed depend on when we would like to bake and on our individual starters activity level (impacted by many factors including the flour, water & environmental conditions). This post will help guide you to figure out what ratio & amounts you need to replenish your starter.
REACTIVATING a starter is when we “wake the starter up from its sleep” in the refrigerator, & feed it in preparation for baking a loaf of sourdough bread. This is where we need to watch for the peak activity & rise before we use the starter to mix our leaven (aka preferment or active starter in a recipe). Basically, the refrigerated starter gets fed 2x prior to going into our dough. The 1st time is to reactivate it, and the 2nd time when we mix our leaven (or preferment or active starter). I find this to be a very successful way to get my starter back to its peak activity.
REPLENISH YOUR STARTER
(always store your starter in the fridge)
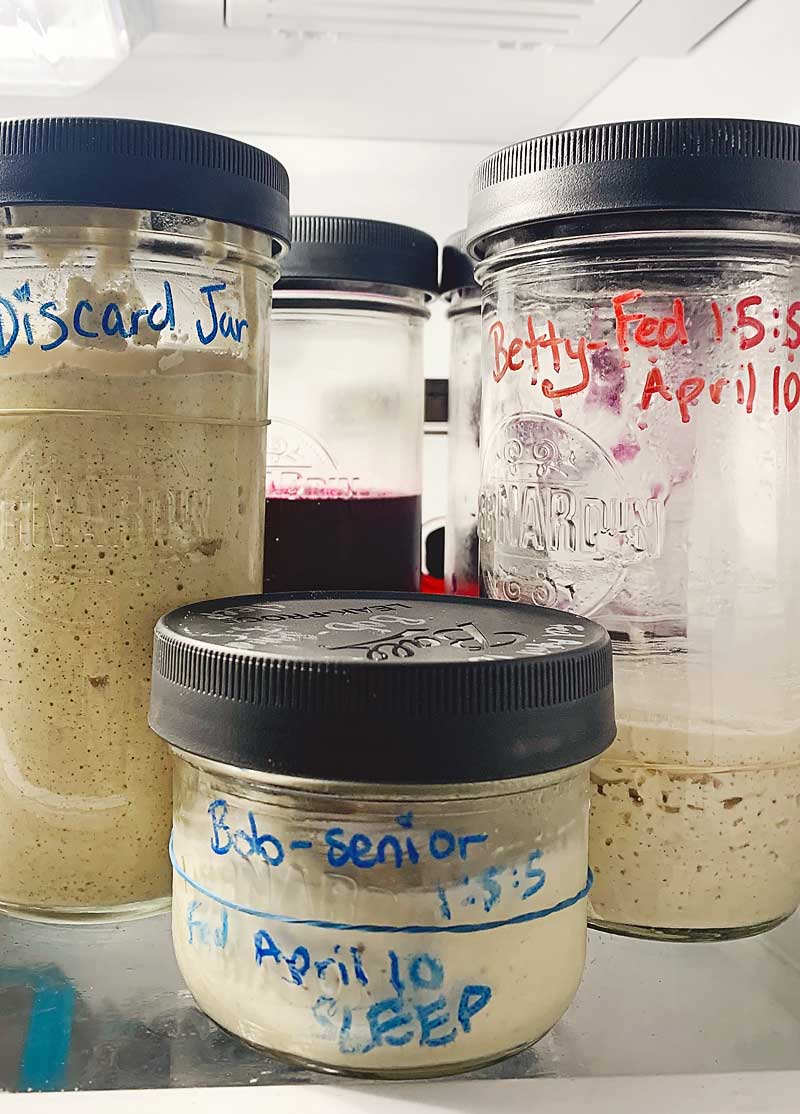
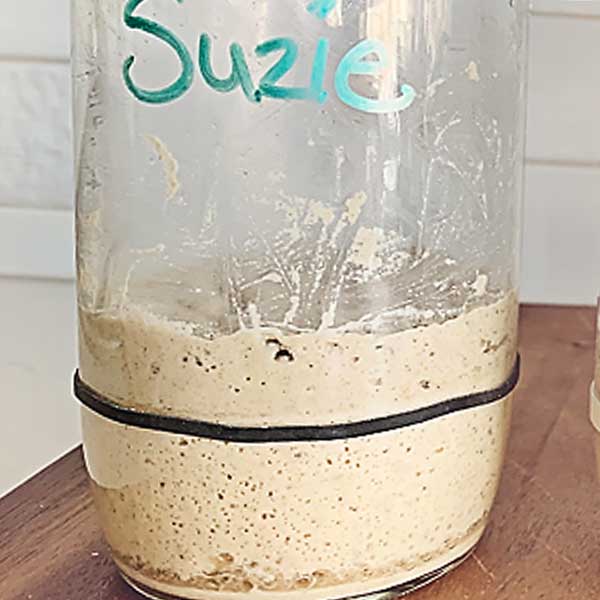
I always store my starter in the refrigerator. I call this my “Mother Starter” so I don’t get confused. My “mother starter” likes to hang out in the cold fridge & only comes out to get replenished or to get reactivated to create a leaven (aka preferment) to bake sourdough! This way I can reduce not only the amount of feed my starters requires, but also the frequency of feeds. This is a HUGE time & money saver as gluten free flours are expensive and my starter is always hungry @ room temperature!
WHEN CAN I PLACE MY STARTER IN THE FRIDGE?
If you followed along with me to make your gluten free sourdough starter, your starter was replenished and placed into the refrigerator on Day 14. However, if you’re still making your starter, I’d highly recommend keeping it at room temperature for 2 weeks and feeding regularly. You can reference my video guide here for more details. I did some experimenting and my starter truly did have WAY more lifting power on Day 14 than it did on Day 5-7. The choice is ultimately yours of course ♡. After Day 14, you can go ahead and replenish your starter & refrigerate as below.
HOW I REPLENISH MY STARTER
BEFORE PLACING STARTER INTO FRIDGE
Before we can say goodnight to our starters, we need to make sure they have been given a really good feed and a chance to rest for an hour, then we can refrigerate & say nighty night for a week! I call this the 3R’s = REPLENISH, REST & REFRIGERATE. Think of starters like humans (they are living cultures after all) to make it easier to remember things. Do you like going to bed on an empty stomach? Or a full one? Me either! So I feed the starter to replenish it, let it rest on the counter for an hour (to sort of give it a chance to start digesting), then refrigerate (go to sleep).
WHAT HAPPENS WHEN THE STARTER IS IN THE FRIDGE?
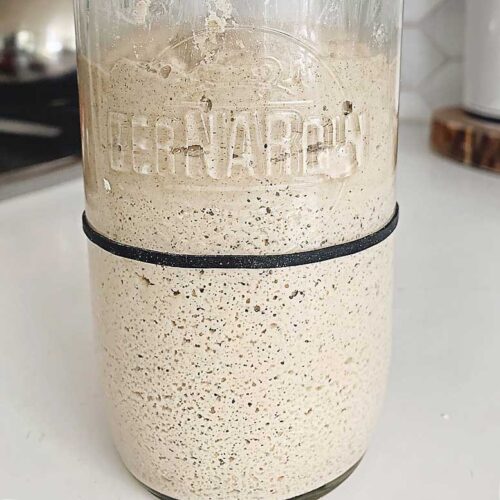
I’ve had many people ask me if the starter stops all activity in the fridge? The cold temperature of the refrigerator slows down the fermentation process significantly (to learn more about the effects of temperature on starter activity, please check out my post on the 3 Keys to Success). Again, I like to think of my starter like a human. When we go to sleep, we don’t shut off completely. Rather, our bodies go into digest mode & a lot of bodily processes slow down! The starter is still active, just much slower. It will still reach PEAK activity while in the refrigerator & you will notice it rise & fall! This will prove to you that it is indeed still alive and active, just a lot slower!
WHEN IS THE BEST TIME TO REPLENISH A GLUTEN FREE STARTER
(necessary to maintain a sourdough starter)
I highly recommend replenishing your starter when it is at its peak activity! This may seem strange if you didn’t make your starter with me (where I explain why). Basically, the goal is to keep your starter as active & vital as possible which means it’s incredibly healthy! If we learn our starters “eating habits” we can then plan to feed it on a schedule that keeps it at its peak! It will remain active, will peak, but will not fall down as we will feed it before it gets a chance to fall, replenishing its activity!
USING A SOURDOUGH JOURNAL HELPS TO MAINTAIN A SOURDOUGH STARTER
This is where I highly recommend pulling out your handy Sourdough Journal (you created one with me on Day 1 if you made your starter with me) and recording when your starter gets fed & when it peaks. I call this my RISE TIMER, and you can do this while the starter is in the fridge the same way we did on Day 13 of making our starters. This won’t have to be a forever job, just for the first few weeks or so, until you get to know your starters eating habits. I also recommend using your RISE TIMER when the seasons change as the temperature of the environment (and therefore our starters activity) can vary greatly!
When you’re baking a loaf of gluten free sourdough bread, you’ll first feed your starter to reactivate it & wait for it to reach its peak activity on the countertop. Once it does, this is a great time to remove 10-20g of active starter & replenish it! When you’re going to bake a loaf of sourdough, most likely you’re ready to place your starter into the refrigerator to sleep so you don’t have to keep feeding it twice daily. Just follow my video instructions below to replenish, rest & refrigerate your starter.
RISE TIMER FOR SOURDOUGH STARTER
WHAT IF I MISS THE PEAK? CAN I STILL REPLENISH IT?
ABSOLUTELY! In fact, I have forgotten about my starter many times and have always managed to return it to its healthy state. It is ideal to replenish your starter when it is at peak activity, but it is not necessary. As long as it looks and smells ok, it probably is! Avoid using a starter that has mold growing on top. Note that hooch (a by-product of fermentation) often has a greyish colour and can smell like alcohol. If your starter has very strong over powering smell like nail polish remover, it may be hard (but not impossible) to recover. I like to set an alarm on my phone for 1x/week to make sure my starter gets replenished regularly.
HOW TO DECIDE HOW MUCH TO FEED TO REPLENISH YOUR STARTER?
This is the ultimate question with sourdough starters right? Truly, the answer is it depends. However, I won’t leave it at that I promise! I’ll help you to decide ♡.
How much you feed your starter to replenish it is really based on how long you think it’ll be until you wish to bake again. I highly recommend that the 1st time you put your starter to sleep in the refrigerator, you follow my recommendation in the video below. Then, you use the RISE TIMER (that I talked about above) & record how your starter looks each day for a week while in the fridge. When your starter reaches its peak activity (click to find out more) make a note of this. This is the perfect time to replenish your starter. Depending on the health of your starter culture, the flour & water its fed, & the temperature of your refrigerator this time will vary (usually between 5-10 days). Then based on how often you’d like to bake, you can adjust the ratio & amounts accordingly.
QUESTIONS TO HELP YOU DECIDE
You can ask yourself the below questions when trying to decide on the ratio of FEED : STARTER to replenish it.
- What is the temperature of your starters environment – temperature of fridge?
- cooler refrigerator – starters activity slower, needs less feed.
- warmer refrigerator – starters activity faster, needs more feed.
- How long until you would like to bake again?
- compare using your RISE TIMER.
- If you’d like to bake in a few days. Feed a lower ratio of FEED : STARTER so the starter peaks in a few days.
- How has your starter been responding to the previous feeds?
- gives a clue to how it will respond to different ratios.
- What is your starters appearance? Hooch present? Rise? Surface appearance? Bubbles?
- tells you the part of the life cycle that your starter culture is in & gives a clue of timing. See here (Day 10 evening video) for more details.
WANT TO BAKE?
(need to speed up your starter in the fridge)
If you’d like your starter to reach its peak in the refrigerator sooner (say you want to bake sooner) then you can feed it a LOWER ratio of FEED : STARTER
The LOWER the ratio of feed : starter (LESS FEED given to the same amount of STARTER), the quicker it will peak because you have a more microorganisms to eat the food.
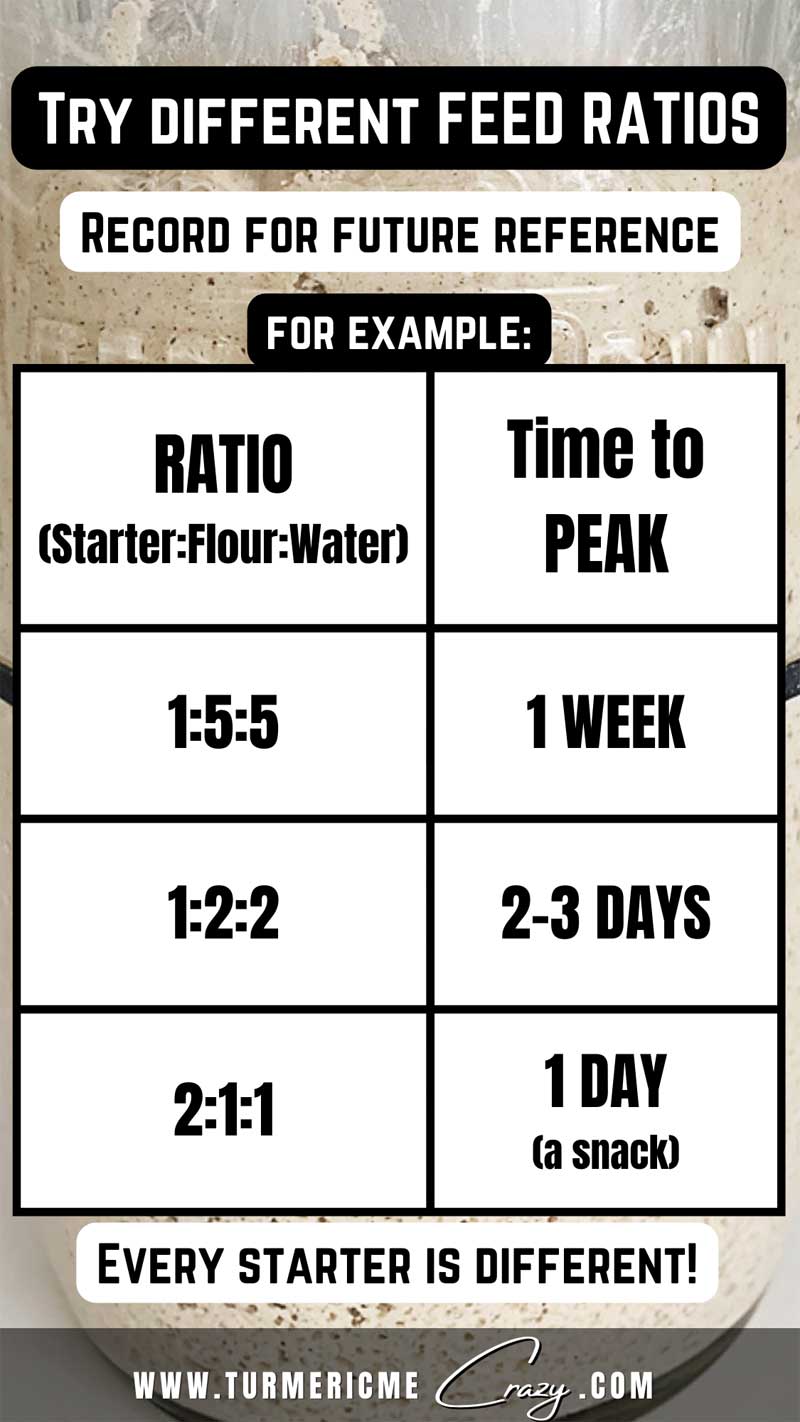
- 5 parts FEED: 1 part STARTER (starter may take 7 days to peak activity in the fridge).
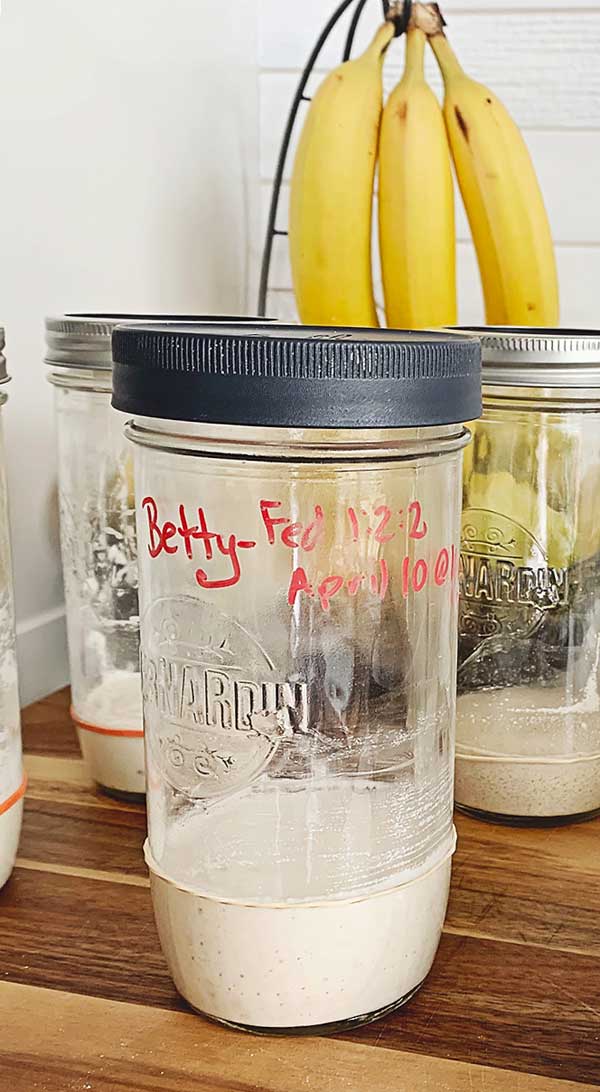
- To speed this up you may try 2 parts FEED : 1 part STARTER (this may take 2-3 days to peak).
* It is important to note that this is the same as the HIGHER ratio of STARTER : FEED, the quicker it will peak. The order in which you think of the ratio doesn’t matter as long as you understand the concept!
TRAVELLING?
(need to slow down your starter in the fridge)
The reverse is also true! If you’d like your starter to take a longer time reach its peak in the refrigerator & have it sleep longer (e.g. don’t want to bake or your travelling) then you can feed it a HIGHER ratio of FEED : STARTER.
The HIGHER the ratio of feed : starter (MORE FEED given to the same amount of STARTER), the longer it will take to peak because you have less microorganisms to eat the food.
- 5 parts FEED: 1 part STARTER (starter may take 7 days or more to peak activity in the fridge).
- 10 parts FEED : 1 part starter (may take 14 days or more to peak activity in the fridge).
* It is important to note that this is the same as the LOWER ratio of STARTER : FEED, the longer it will take to peak. The order in which you think of the ratio doesn’t matter as long as you understand the concept!
TO MAINTAIN A SOURDOUGH STARTER IS A SCIENCE EXPERIMENT!
Since every starter is different and everyones environment is different, this truly becomes a science experiment! The cool thing about it is that you can then hypothesize (make an educated guess) on the ratio of feed to starter & test your hypothesis! Make sure to record your results! Just make sure you only change 1 variable at a time! What I mean by this is, if you are changing the ratio of feed : starter (one variable) then keep the other variables the same (type of flour used, water etc).
REPLENISHING A STARTER THAT’S BEEN IN THE REFRIGERATOR
So now that you have a wonderful gluten free sourdough starter, who’s been “sleeping” away, slowly & quietly metabolizing its feed for a few days, what do you do? Don’t worry, your starter will be much easier to deal with now that its in the refrigerator! No more twice daily feeds! The video below will walk you through how to decide what to feed your starter to replenish it whether you want to bake now or not!
REPLENISH, REST, REFRIGERATE!
SUMMARY – REPLENISH & REFRIGERATE YOUR STARTER
(example replenishment feed)
Starter (S)
Discard &
Keep
20g
Flour (F)
GF Flour
Feed
100 g
Liquid (L)
Water
Feed
100g
Ratio (Total)
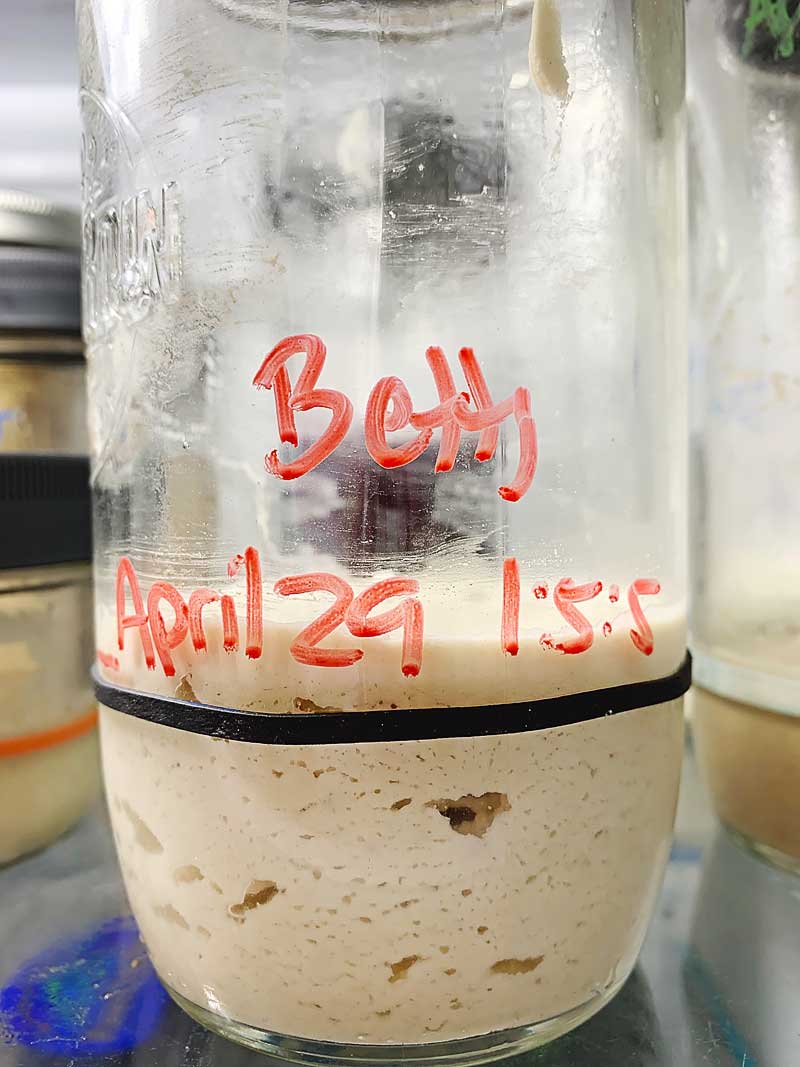
1 : 5 : 5
S : F : L
Total
Remember if you have a sorghum flour sourdough starter you will need to increase the water within your ratio (usually 10g extra water / 100g flour). Just remember to always look for the desired consistency when feeding your starter & you won’t go wrong!
DON’T THROW AWAY YOUR DISCARD!
With this method of replenishing your starter, you should have very little discard! But, with the little you do have, you can use it to make all sorts of delicious goodies and have zero waste! Find some wonderful recipes to try in my post HOW TO USE YOUR SOURDOUGH DISCARD – ZERO WASTE!
REACTIVATE YOUR STARTER – TIME TO BAKE AGAIN!
READY TO BAKE SOURDOUGH?
YOU NEED TO REACTIVATE YOUR STARTER
You now need to reactivate your starter, kind of like we need to eat breakfast when we wake up in the morning! Your starter has been “sleeping” with very slow activity level in the refrigerator and now it’s time to reactivate it to prepare it for baking. When you’re ready to bake a loaf again, follow the video instructions below, the day before you wish to bake, to REACTIVATE your starter (prepare it) so it can give you the best possible leavening power for baking!
If your starter is already at room temperature, you can follow these directions too!
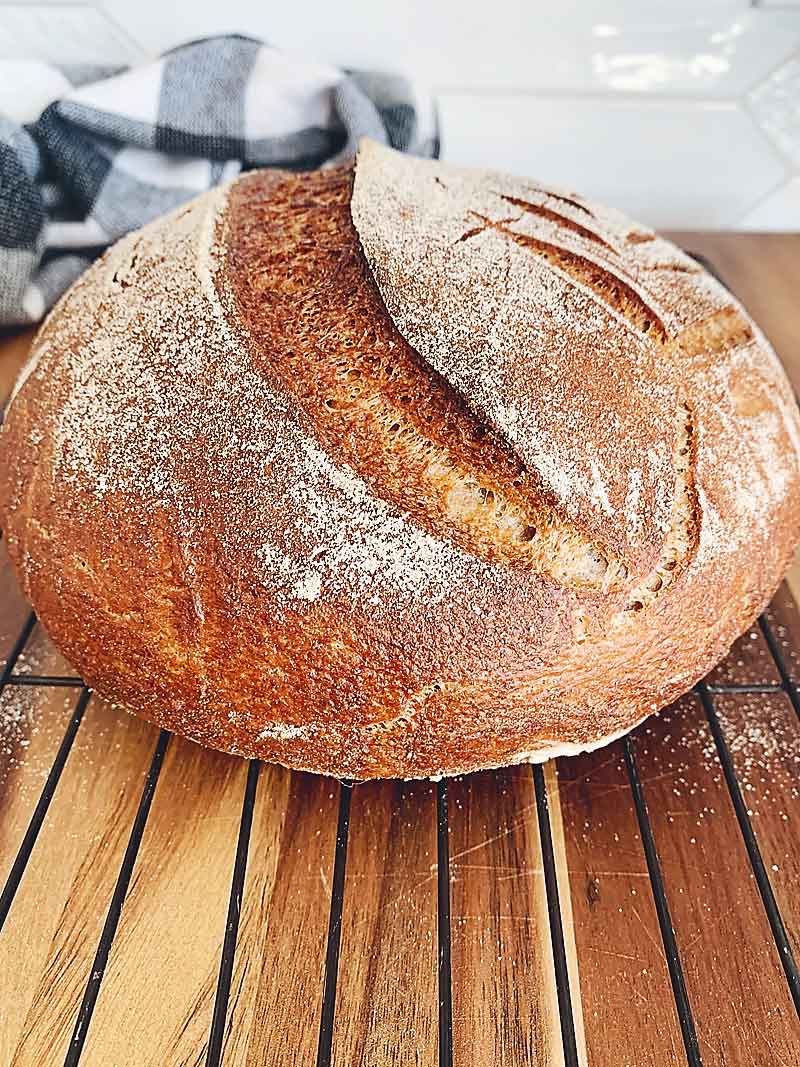
READY TO BAKE SOME SOURDOUGH BREAD!
My recipe for “Just like the real thing Gluten Free Sourdough Bread” includes follow-along videos to help make your bake a success! 👇🏻

HOW TO CALCULATE HOW MUCH STARTER YOU NEED TO REACTIVATE?
In my video above I recommend reactivating 20g of starter with 100g flour & 100g water. This is because most leaven (aka preferment) formulas (recipes) call for between 100-200g active starter. However, you can easily calculate exactly how much starter you need to create so that you can have ZERO WASTE! Just plug in your numbers to my example equation below!
For example: If you are wanting to bake my “Just like the real thing Gluten Free Sourdough Loaf” this recipe calls for 150g of active starter to mix your leaven. This means I will need to have at least 165g of active starter if I want to also replenish some starter to keep as my “mother starter” in the refrigerator. I also like having a few extra grams of starter (5g), as I find some always gets lost by sticking to the container or jar.
DECIDING ON AMOUNTS OF FEED & STARTER
| Recipe (formula) active starter | 150g |
| Needed to replenish starter | 10g (you may choose more e.g. 20g) |
| Extra starter due to loss | 5g |
| Total Active Starter Needed | 165g |
I always recommend feeding your starter to reactivate it with a ratio of 1 : 5 : 5 (starter : flour : water). This is to achieve a lower base acidity which allows for a larger window of time to reach the perfect bulk fermentation & decreases the chances of over-fermenting your dough! For more information on this concept check out my Day 10 morning video here or visit “The Bread Code“.
EXAMPLE CALCULATIONS
If I need 165g of active starter in total & I want to feed 1:5:5 ratio I just need to do some simple math.
Ratio 1 : 5 : 5 means there are a total of 11 parts (1+5+5=11). So take your total amount of active starter that you would like to create & divide it by 11.
In this example: 165g ÷ 11 = 15g (so each part within my formula is 15g)
RATIO 1 : 5 : 5 (STARTER : FLOUR : WATER)
I have 1 part starter = 15g
5 parts flour = 15 x 5 = 75g
5 parts of water = 15 x 5 = 75g
Discard: all but 15g of starter
Feed it: 75g flour & 75g water
Total: 75 + 75 + 15 = 165g of active starter
CAN I REACTIVATE MY STARTER IF IT HASN’T PEAKED IN THE FRIDGE YET?
YES! If your starter is in the refrigerator, hasn’t peaked yet, and you decide you want to bake…simply take your starter out of the fridge & place it on the counter. Wait until it peaks, then feed it again to reactivate it! I talk about young vs mature vs old starters in the above video. I am referring to the life cycle of the microorganism culture not of how long it has been since the starter was created. If you’d like to learn more about the life cycle of your sourdough starter culture, please click here and watch the Day 10 evening video.
HOW TO FEED YOUR STARTER A SNACK
I often talk about feeding your starter or your leaven a snack if you happen to miss its peak activity. It is always better to use a starter or a leaven at its peak activity as this will give the best leavening power to your baking! If you miss the peak activity of your leaven (active starter that is fed as per recipe or formula) simply feed it a small SNACK = 10g of flour, 10g water using one of the gluten free flours within the leaven recipe. This will provide the microorganisms a little boost to regain the maximum yeast activity & therefore max rise power! Once you get to know your starter better, you’ll have recorded (with your rise timer) the time to peak activity for different ratios & amounts of feed. You can then use this knowledge to perfectly time out your bake schedule!
NOT READY TO BAKE?
HOW DO I MAINTAIN MY SOURDOUGH STARTER?
If you are still not ready to bake but your starter has past its peak activity in the fridge, then its time to REPLENISH your starter & place it back in the fridge, click here to go back to video instructions above. Not sure what peak activity really means? Check out my Gluten Free Starter Guide here for more details.
HELP! I FORGOT ABOUT MY STARTER IN THE FRIDGE…CAN I STILL USE IT?
Yes and maybe! This depends on how long your starter has been in the fridge. If it has been 2 weeks or less, then most likely it is still good to use! After 2 weeks, you’ll need to use your senses to decide. How does it look? Is there any greyish spots that could be mold? If so, I recommend throwing it out and starting over.
Don’t fret though as I have an easy to follow video guide for that too! Just click here to start. After giving it a stir, are they any bubbles or signs it may still be alive? How does it smell? It will be alcohol like but not like really strong nail polish remover. Although, I have recovered a gluten free starter that smelt like acetone and it returned to a healthy state. So it is possible. As long as there is no mold growing on it, you can attempt a recovery effort!
HOW MUCH SHOULD I FEED IT?
To recover your starter, give it a good discard & feed to try and reactivate it. Since there won’t be as many microorganisms present, feed a higher ratio of Starter : Feed (e.g. 2 : 1 : 1 – starter : flour : water). You should see some bubbles present within 24 hours if it is still alive. Each time it peaks, feed it 2-3x that day to help it recover. Once it has returned to a healthy, vital & active state, you can replenish it as above and place it back into the refrigerator!
PLEASE RATE & COMMENT
I know you’ll just love this easy to follow video guide to help you maintain a sourdough starter. If you find it helpful, please add a rating & a comment onto the recipe below or at the top of the post as it helps Google recognize the recipe & my website which will help show it to more people. I’d love to see our community grow! ♡
Questions? Please feel free to post them in the comments below!

FOLLOW ME
Please follow me on Pinterest
If you’re already on Pinterest, please feel free to PIN the pictures above & below for future reference & so others can find it too and learn how to maintain a sourdough starter. Thank you kindly!
WANT TO MAKE A SOURDOUGH STARTER?


HOW TO MAINTAIN A SOURDOUGH STARTER
Equipment
Materials
- Sourdough Starter
- Water rested on counter or filtered
- Gluten Free Flour Single Origin (e.g. Brown Rice, Sorghum, Teff)
Instructions
REPLENISH A SOURDOUGH STARTER
- Discard all but 10g. Feed 50g flour, 50g water. Mix well.
- Let starter rest on countertop for 1 hour, then refrigerate until it reaches peak activity (it usually takes about 7-10 days for starter to reach peak activity while in the refrigerator). Once starter reaches peak activity, remove from the fridge & replenish as above again. Then you can place your replenished starter (what I call the "mother starter") back into the fridge.
REACTIVATE A SOURDOUGH STARTER
- Discard all but 20g. Feed 100g water, 100g flour. Feed Ratio 1:5:5. Once starter peaks, mix leaven (aka preferment or active starter).
- Yields 220g active starter. Then replenish 10-20g as above and refrigerate. This leaves 200g of active starter to create a leaven (aka preferment).


4 Responses
Hello, does the starter have to remain in the fridge? Or, can I leave it on the counter and feed it each day?
Hello Amber. You can absolutely leave your starter on the countertop and feed each day. If you’re going to use this method, I recommend using a rise timer, to record time to peak with different feed ratios until you reach a feed ratio that allows your starter to peak just before the time you’d like to feed each day. Keep in mind this can be a more expensive method (especially if using gluten free flours) as you’ll go through a lot more flour this way. You may want to consider milling your own flour (will save you money) if you decide to use this method. I have guides on how to do that (with how to videos) I’ll link that page for you. Hope this helps.
💜 Trish
How to make GF flours: https://turmericmecrazy.com/how-to-make-gluten-free-flours/
Thank you for this! It makes things so clear & easy to understand.
You are so very welcome 🥰. Thank you for the kind comment.