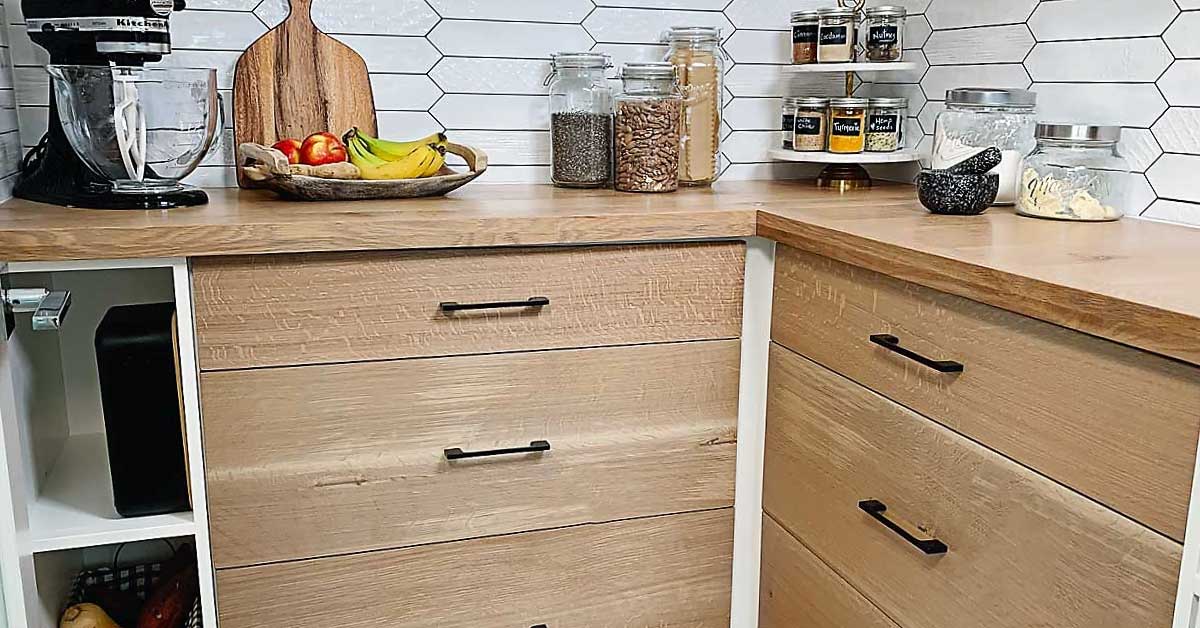
Whether you’re looking to optimize your kitchen cabinets, upgrade your closet organization, or enhance your workshop efficiency, mastering the art of building wood sliding drawers will revolutionize how you utilize space in your home. From selecting the right materials to installing smooth-gliding drawer slides, together lets transform that ordinary storage into organized brilliance!
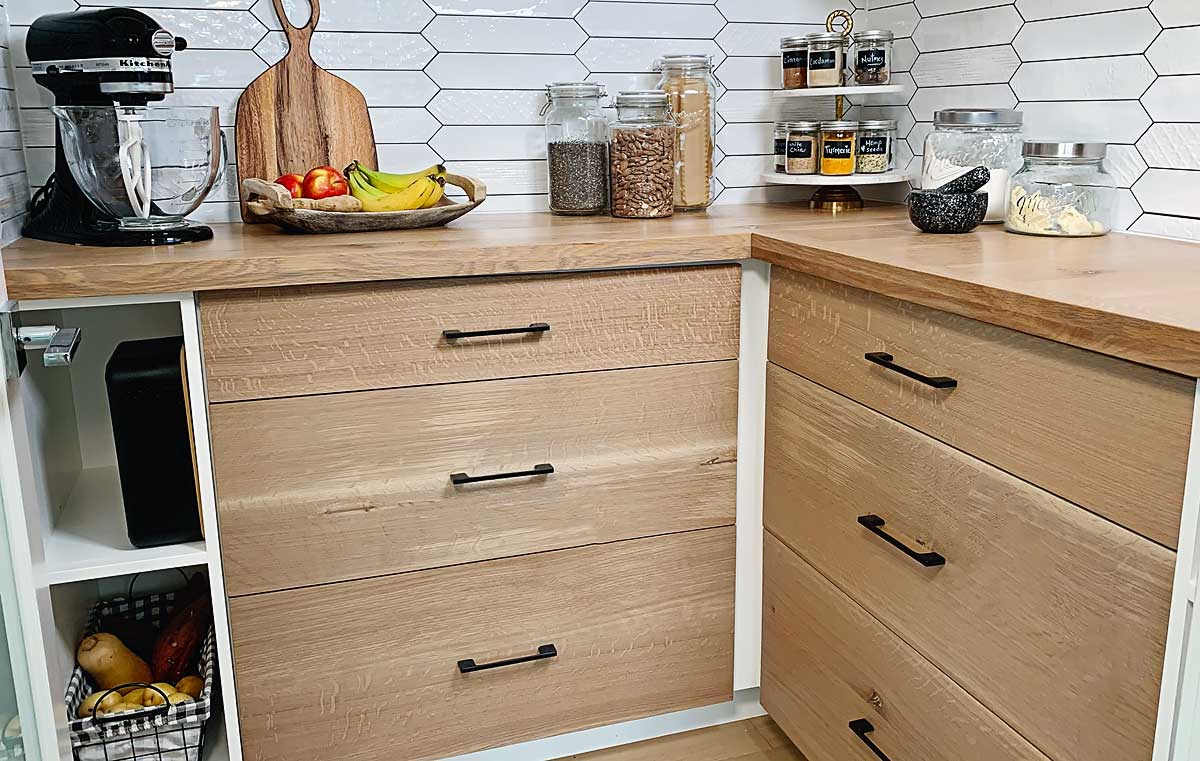
Aren’t these wood drawer fronts just stunning? We truly couldn’t be happier with the final result. We just love everything about these drawers, from their gorgeous visual appeal to their absolutely incredible functionality, these drawers have truly transformed our pantry! So lets get started and show you how we made them!
what do I need to be able to build these?
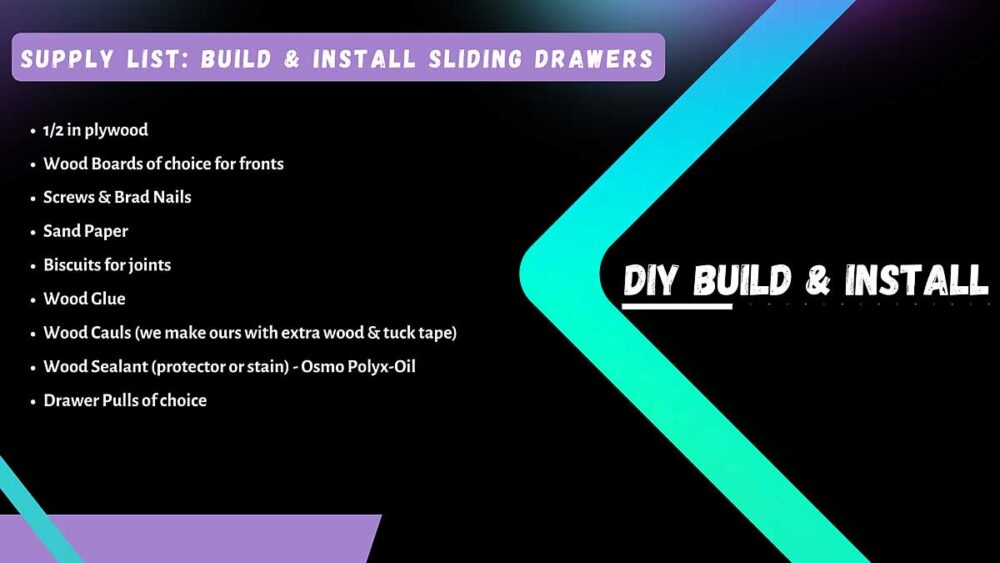
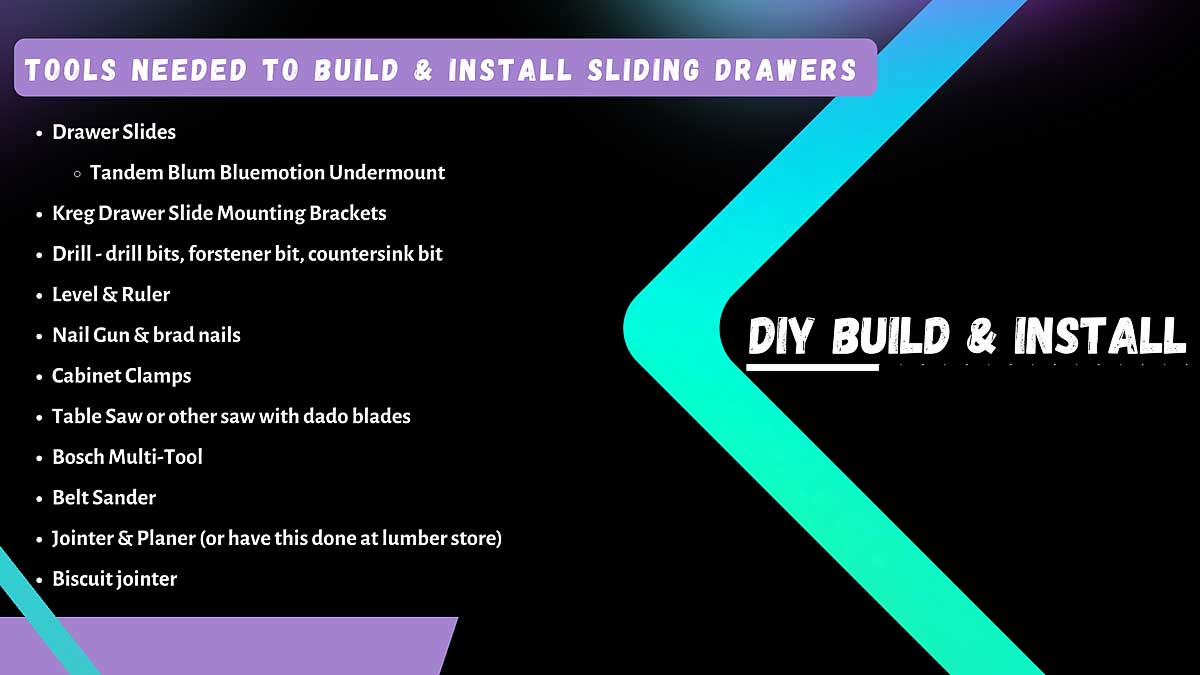
Our list of tools and supplies is quite extensive. In our how to video we do our best to let you know when and where you can use alternate tools or have the lumber store do things for you.
Steps to build sliding cabinet drawers
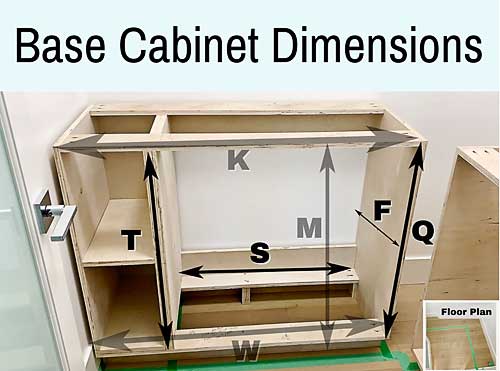
Refer to your sizing and dimensioning plans from our planning guide video. This is where all of your base measurements were calculated & recorded. Then just follow
1. Planning
Our follow along videos will walk you through absolutely everything you need to know to build your own base cabinet! Once you’ve got the base cabinet frame built, your ready to add the sliding drawers. So let’s get planning!
2. Measurements
Calculate all necessary measurements to build your stunning drawers!
4. Build the Drawer Boxes
Now that we’ve designed and planned, building the drawer boxes is a breeze!
5. Finish and Install the Drawer Boxes
Time to finish then install our drawer boxes.
6. Build, Finish and Install Drawer Fronts
The drawer fronts are what really make this project so incredibly beautiful!
STEP BY STEP GUIDE
Before you start, refer to your sizing and dimensioning plans from our planning guide video. This is where all of your base measurements were calculated & recorded.
- Decide on the # of drawers
- Decide the look of drawer fronts
- all equal width
- differing widths
- chose the wood (recommend a hardwood)
- Quarter Cut Oak
- Maple
- Cherry
- Walnut
- Calculate the max size of the drawers
- measurement “T” divided by # drawers
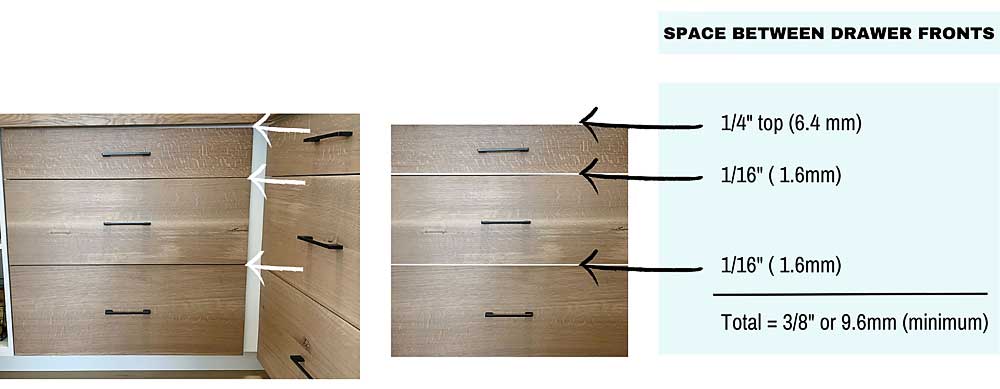
- account for space needed between drawer fronts & at the top for drawers to function smoothly
4. Finalize the drawer front widths & proportions
- Make the proportions visually appealing
- use a slight overhang on both sides for a seamless look (see video)
- Length = “S”- overhangs
- Decide on Depth (DD) of each drawer
- each drawer box can have different depth (DD) to meet drawers function
- Planning Considerations choosing Drawer Depth:
- Max height of storage?
- What do you want to store in each drawer?
- Function of each drawer?
- Remember – need room above each drawer box to easily remove things from drawer
- Max extension of drawer – not to impeded door if have one (Max “E” from planning guide)
Gaps = necessary on all sides of drawer boxes
allows room for drawer slides to smoothly function
dependant on type of drawer slides chosen (READ INSTRUCTIONS)
max width of Drawer Box = “E” (if have a swinging door)
- Calculate the final measurements of the boxes
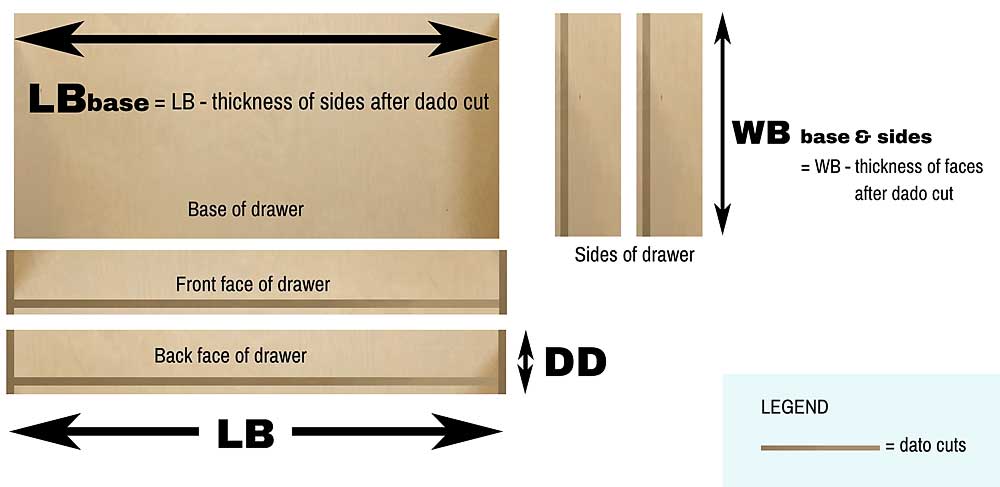
- LB x WB x DD

- Decide:
- How you will cut plywood & put together the boxes?
- We used a simple rabbet joint & groove style
- cut with dado blades on table saw
- glued & nailed together
- Dado Cuts for Drawer Boxes:
- Base of drawer
- no cuts
- Front & Back faces of drawer
- dado cuts (depth = 1/2 the width of plywood, width = width of plywood with 1/64″ wider to allow for glue)
- one long edge (groove created inset slightly, 3/8″, to accept the base of drawer) &
- both short edges (for rabbet joint, cut to the edge)
- Sides of drawer
- one dado blade cut = groove the thickness of plywood inset slightly to accept base of drawer
- Base of drawer
Pieces of drawer box with dado cuts
Assembled drawer box
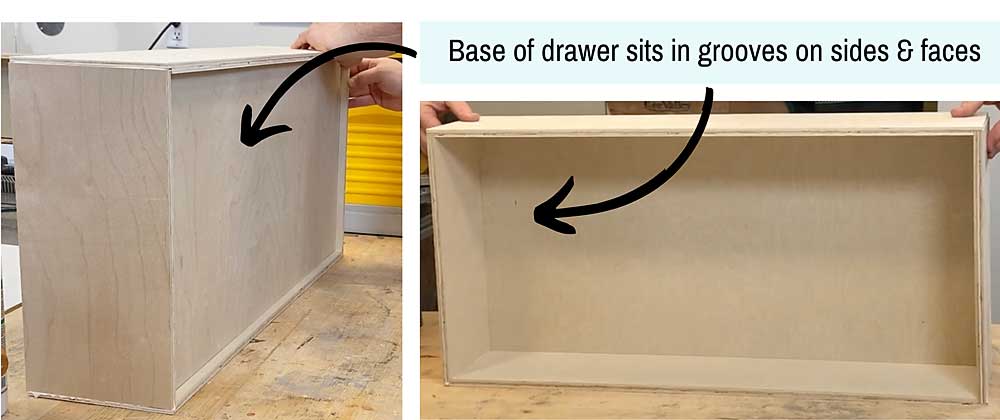
We highly recommend installing your drawer slides prior to building the drawer boxes. This way you can double check your measurements before cutting so that your drawers will fit perfectly!
- DRAWER SLIDES: Tandem Blum Bluemotion Undermount Drawer Slides
- undermount so completely hidden
- holds up to 30Kg/drawer
- silent and smooth function with lovely soft close
- TO INSTALL:
- we highly recommend the KREG Drawer Slide Jig
- makes installing the drawer slides SO EASY!
- inexpensive and so worth it!
- see video for our step by step instruction
- Cut the Plywood for the drawer boxes to the the exact length x width
- lumber stores can also do this for you
- Dry-fit drawer box pieces into the drawer slides in the base cabinet, before any further assembly. This will ensure you’ve cut the boards to the exact length needed.
- Add dado blades to table saw & set to create the exact width needed (width of the plywood)
- Cut the inset grooves & edges for the rabbet joints as per your plan.
- Assemble drawer boxes:
- Lay out pieces to make assembly easiest
- Place glue into each of the grooves and assemble
- place base into groove of base face
- add left and right sides pushing the base into the grooves
- add front face
- Clamp and Secure the joints with a nail gun and brad nails
- double check the corners are square with a carpenters square
- Repeat process for all other drawer boxes
- Add hardware to drawer boxes
- depending on the slides you choose, this will vary. See our video for details on how we installed the hardware.
- Sand Drawer Boxes: 100 grit sand paper will do the trick.
- sand all over to remove any sharp edges and create a smooth surface for the inside of the drawer
- Protect the Drawer Boxes:
- protect from any water spillage or moisture
- Osmo Polyx-Oil Clear Matte Finish is our favourite finish – very protective
- apply all over
- Install Drawer Boxes:
- depends on drawer slides chosen
- ours very easy to install
- install all drawers and ensure a perfect fit and function
1. We use raw lumber:
- the lumber store can also do this for you for a cost
- prepare the raw lumber:
- creates square edges
- joint 2 sides (1 edge, 1 face)
- plane other side and cut the other edge with table saw
2. Cut boards to approximate length:
- add 1 inch length to each board
- cut to exact measurements after glued
2. Orient boards and Biscuit Joint:
- create the desired look of drawer fronts
- biscuits help prevent slippage while gluing and help create a stronger joint
- mark where biscuits joints will be (one every 12″ or so)
- biscuit joint all edges with joins (see video)
3. Glue and Clamp boards:
- easiest with 2 sets of hands
- our favourite wood glue – Titebond 3 Ultimate Wood Glue
- cover all surfaces to be glued and the biscuits with glue
- use a rubber mallet to help push boards together
- use wood cauls with tuck tape on one side and cabinet clamps (see video)
- prevents any warping in the boards from creating an edge thats not flat
- add as many cauls and clamps as necessary to get boards completely flat
- use a scrapper to remove any excess glue before it dries
- glue should slightly ooze out of joints after tightening clamps
- greatly decrease amount of sanding later
4. Plane Drawer Fronts:
- once glue is completely dry
- plane both faces to create a flat surface and equal thickness
5. Cut Drawer Fronts to Exact Length:
- from our plans above
6. Finishing the Drawer Fronts:
- Sand the front faces – we use a belt sander (ensure to move with the grain of the wood)
- Sand edges and corners by hand for more accuracy
- Start with 120 grit (if your planer creates a nice smooth surface) then move up to 150, and 180
7. Install Drawer Fronts:
- TOP TIP: cut supports exact height of your kick plate (KP from plans)
- place drawer on top
- perfect alignment
- use additional shims 1/16″ or so if needed to create a perfectly level surface
- Dry-fit all drawer fronts before secure
- add shims = gaps from plans
- place drawer on top
- if all perfect and level
- Install bottom drawer first
- remove all other drawer boxes
- clamp drawer front to drawer box with cabinet clamps
- pre-drill 2 holes on each side
- ensure drill bit is correct length and won’t puncture the drawer front
- countersink holes
- secure with screws
- double check drawer front is level once remove supports
- add shims to create correct gap, add the next drawer box, the clamp and secure as above
- repeat until all drawer fronts are secured
- TOP TIP: align edges of drawer fronts with a straight edge and slide it up and down (see video)
- TOP TIP: cut supports exact height of your kick plate (KP from plans)
8. Protect Drawer Fronts:
- Osmo Polyx-Oil Clear Matte Finish is our favourite finish – very protective
- see video for our tips
9. Add Drawer Fronts:
- choose a style that fits your overall design
- use a centre finding ruler to find the exact centre of the drawer front
- mark where holes should be a pre-drill through drawer fronts and box
- use a Forstner drill bit so the screw has enough length
- ensure you account for the distance that your chosen drawer pull sticks out so that they don’t interfere with the drawers extension
ENJOY YOUR GORGEOUS SLIDING DRAWERS!

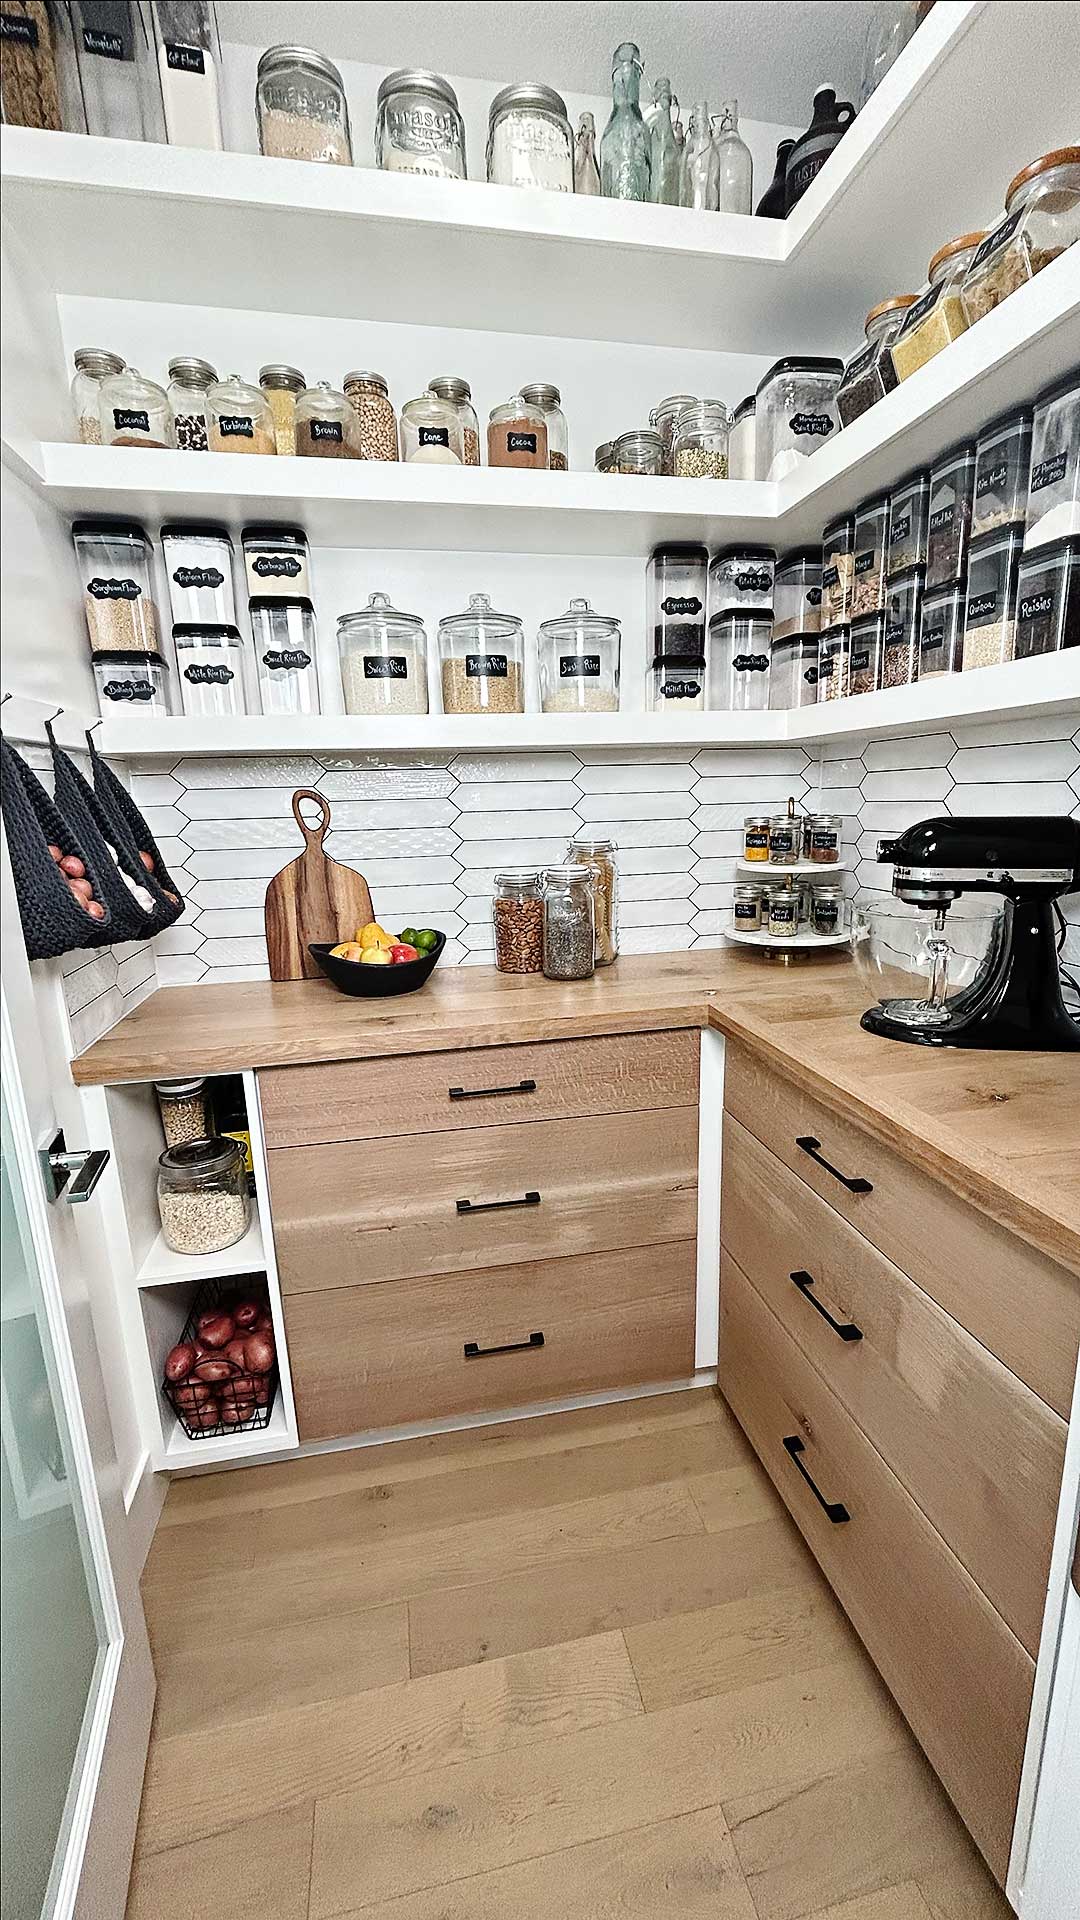
Watch the entire Butlers style
pantry renovation
Still don’t have a plan? Check out our Planning Guide. We’ve worked hard to create a printable PDF file for you to use to help guide you in making your base cabinet for to fit your specifications. There’s even a fill in the blank measurements list to help you get started. We hope you enjoy it!
Subscribe to our YouTube Channel to be notified when our next video goes live!
We are always working hard to get new DIY videos ready for you! Please check back again soon and subscribe to our blog & YouTube Channel to find out when our next videos are released.
Please support us ♥︎
If you’re enjoying our free recipes & DIY projects at TurmericMeCrazy and would like to say thank you, here’s how:
1) Buy us a bag of groceries to help support us and say thanks for all of our hard work ♡.
2) Leave us 5 
3) Subscribe to our monthly updates on TurmericMeCrazy.com & to our YouTube Channel.
3) Consider using some of my affiliate links on my website to buy products or check out my favourite kitchen things links.
Your support will allow us to continue to create free content on our blog & YouTube Channel! Thank you so much in advance 

Want more DIY projects & delicious recipes at your fingertips?
Get updates on our latest posts, DIY projects & recipes from TurmericMeCrazy straight to your inbox!
By clicking subscribe you are consenting to receive emails from TurmericMeCrazy. I will only email you monthly with new recipes & updates. No spam I promise!

