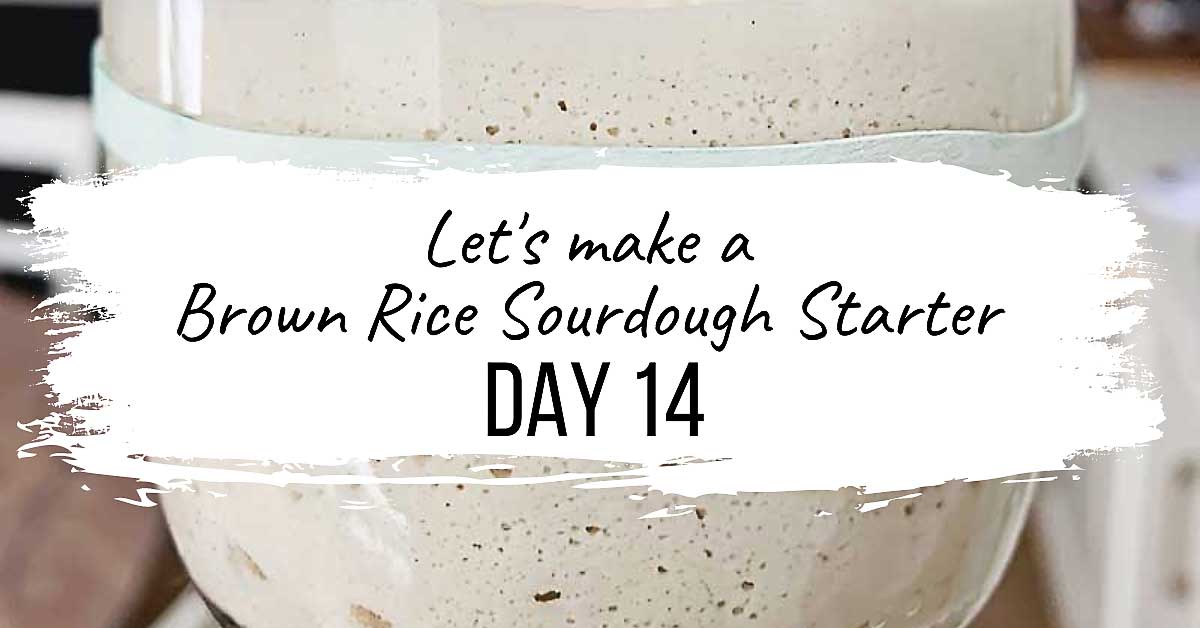
Day 14 - Brown Rice Sourdough Starter
Brown Rice Starter: Day 14 will walk you through baking your very 1st gluten free sourdough loaf with your new brown rice sourdough starter!
I sure do hope you’ve loved this easy to follow daily video series to help you make your own sourdough starter from scratch! If you enjoyed it and feel you learnt something, please add a rating onto the recipe above or at the top of the post as it helps Google recognize the recipe & my website which will help show it to more people. In turn, this will help me create more videos like these! A positive comment & 5 star review are truly the best thanks you can give me! ♡ Thanks in advance for your kind comments & 5 

Day 14 on our Brown Rice Sourdough Starter journey, today we will bake our 1st loaf of Gluten Free Sourdough Bread Loaf together! This is so much fun. Enjoy!
CONTENTS Brown Rice Starter: Day 14
1. Baking Timeline & Starter Readiness Checklist
Jump to Timeline & Checklist.
You’ll love how easy making this bread becomes with my FREE BAKING TIMELINE & follow-along videos. Please contact me in the comments below or on my contact page if you have any questions at all. I believe we are a community, lets help one another in our gluten free sourdough journeys!
2. Watch FULL day 14 Video Playlist
Watch the FULL Day 14 video playlist on TurmericMeCrazy YouTube Channel.
3. Step-by-Step Instructions
I like to break things down into easy to remember parts when creating a recipe. So I have created an easy 6-STEP process to making my gluten free sourdough bread with 4 components (bolded below) that make up the dough. I’ll go into detail of how to do each of these steps & components below.
- REACTIVATE & REPLENISH STARTER
- MIX LEAVEN
- MIX SOAKER & GEL
- ADD STARCHES & MIX DOUGH
- REST & CHILL DOUGH
- SCORE & BAKE
10. Follow me on your social for more!
Follow me for more gluten free sourdough goodness!
11. Frequently Asked Questions (FAQ)
Can’t find the answer to your question? Please feel free to contact me anytime in the comments below or privately on my contact page.
MORNING - Brown Rice Starter: Day 14
BAKE A GLUTEN FREE SOURDOUGH BOULE (ROUND LOAF)
If you don’t want to bake your 1st loaf of sourdough today NO WORRIES! Check out my free timeline for baking your 1st loaf below & plan accordingly. Continue to feed your starter at room temperature if you think you’ll bake within the next day or two. You can feed 1:5:5 or even 1:10:10 starter to feed ratio and when it peaks, begin the process!
STARTER READINESS CHECKLIST
Follow this checklist to make sure your starter that we fed 1:5:5 ratio last night is now ready to mix your 1st leaven today! See the video below for all of the details! 👇🏻
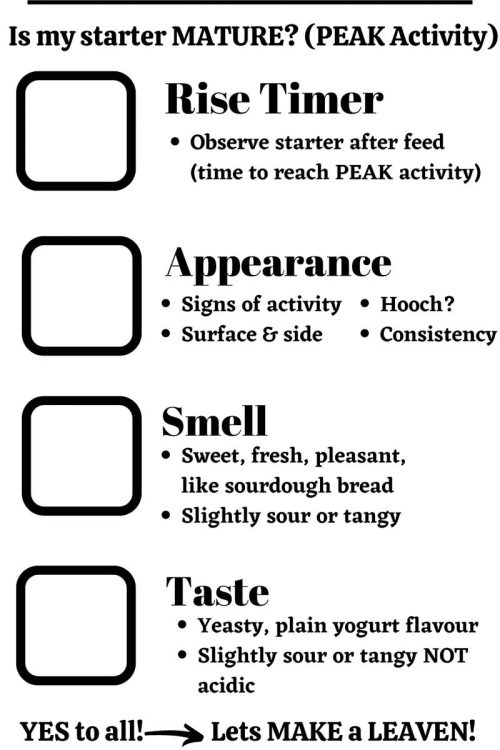
STEP BY STEP INSTRUCTIONS:
1) REACTIVATE & REPLENISH OUR STARTER - TIME TO REFRIGERATE!
Once your starter is at its PEAK ACTIVITY, like we reviewed last night…then it’s time to mix our leaven & replenish our starters to prepare them to go into the refrigerator! I often feed my starter the 1:5:5 ratio (the evening before) and if it has not peaked by morning, I place it in my oven with the light on to speed things up!
If you want to bake again the following day, go ahead and keep your starter at room temperature! Putting the starter in the refrigerator slows down the fermentation significantly!
HOW TO REPLENISH YOUR STARTER
The best way to maintain your starter is in the refrigerator. I call the starter that I keep in the fridge my “Mother Starter”. When you’re planning to bake, take the mother starter out of the fridge the evening before you’d like to bake with it. Then, remove some of your starter (in this case we used 15g) & feed to reactivate it (as above). It will then be prepped & active again!
THE “MOTHER STARTER”
The left over “mother starter” should now be replenished (fed) prior to going back into the refrigerator. Never put your “mother starter” to bed hungry! I always “replenish, rest, refrigerate” my mother starter. After I feed it to replenish, I let it rest on the counter for about 1 hour, then refrigerate.
This is much easier than it sounds! Watch the video below to clarify! I will also explain all of this in my post “HOW TO MAINTAIN YOUR SOURDOUGH STARTER“.
SUMMARY - REPLENISH & REFRIGERATE YOUR STARTER
Starter (S)
Discard most
Keep 20g
20g
FLOUR (F)
Brown Rice
Feed 100g
100g
LIQUID (L)
Feed
100g Water
50g
RATIO (TOTAL)
1 : 5 : 5
S : F : L
220g
2) MIXING OUR LEAVEN
When this reactivated STARTER has peaked, I use it to create a LEAVEN. The LEAVEN (aka preferment or active starter) has been kept at room temperature & freshly fed to reach peak activity and is used to LEAVEN your gluten free sourdough dough! I think of it as the “STARTER” starts off the bake & is what I keep as my constant supply. The “LEAVEN” is made when I want to bake & is used to leaven my dough.
The health & vitality of your starter will dictate the power & activity of your leaven! So, keeping your starter as strong, healthy & vital as possible is KEY! If you have questions regarding the leaven, please check out my FAQ’s below!
Once your starter has reached its PEAK RISE, mix your leaven & let it do its magic! It will take a good 2-4 hours (more or less depending on the temp of the environment) for the leaven to reach its PEAK and be ready to mix your dough!
HOW MUCH TIME WILL IT TAKE BEFORE I CAN BAKE?
- Temperature of your starters environment? WARMER = LESS TIME, COLDER = MORE TIME
- How has your starter been responding to the previous feeds & ratios?
- What is your starters appearance? Hooch present? Rise? Surface appearance? Bubbles?
SUMMARY - GLUTEN FREE SOURDOUGH LEAVEN
Starter (S)
Active
Keep 150g
150g
FLOUR (F)
Brown Rice
Feed 60g
60g
LIQUID (L)
Feed
90g Water
90g
RATIO (TOTAL)
1 : 1
S : Feed
300g
3) MIX A SOAKER & GEL
Time to mix your soaker & gel, two important components in this gluten free sourdough loaf!
The soaker is used to allow grains to absorb some of the water before the dough is mixed. It is basically an AUTOLYSE. “Auto” means something that happens all on its own, and “-lyse” means to break something down. During this soaker period, the proteins in the whole grains are broken down into smaller segments due to the natural enzymes & microorganisms present on the flour. We “SOAK” the whole grains before we add the starches. Starches are VERY water absorbent so if you don’t make a soaker, the starch will absorb so much water that the whole grains will not get a chance to break down as much!
Why make a GEL? Unfortunately, it is the gluten proteins in regular sourdough that bind the ingredients together. Since our gluten free flours don’t contain gluten, we need to figure out another way to bind the ingredients. Using some very healthy binders found in nature we can do just that!
I also add some enrichment to this dough by increasing the fat content slightly with olive oil. If you don’t like this you can try omitting the oil and substituting more water.
Adding a few key ingredients: apple cider vinegar, pure maple syrup, and aquafaba, help to rise the dough and bind it together. See below for more!
SUMMARY SOAKER
FLOURS
55g Sorghum Flour
50g Brown Rice Flour
65g White Rice Flour
170g
LIQUID (L)
Feed
200g Water
200g
SUMMARY GEL
FLOURS
55g Sorghum Flour
50g Brown Rice Flour
65g White Rice Flour
170g
LIQUID (L)
Feed
200g Water
200g
4) ADD STARCHES & MIX DOUGH
So as always, us gluten free folk need to find another way to replace that darn gluten!
Adding starches allows the dough to absorb more water which helps bind the dough. Gluten free flours are missing the moisture retention abilities that gluten containing flours have.
STARCHES
55g Tapioca Starch (aka Flour)
90g Potato Starch
145g
5) REST & CHILL : BULK & COLD FERMENTATION
(aka BULK FERMENT & COLD FERMENT)
BULK FERMENT (REST)
After we mix our dough, we set it in a warm place to “REST” for about 2-4 hours. Watch the video below for all of my tips to help you decide when the bulk ferment is over. During this time, the dough continues to ferment, just as our starters do. This period is called the “bulk ferment” time. I like to think of it as a rest for the dough. The bulk fermentation is absolutely necessary for our dough to rise & get that iconic sourdough flavour!
COLD FERMENT (CHILL)
The “CHILL” time as I like to call it is called the “cold ferment”. This is when the dough is placed into the refrigerator to develop its flavour profile. Just like when we place our starter in the refrigerator, the fermentation slows down, but doesn’t completely stop. The longer the “CHILL” time the more sour your bread will end up tasting. The “CHILL” is not a necessary step and can vary from 30mins to overnight, to a few days depending on the formula. I find a 30min chill time just before baking, eases the “scoring” process (cut the surface of the dough before baking) and allows a slight flavour development without over fermenting your dough.
DECIDE: WHEN DO YOU WANT TO BAKE?
Do you want to bake today or tomorrow morning? This will help you decide how long your cold ferment will be. If you want to bake today, cover your dough & place it in the refrigerator while your oven heats up. PREHEAT OVEN with dutch oven or baking stone inside for 30-45mins: 475°F (246°C) – convection bake or 500°F (260°C) if you don’t have convection bake).
6) BAKE YOUR GLUTEN FREE SOURDOUGH BOULE
(SCORE & BAKE Gluten Free Sourdough)
STEP 1: PREHEAT OVEN with dutch oven inside for 30-45mins at 475°F (246°C)
Use convection bake. If you don’t have a convection oven, bake at 500°F (260°C) . Place your dutch oven or baking stone inside the oven to preheat.
STEP 2: CHILL DOUGH
Ensure your dough is being chilled in the refrigerator while your oven is preheating. If your dough has been chilling over night, leave it in the refrigerator until the oven is preheated.
STEP 3: SCORE YOUR DOUGH
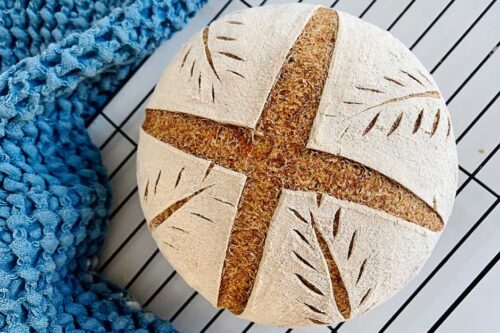
In the video I do a simple cross hatch score but you can chose whatever score you like. I often do just a simple “C” when I’m running low on time. The importance of scoring the dough is explained in the video.
STEP 4: BAKE DOUGH
- Turn oven temperature down to 450°F (232°C) convection or 475°F (246°C).
- Bake for 45mins covered (for a nicely cooked inside. Can cook as little as 35 mins covered if you like your bread really soft).
- DO NOT cut into it until it is completely cool or the loaf will be gummy inside!
- Uncover, turn 180°, bake 25-45 mins. Depending on how crispy & dark you like your crust.
- Remove from oven & cool completely on a wire rack.
- Cut your loaf once completely cool as the gluten free sourdough really needs the cooling time to set completely. I usually leave it to cool at least 3 hours or even overnight.
STEP 5: BAKE YOUR SAMPLE DOUGH
While your loaf is baking remember to bake your sample dough on a baking stone or small tray for about 15 mins. Remove, cool slightly & enjoy!
DO I HAVE TO BAKE IN A DUTCH OVEN?
Baking in a dutch oven is my preferred method to bake sourdough. However, baking on a baking stone with boiling water in an oven proof dish on bottom rack works very well too. The choice is ultimately yours.
SCORE & BAKE- VIDEO
GRAB YOUR FREE BAKING TIMELINE!
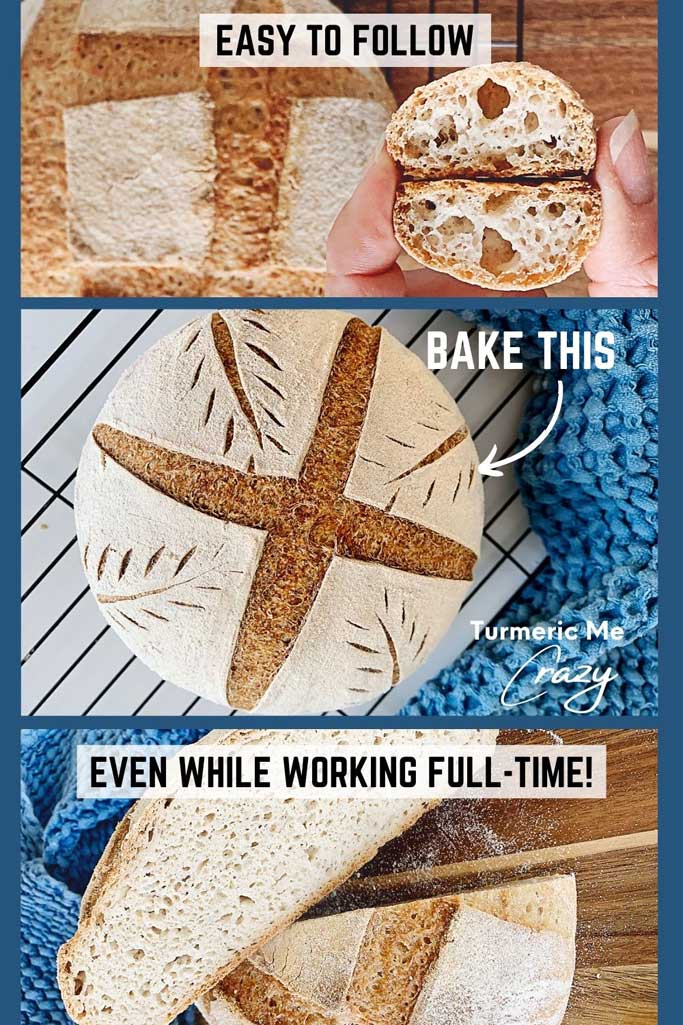
I’ve made an easy to follow baking timeline that includes options for baking same day, the next day and even baking while working full-time! Click on the image below and enter your email address. I’ll immediately send you your FREE Baking Timeline!
Please follow me on Pinterest, Instagram, Facebook, TikTok & YouTube (where I post a new follow-along video every weekend by Sunday at 4pm).
If you’re already on Pinterest, please feel free to PIN the picture below for future reference & so others can find it too

FAQ’S
CAN I FREEZE GLUTEN FREE SOURDOUGH BREAD?
ABSOLUTELY! As with most sourdough bread, gluten free sourdough is best in the 1st 2 days and can be left at room temperature in a brown paper bag or wrapped in a towel. If you won't consume it within 2 days, please do slice it up & freeze it!
TO FREEZE GLUTEN FREE SOURDOUGH BREAD
To freeze your loaf, make sure it is fully cooled then slice and wrap each slice in either parchment or plastic wrap before placing in an airtight container and freezing. This will prevent freezer burn & should stay fresh for a good 2 weeks!
TO THAW GLUTEN FREE SOURDOUGH BREAD
Simply take individual slices out of freezer and thaw on counter overnight. I find it best to toast them slightly to gain the best taste & texture. You can also pop them directly into the toaster from the freezer, you'll likely need to toast it twice!
DO I REALLY NEED TO WEIGH THE INGREDIENTS?
Yes! I have learn't through experience that weighing ingredients using a scale whilst baking is super important and will allow you to reproduce great results every time! I've attempted measuring out the flours by volume (e.g. cups), then double checked the weights of each. They were off by quite a lot actually! It can mean the difference between the most incredible and beautiful looking bagel, to one that quite literally flops. The density of the ingredient makes a BIG difference in the volume of the flour. A new bag of flour may be packed down tight vs an already opened one. A gram will always be a gram of flour!
A KITCHEN SCALE IS WORTH THE INVESTMENT
DOES IT MATTER HOW MUCH STARTER & FEED GO INTO MY LEAVEN?
Where a starter is typically fed fairly equal amounts of water & flour (100% hydration), a LEAVEN can be fed at varying levels of hydration to give the flavour complex you are looking for. Varying percentage of STARTER to FEED used to create your LEAVEN will also change the flavour profile & speed at which your LEAVEN is ready to bake.
MORE starter in the leaven
-
- faster speed of fermentation
-
- less time to peak
-
- more sour flavour
-
- more acidity due to more bacterial activity
LESS starter in the leaven
<\/p>\n
- \n
- LESS LEAVEN<\/strong> = more mild sour flavour to dough & slower fermentation<\/li>\n<\/ul>"}},{"@type":"Question","name":"HOW LONG UNTIL I CAN BAKE MY GLUTEN FREE SOURDOUGH?","acceptedAnswer":{"@type":"Answer","text":"
Time to mix our LEAVEN (aka preferment). Once your starter has reached its PEAK RISE<\/strong>, mix your leaven & let it do its magic! It will take a good 2-4 hours (more or less depending on the temp of the environment & how much starter is in the leaven) for the leaven to reach its PEAK and be ready to mix your dough!<\/p>"}},{"@type":"Question","name":"WHAT AFFECTS THE TIME IT TAKES THE LEAVEN TO PEAK:","acceptedAnswer":{"@type":"Answer","text":"
- \n
- Temperature of your starters environment? WARMER = LESS TIME, COLDER = MORE TIME<\/li>\n<\/ul>\n
<\/p>\n
<\/p>\n
- \n
- How has your starter been responding to the previous feeds & ratios? This will give you a hint to how long it will take your leaven to reach its peak rise. The leaven is 1\/2 starter : 1\/2 feed so it will reach its peak quicker than our feeds that were 1:1:1 ratio!<\/li>\n<\/ul>\n
<\/p>\n
<\/p>\n
- \n
- What is your starters appearance? Rise? Surface appearance? Bubbles? This will help you know what phase of the life cycle your starter is at & how long it will take to peak. See my post on how to make a sourdough starter<\/a><\/strong> for more details.<\/li>\n<\/ul>"}}]}
- How has your starter been responding to the previous feeds & ratios? This will give you a hint to how long it will take your leaven to reach its peak rise. The leaven is 1\/2 starter : 1\/2 feed so it will reach its peak quicker than our feeds that were 1:1:1 ratio!<\/li>\n<\/ul>\n
- Temperature of your starters environment? WARMER = LESS TIME, COLDER = MORE TIME<\/li>\n<\/ul>\n
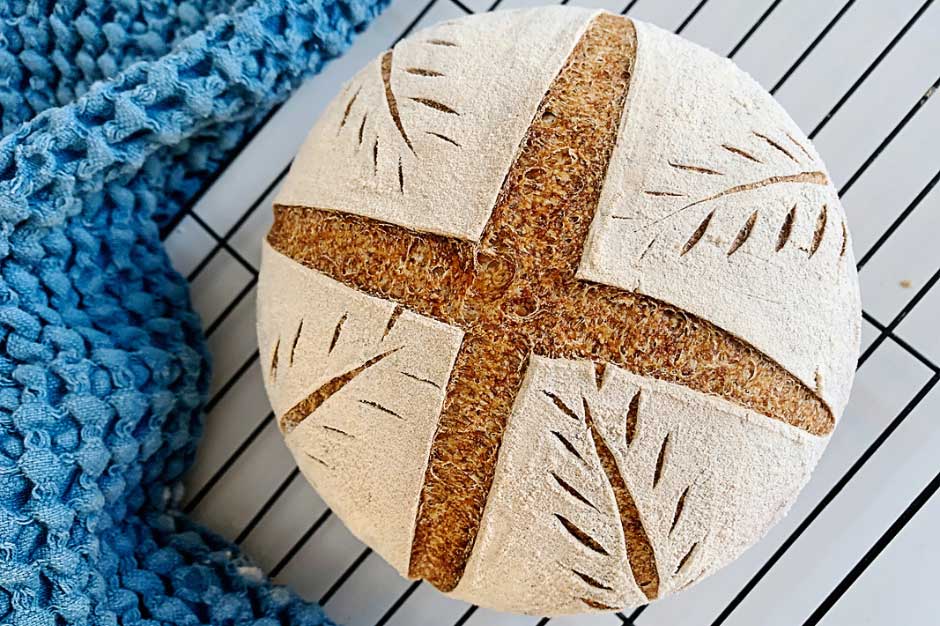
HOW TO MAKE GLUTEN FREE SOURDOUGH BREAD THE EASY WAY!
Equipment Needed
- 1 Stand Mixer optional
- 1 Dutch Oven or Baking Stone
- 1 Banneton (6.5-8" = 16-20cm) or Soup Bowl with lint free towel
- 1 Bowl with lid or Ziplock bag fits banneton or soup bowl inside
- Parchment Paper optional
- 2 Ice cubes or spray bottle with water
- 1 small clear container with lid optional - for the sample dough
INGREDIENTS
To REACTIVATE your starter
- 75 g Sorghum Flour or Brown Rice Flour to feed your starter
- 75 g Warm Water (tepid or slightly warm to the touch) filtered or sat on counter 24 hours
- 15 g Gluten Free Sourdough Starter can be cold or room temp
For the LEAVEN
- 150 g Active Gluten Free Sourdough Starter @ PEAK see post for details
- 60 g Brown Rice Flour superfine (or ground as fine as possible)
- 90 g Warm Water (tepid or slightly warm to the touch) filtered or sat on counter 24 hours
For the SOAKER
- 55 g Sorghum Flour
- 50 g Brown Rice Flour superfine (or ground as fine as possible)
- 65 g White Rice Flour
- 200 g Warm Water (tepid or slightly warm to the touch) filtered or sat on counter 24 hours
For the GEL
- 100 g Aquafaba (or water) see post for details
- 30 g Olive Oil (Extra Virgin or water - optional, see post for details)
- 18 g Apple Cider Vinegar
- 16 g Pure Maple Syrup
- 9 g Kosher Salt or Sea Salt
- 20 g Psyllium Husk (whole)
For the STARCHES
- 55 g Tapioca Flour (aka Starch)
- 90 g Potato Starch can sub with arrowroot powder
INSTRUCTIONS
REACTIVATE STARTER - EVENING BEFORE YOU BAKE
- Feed your gluten free starter (either cold from refrigerator or room temp) a ratio of 1:5:5. Discard all but 15g of starter. Feed 75g brown rice flour (or sorghum flour), 75g water (may need a few more grams if feeding sorghum flour - ensure it passes the jiggle test). Ensure you keep more starter to replenish! Either set aside 10-20g of starter to replenish it now, or replenish later while you mix your leaven. See post for details.
- Leave fed starter in a warm place (near ideal temp 24°C or 75°F) until it reaches peak activity (usually 8-12 hours after feed) (see post for more details on how to tell when starter peaks).
MIX LEAVEN - when STARTER reaches PEAK activity (Bake day A.M.)
- Mix peaked starter (active), water & brown rice flour until well incorporated. This is your LEAVEN (aka preferment or active starter) that will be used to leaven (rise) the dough.
- Leave leaven in a warm place (near ideal temp 24°C or 75°F) until it reaches peak activity (see post for more details on how to tell when leaven peaks). Usually this will take between 2-4 hours.
MIX SOAKER & GEL
- After mixing leaven. Sift flours together & mix together all ingredients for soaker (I like to mix in the bowl of my stand mixer). Set aside in a warm place.
- Mix your gel. Mix all ingredients in the gel together & set aside.
ADD STARCHES & MIX DOUGH - when LEAVEN reaches PEAK activity (2-4 hours after mixing)
- Add peaked leaven, gel & sifted starches to your soaker (in the bowl of a stand mixer). Mix on low-medium for 2 mins until combined. Then increase speed to medium-high for another 5-10 mins until dough comes together nicely.
SHAPE DOUGH & PLACE INTO BANNETON OR BOWL
- Very lightly dust countertop with brown rice flour. Use a spatula or a bench scaper to make a dough ball & then transfer to countertop. Gently shape dough into a ball ensuring to close all seams. Remove a small piece of dough for your sample (see post & video for more details).
- Dust your banneton (or soup bowl lined with towel) generously with brown rice flour. Gently flip dough into banneton or soup bowl top side down. Place banneton or bowl into an airtight container or ziplock bag.
REST & CHILL
- Bulk ferment your dough (aka REST) covered for about 2 hours in a warm place. See post for list of signs that your dough is finished its "REST" time.
- CHILL the dough in refrigerator for 30mins (if baking same day) or overnight if you wish to bake the next morning. See post & video for details.
- BAKING TODAY - PREHEAT OVEN with dutch oven or baking stone inside, to 475°F (246°C) convection setting, while dough is chilling for 30 mins. No convection? Increase temp (500°F or 260°C) & or increase bake time slightly.
SCORE & BAKE
- Once oven has preheated for 30 mins, remove dough from refrigerator. Use parchment paper to gently flip dough out and onto countertop (top of loaf now facing up).
- Spray loaf with a little water (optional) then dust generously with brown rice flour. Score loaf at a 45° angle to the surface. See video for more details. Remember to score your sample too!
- Gently lift dough into the dutch oven, cover & place on center rack. TURN OVEN DOWN to convection 450°F (232°C) & BAKE covered for 45 mins (as little as 35 mins for a softer crumb & crust). No convection (475°F or 246°C).
- Bake your sample dough on a baking stone or tray for about 15-20mins. Remove, cool for 10 mins, slice and enjoy!
- After 45 mins, uncover dutch oven, turn dutch oven 180° & bake for another 35-45 mins uncovered.
COOL THEN ENJOY
- Make sure to let your beautiful artisan loaf cool for at least 2-3 hours before cutting into it. The gluten free sourdough needs to completely cool in order to set fully.
Video
Notes
- Stand mixer is very useful for this recipe but not essential. You can mix by hand but just make sure to mix well until ALL the ingredients are well incorporated & dough comes together nicely (10-15mins).
- This gluten free sourdough is best slightly warm. I always give mine a slight toasting and it tastes like it came directly out of the oven!
- HOW DO I MAKE THIS TOTALLY RICE FREE?
- You can substitute the white rice flour in this recipe very easily. It calls for a very small amount and switching it out will not affect it very much. You can either just increase the amounts of sorghum or cassava. Or totally substitute 1:1 for any of the following:
- Millet Flour
- Cassava Flour
- Oat Flour
- Tapioca Flour (aka Tapioca Starch)
- You can substitute the white rice flour in this recipe very easily. It calls for a very small amount and switching it out will not affect it very much. You can either just increase the amounts of sorghum or cassava. Or totally substitute 1:1 for any of the following:
-
CAN I FREEZE MY LOAF?
- Absolutely! As with most sourdough bread, gluten free sourdough is best in the 1st 2 days and can be left at room temperature in a brown paper bag or wrapped in a towel. However, if you won't consume it within 2 days please do slice it up & freeze it! TO FREEZE: Once fully cooled, slice the loaf and wrap each slice in either parchment or plastic wrap before placing in an airtight container and freezing. This will prevent freezer burn & should stay fresh for a good 2 weeks or longer! TO THAW: Simply take individual slices out of freezer and thaw on counter overnight. I find it best to toast them slightly to gain the best taste & texture. You can also pop them directly into the toaster from the freezer, you'll likely need to toast it twice!
Nutrition
PLEASE SHARE THE GLUTEN FREE SOURDOUGH ♥︎!
- \n
- MORE LEAVEN <\/strong>= more sour dough & faster bulk fermentation<\/li>\n<\/ul>\n
<\/p>\n
<\/p>\n
- \n
- LESS LEAVEN<\/strong> = more mild sour flavour to dough & slower fermentation<\/li>\n<\/ul>"}},{"@type":"Question","name":"HOW LONG UNTIL I CAN BAKE MY GLUTEN FREE SOURDOUGH?","acceptedAnswer":{"@type":"Answer","text":"
Time to mix our LEAVEN (aka preferment). Once your starter has reached its PEAK RISE<\/strong>, mix your leaven & let it do its magic! It will take a good 2-4 hours (more or less depending on the temp of the environment & how much starter is in the leaven) for the leaven to reach its PEAK and be ready to mix your dough!<\/p>"}},{"@type":"Question","name":"WHAT AFFECTS THE TIME IT TAKES THE LEAVEN TO PEAK:","acceptedAnswer":{"@type":"Answer","text":"
- \n
- Temperature of your starters environment? WARMER = LESS TIME, COLDER = MORE TIME<\/li>\n<\/ul>\n
<\/p>\n
<\/p>\n
- \n
- How has your starter been responding to the previous feeds & ratios? This will give you a hint to how long it will take your leaven to reach its peak rise. The leaven is 1\/2 starter : 1\/2 feed so it will reach its peak quicker than our feeds that were 1:1:1 ratio!<\/li>\n<\/ul>\n
<\/p>\n
<\/p>\n
- \n
- What is your starters appearance? Rise? Surface appearance? Bubbles? This will help you know what phase of the life cycle your starter is at & how long it will take to peak. See my post on how to make a sourdough starter<\/a><\/strong> for more details.<\/li>\n<\/ul>"}}]}
- How has your starter been responding to the previous feeds & ratios? This will give you a hint to how long it will take your leaven to reach its peak rise. The leaven is 1\/2 starter : 1\/2 feed so it will reach its peak quicker than our feeds that were 1:1:1 ratio!<\/li>\n<\/ul>\n
- Temperature of your starters environment? WARMER = LESS TIME, COLDER = MORE TIME<\/li>\n<\/ul>\n
- LESS LEAVEN<\/strong> = more mild sour flavour to dough & slower fermentation<\/li>\n<\/ul>"}},{"@type":"Question","name":"HOW LONG UNTIL I CAN BAKE MY GLUTEN FREE SOURDOUGH?","acceptedAnswer":{"@type":"Answer","text":"

