
It’s easy as 1-2-3 Turmeric It in our home kitchens with this easy How to Make Roti instructional guide! This is another recipe that my delightful friend Alnaar has created for me. Thank you Alnaar! It is one of my blogs original recipes. It contains gluten and dairy. I have kept it here, as I have all of the original recipes, for those of you who love it and would like to keep the recipe the same! Please stay tuned and follow me as I will have the gluten, and dairy free alternative options coming soon! When it’s ready I’ll post it here.
What is Roti?
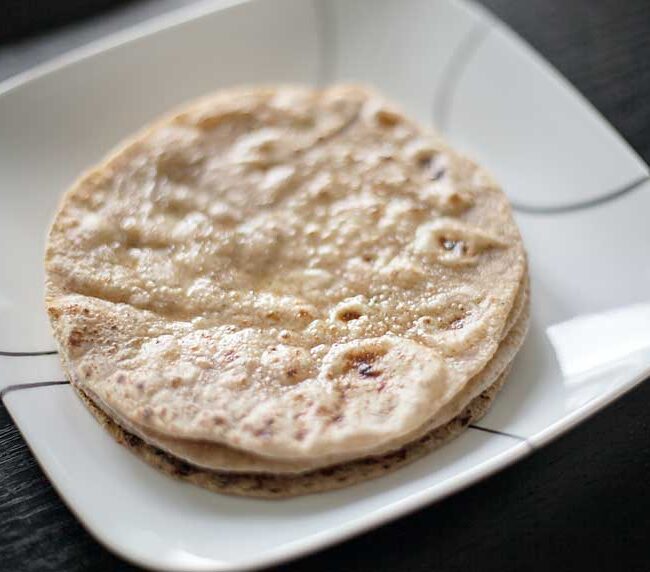
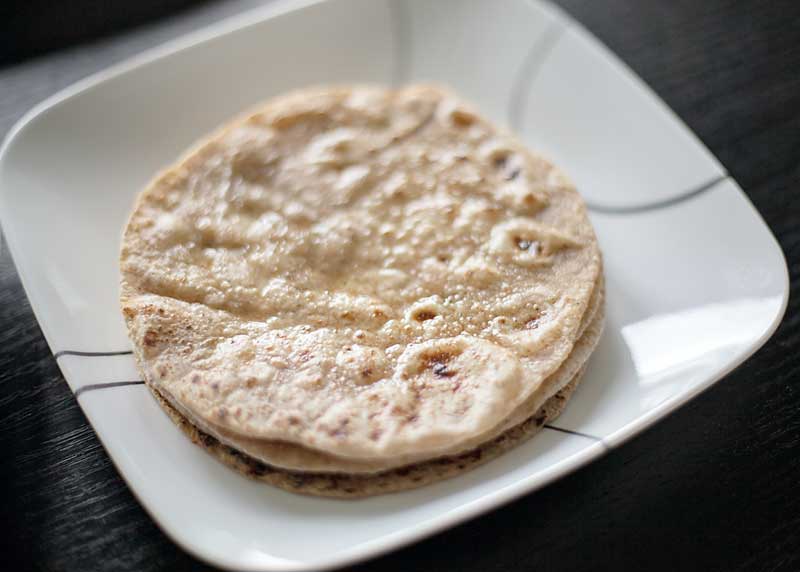
Roti is an Indian flatbread. There are many ways to eat roti. It can be paired with a curry or eaten on its own. My kids love to have it with butter and honey spread on top. It can be intimidating to make roti, but its really not too bad once you have made it a couple of times. It’s one of those things where practice makes perfect. Here I’ll show you How to Make Roti with easy step by step instructions and photos.
How to Make Roti with 4 simple ingredients
You can make rotli (roti) with whole wheat flour or special chapati flour (can be found in the ethnic section at large grocery stores). I prefer whole wheat flour since it is slightly healthier.
- Flour
We like to use Anita’s Organic Whole Wheat Flour. You can find it at most grocery stores. You may wonder if organic flour makes a difference? I can assure you the taste is significantly different. You can tell right away when you kneed the dough! It simply feels different. You can also use chapati flour which is more traditional (but maybe a bit less healthy) if you prefer.
- Olive Oil
We like Extra Virgin Olive Oil.
- Butter
I use Savor Grass Fed Butter for it’s truly delicious flavour and health benefits of grass fed dairy! Give it a try, but I’m warning you, you may never be able to eat any other type of butter again! It’s that good!
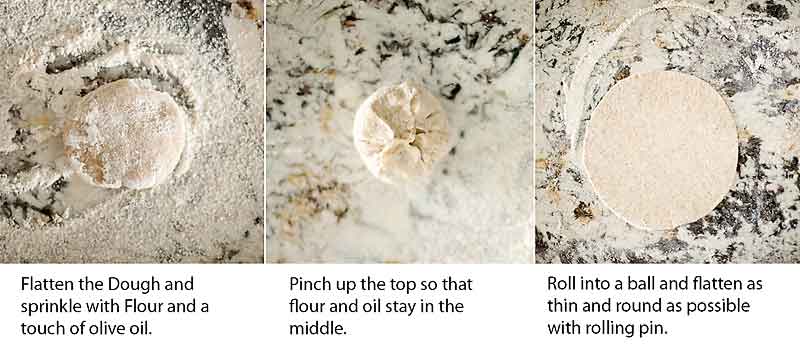
Crucial Tip #1: Use our technique above to ensure Roti fluffs up while cooking
One of the trickiest parts of making roti is to get it to fluff up with air while it is cooking. You need this to happen so that it doesn’t become dense and heavy. A strategy that Alnaar’s mom taught her is once you have separated the dough into smaller balls, flatten each ball and brush a tiny bit of olive oil on top. Sprinkle on some flour and then pinch the dough around the oil/flour portion back into a ball. See above photo for a visual.
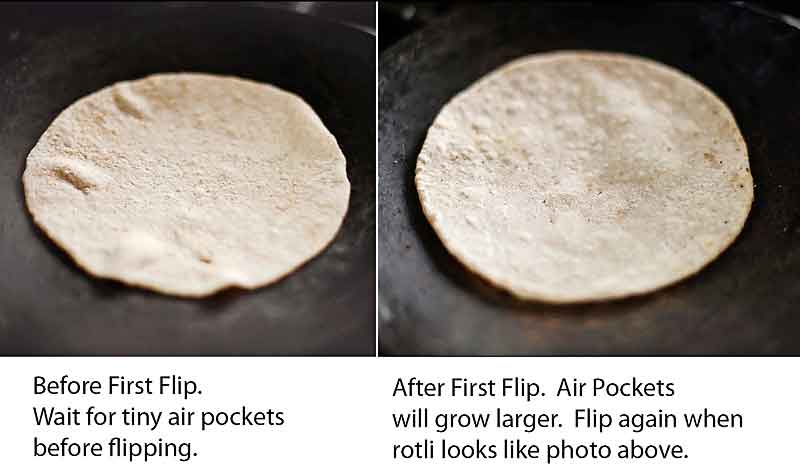
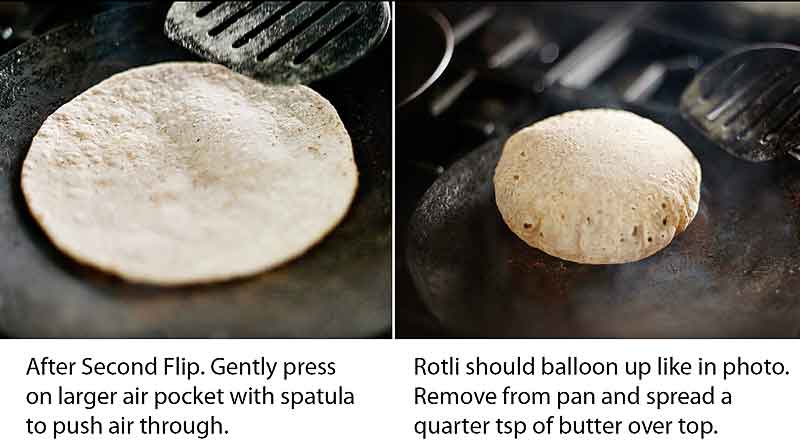
Crucial Tip #2: Pre-Heat!
Another crucial point is that the pan (you can use a tawa or a griddle) must be very hot before you start. Make sure that you have the burner running on medium to medium high heat for at least 5 minutes before you start cooking the first roti. The above photo gives you a visual for what the roti should look like at each phase of cooking. Note that it does not take much more than 2 minutes per roti. With the right temperature, the roti should balloon up. If the temperature is too high, the roti will burn before it gets a chance to balloon up. And if temperature is too low, it will not balloon up at all.


ENJOY!
I hope you enjoy this How To Make Roti post. I am beyond excited to work with Alnaar in creating the Gluten Free, Dairy Free version of this How to soon! I’d be ever so grateful if you follow me on Instagram @Turmeric_Me_Crazy and rate and comment on this How To Make Roti instructional guide.
Thank you as always for visiting and for you continued kindness and support.


How to Make Roti
INGREDIENTS
- 2 cups whole wheat flour
- 3 tbsp Olive Oil
- 1 cup very warm water
- 1 tbsp Butter
INSTRUCTIONS
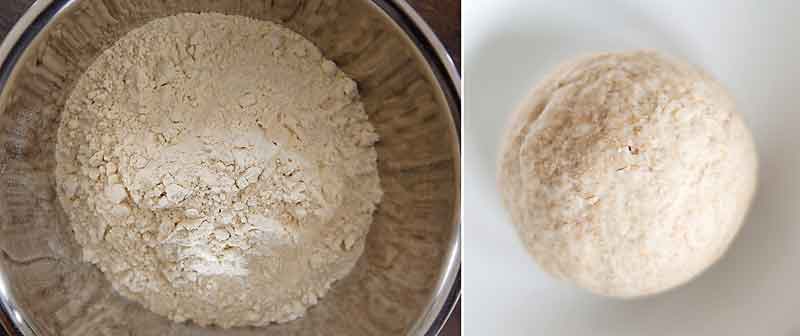
- Add flour to mixing bowl.
- Set aside 1 tbsp of olive oil. Slowly add 2 tbsp of olive oil to the flour. Mix thoroughly until all of the clumps are gone.
- Add the water slowly. Mix together with your hands and knead the dough a few times. If the dough is sticky, add a bit more flour until it no longer sticks to your hands.
- Place the dough back into the mixing bowl and cover with a towel or saran wrap.
- After half an hour, remove the dough from the bowl and separate into 8 smaller balls.
- Place skillet (tawa) on the stove and turn on heat to medium high setting.
- On a lightly floured surface, flatten each ball and brush with the olive oil that you set aside. Sprinkle with flour and pinch the sides up so that the flour/oil section is in the middle of each ball.
- Using a rolling pin, carefully roll each ball flat on a floured surface. You need to roll it out slowly to make sure that it is not sticking to your surface. If it feels sticky, flip the dough and sprinkle with flour and continue to roll it out.
- Once the rotli is as thin as you can get it without it tearing, carefully place it on the pre-heated tawa or griddle top side down. As soon as you start to see little air bubbles forming, flip the rotli.
- The air pockets will start to grow larger now. Flip the roti after they are a decent size. See photo for how the roti should look if you are not sure.
- Place a light amount of pressure on the rotli with a spatula to push the air throughout the rotli. Once it has puffed up you can remove it from the stove.
- Spread a small amount of butter on top of cooked rotli to keep it moist.
- Repeat for the remaining 7 rotis.
Notes
Photos:


