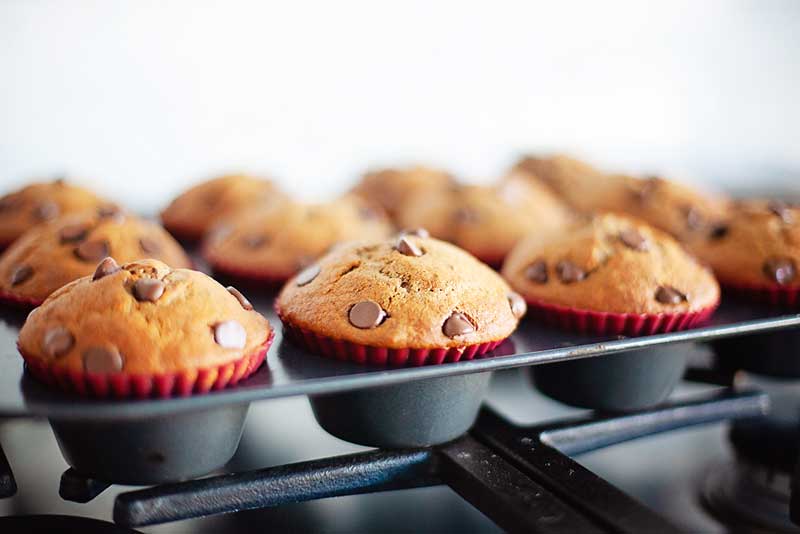
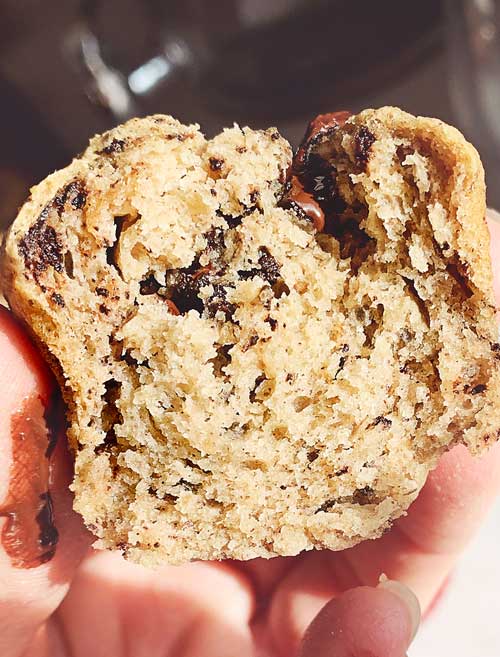
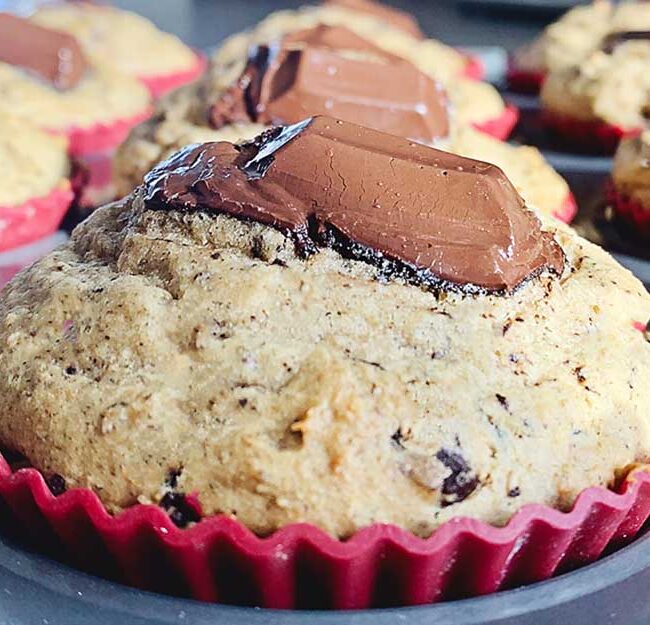
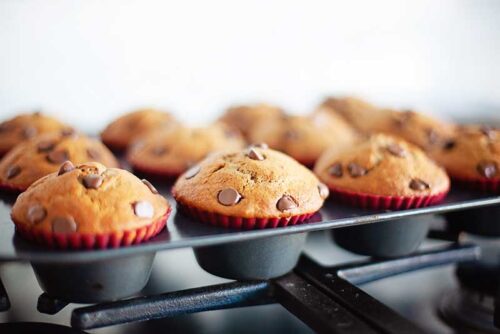
Fluffy and perfectly moist, these gluten free banana chocolate chunk muffins are the perfect way to use up your gluten free sourdough discard! These muffins are completely gluten free, egg free, corn free, xanthan & guar gum free & have dairy free & vegan options that are equally as delicious!
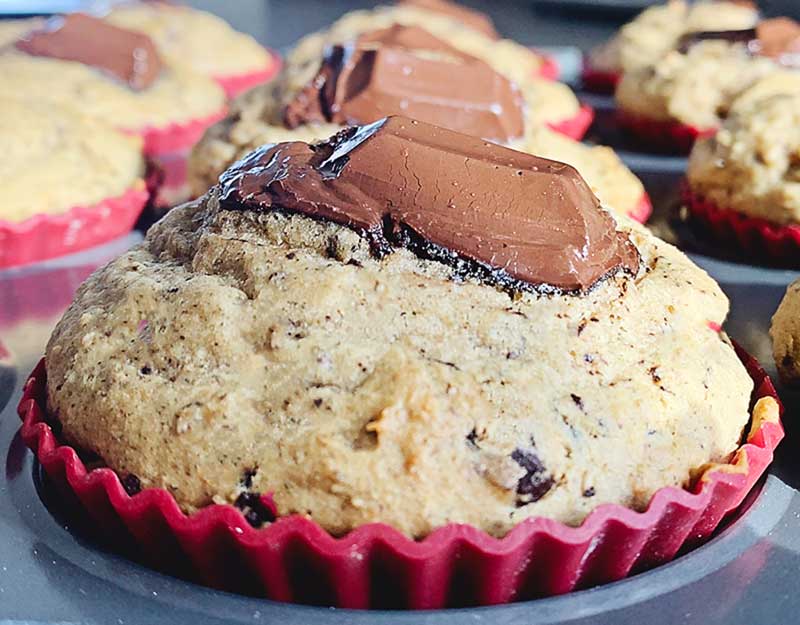
If you’re following along with me in my video series to make a gluten free sourdough starter and you’re on Day 4 and beyond, these muffins are going to put a huge smile on your face! They are so delicious, moist and fluffy that you truly can’t tell that they are gluten free!
You’ll love how easy & quick they are to make! I always double the recipe with the intention of freezing them (they are great for a quick morning on the go) but they usually get gobbled up before they even get a chance to hit the freezer!
FOLLOW ME
I’d be ever so grateful if you’d please follow me on your social media!
If you’re already on Pinterest, please feel free to PIN the picture below for future reference & so others can find it too. Thank you kindly.

INGREDIENTS
(in sourdough discard banana muffins)
Have you ever thought of muffins as healthy? Me either. However, these muffins contain ingredients that are not only easier to digest, but also have numerous health benefits! Check it out.
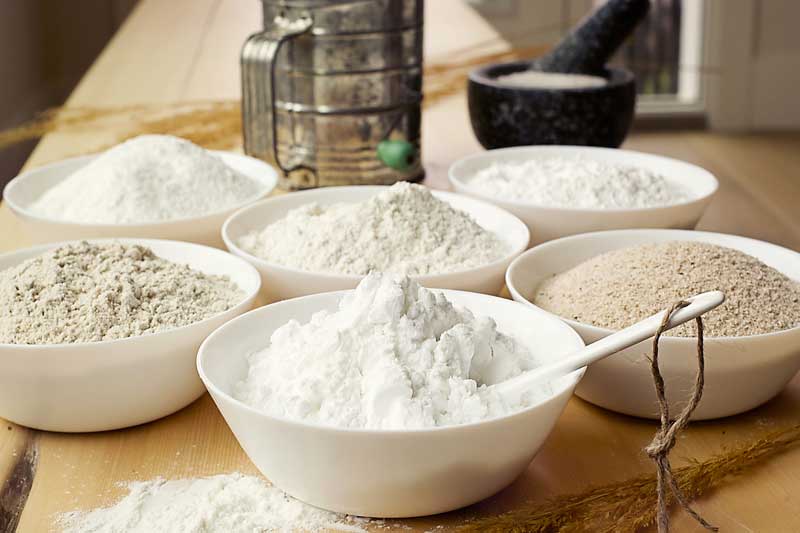
FLOUR
- Crazy Good Gluten-Free All-Purpose Flour
* See my post How to make your own GF Flour Blend for ingredients & instructional details. Or follow the amounts given in the notes below my recipe. The flours & starches in this blend are:
- Sweet Rice Flour
- Brown Rice Flour
- Sorghum Flour
- Potato Starch (not Potato Flour)
- Tapioca Starch (aka Tapioca Flour)
LEAVENING AGENT
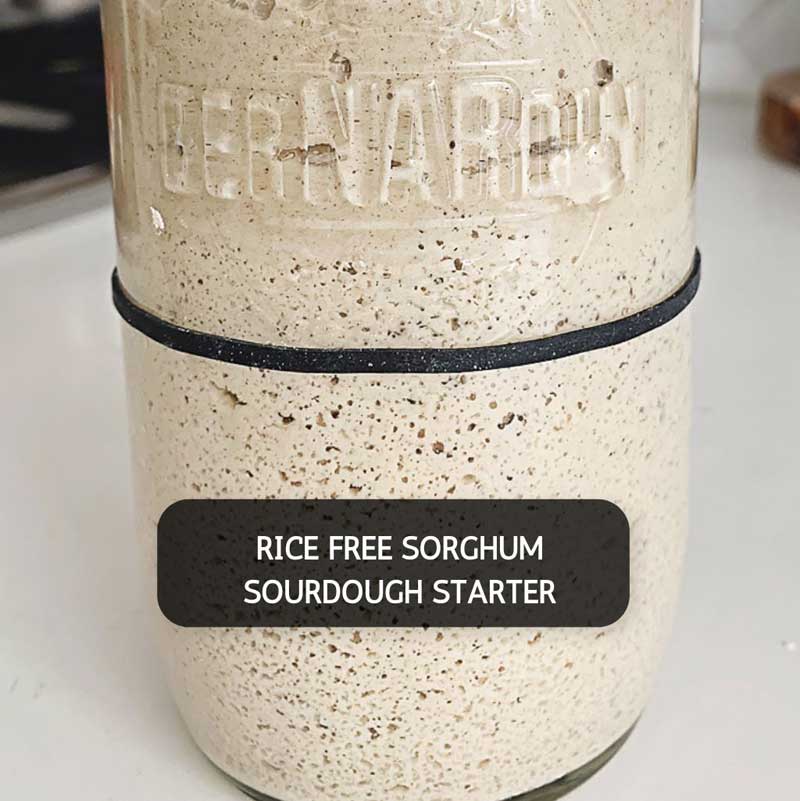
- Gluten Free Sourdough Starter
This can be either discard (no more than 1 week old from refrigerator) or active starter. The sourdough starter is the biological leavening agent in this recipe and will give your muffins a lovely rise and fluffy texture! If you don’t have a starter yet and would love to make one, please check out my follow along video guide that will make creating a gluten free sourdough starter easy for you!
Don’t have a gluten free sourdough starter yet?
If you’re hoping to make a gluten free sourdough starter culture you’ve come to the right place! My follow-along video series will take you through the process from start to baking your 1st loaf and everything in between! I share with you my intuitive approach to creating & maintaining your gluten free sourdough starter in order to take away the mystery of sourdough baking! Join me here!
OTHER INGREDIENTS
- Warm Water
The most ideal Water temperature to activate yeast is between 105-115°F (40.6-46.1°C). In fact, yeast dies at 130-140°F. So if you place your sourdough starter in water >140°F the yeast will be killed off and your dough will not rise properly. Inversely, yeast in water <100°F will create a very sticky dough that will not rise as well either. So it is totally worth investing in a kitchen thermometer for this purpose.
- Cane Sugar
I like to use Cane Sugar over regular granulated sugar. Although identical in chemical composition, these sugars are quite different in taste. Cane sugar imparts a deeper, more full bodied flavour to baking due to its molasses content and is therefore higher in nutrients. Granulated sugar is more processed and stripped of its molasses content making it less flavourful. I figure if I’m adding the calories from sugar, why not use the BEST flavoured type and therefore need much less!
BINDERS
- Binders
- Psyllium Husk
- Ground Flax Seeds
- Whole Chia Seeds
Psyllium Husk is one of the main ingredients in Metamucil! So needless to say it is incredibly good for the intestinal tract and in fact it enhances the digestive process & has prebiotic effects. Psyllium husk is very rich in fibre and can help improve & prevent constipation and haemorrhoid pain. Research is even showing it can help manage diabetes and may even lower risk of developing diabetes! On top of all of that psyllium husk is heart healthy, may help decrease blood pressure, decrease cholesterol & can help with weight management. Psyllium contains antibacterial compounds that help eliminate toxins in the body & in turn give you healthy glowing skin! You can find psyllium husk at most grocers and health stores (e.g. Blush Lane Organics).
Ground Flax Seeds & Whole Chia Seeds help to bind the ingredients together as well as add numerous health benefits! If you only have one of these options feel free to substitute! I like using the mix of the 3 binders as I find each has it’s own health benefits, binding properties & flavour complex!
ADDITIONAL LEAVENING AGENTS
- Baking Powder
Did you know that most Baking Powder is made with corn and contains aluminum. You can find Corn Free Baking Powder free from aluminum in the natural section of some grocery stores, whole foods markets and at Blush Lane in Calgary.
- Baking Soda
Like baking powder, baking soda is another chemical leavening agent. It is used to help give your muffins even greater rise! The recipe includes a sourdough starter, so if you wish to leave the baking soda & or powder out feel free. However, you may not achieve the same rise & fluffy texture.
- Apple Cider Vinegar
Apple Cider Vinegar is used to strengthen the batter. The apple cider vinegar has a chemical reaction with the baking soda giving a lift to the batter! This is why I suggest not to mix the batter further after its rest time. In fact, if you can’t or don’t like to use yeast, some say you can increase the apple cider vinegar to replace it. Please let me know if you try it! I like to use Bragg’s raw unfiltered Apple Cider Vinegar for its purity and flavour.
ENRICHMENT
- Olive Oil
I use Extra Virgin Olive Oil for moisture and a boost of heart healthy fats. I like this brand which I get at Costco.
- Spices
Cinnamon, Nutmeg & pure Vanilla give these muffins a lovely flavour complex.
- Dairy (or alternatives)
- Greek Yogurt (or non-dairy yogurt like oat or coconut)
- Butter (or non-dairy butter, or neutral oil)
- Chocolate Chunks or Chips
I like to use dark chocolate chunks that are dairy & additive free.
- Bananas
Try and use ripe bananas. They are much sweeter and will lend a better flavour. These muffins are the perfect way to use up bananas that have turned brown!
* Please see my post How to Create your own GF Flour Blend for all the details and recipe for my Crazy Good Gluten-Free All-Purpose Flour
DO I REALLY NEED TO WEIGH THE INGREDIENTS?
Yes! I have learn’t through experience that weighing ingredients using a scale whilst baking is super important and will allow you to reproduce great results every time! I’ve attempted measuring out the flours by volume (e.g. cups), then double checked the weights of each. They were off by quite a lot actually! It can mean the difference between the most incredible and beautiful looking bagel, to one that quite literally flops. The density of the ingredient makes a BIG difference in the volume of the flour. A new bag of flour may be packed down tight vs an already opened one. A gram will always be a gram of flour!
I use a very simple mini digital kitchen scale that I got for $19.99. Trust me it is well worth the investment! It is super easy to measure ingredients by weight. I think it’s WAY easier than measuring by volume (e.g. cups). To measure flour, place a bowl on the scale, press the tare button to zero your scale to the weight of the bowl, and then add your flour. Simple as that!
HOW TO MAKE SOURDOUGH DISCARD BANANA MUFFINS
These muffins are so quick & easy to whip up! Especially if you already have some of my Crazy Good Gluten Free All-Purpose Flour already whisked up and on hand. I keep a container of the flour blend in my pantry so that I can whip these up in a jiffy!
STEP 1: PREHEAT Oven to 350°F (177°C) on convection
- Convection ovens have a fan which evenly distributes the hot air throughout allowing bakes to cook 25% faster and at a lower temperature. If you don’t have convection, you may need to increase the temp by about 25°F (15°C) and increase the bake time by 4-5 mins or so.
STEP 2: MIX dry ingredients
- In a medium bowl, sift together flours, starches, baking soda & baking powder.
- Whisk in chia seeds, psyllium husk, flax seeds, cinnamon, nutmeg & salt. Set aside.
STEP 3: CREAM together butter & sugar
- In the bowl of a stand mixer with a paddle (or hand held mixer) cream butter, sugar, vanilla & apple cider vinegar together.
- If you don’t have a stand mixer that’s ok, you can use a hand held mixer!
STEP 4: ADD dry ingredients to butter mixture
- Add dry ingredients to butter mixture. Mix on low with paddle attachment.
STEP 5: COMBINE wet ingredients (except sourdough starter)
- Using a hand held blender or food processor, blend together bananas & greek yogurt until smooth. Or use a potato masher to blend by hand.
- Add Sourdough Starter Discard to wet ingredient & gently stir (can also be active starter).
STEP 6: COMBINE wet & dry ingredients
- Add wet ingredients to dry ingredients in the stand mixer bowl. Mix on medium speed for 15 mins.
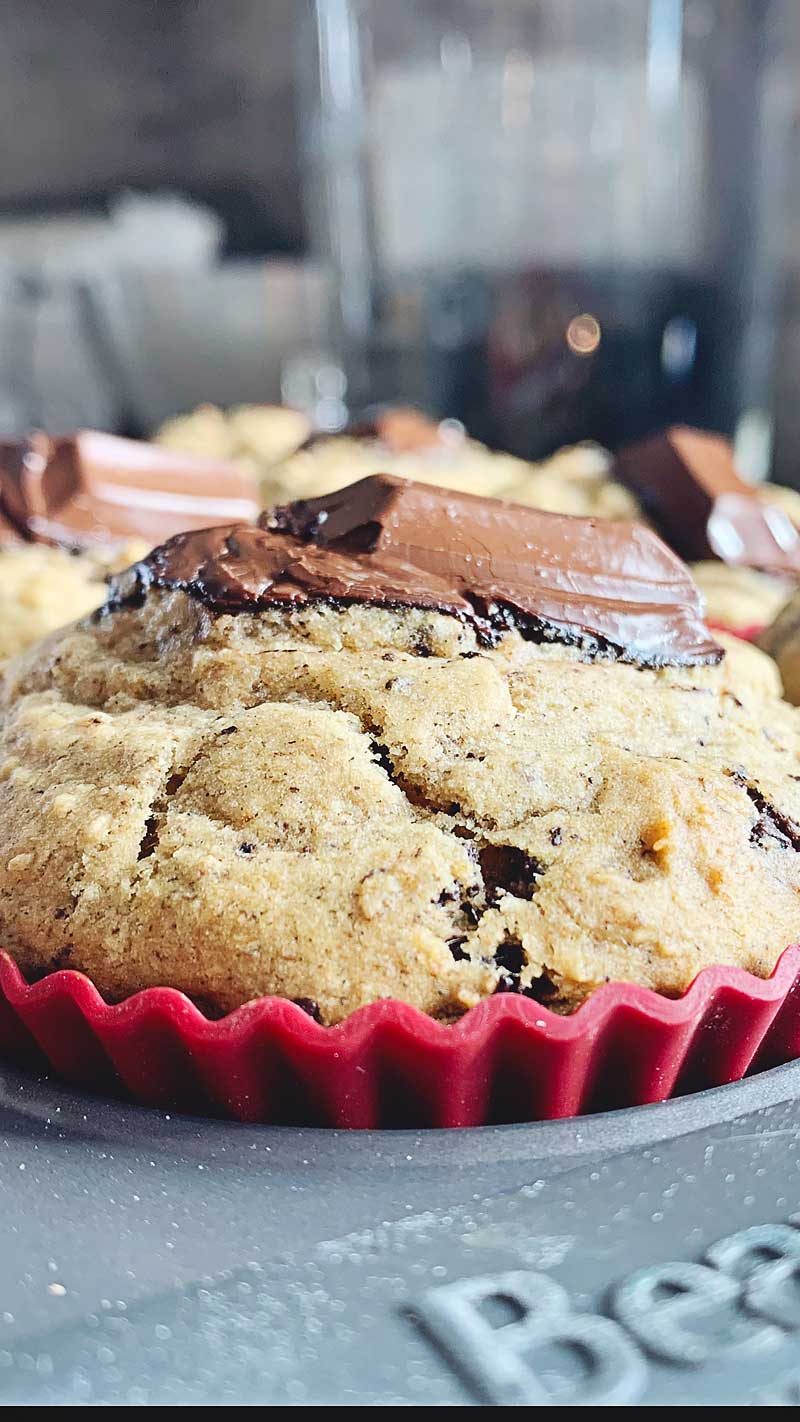
- OPTIONAL: Add chocolate chips or chunks & gently stir in. Or simply top each muffin with a chunk of chocolate.
STEP 7: Let batter REST
- Let batter rest covered for 30 minutes. This is an important step as the gluten free flours take time to absorb the liquids. If you skip this step your muffins may fall flat when cooling or be under cooked. Do not mix further after this rest as this will cause the batter to lose some of its leavening power!
STEP 8: BAKE & REST
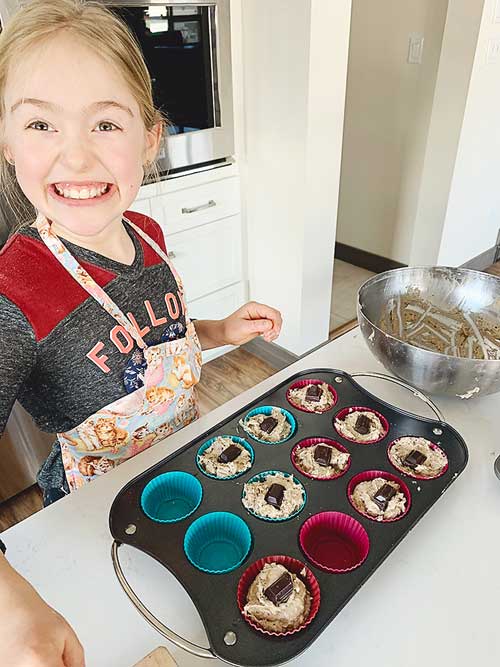
- Line muffin tray with muffin cups. I like to use silicone re-useable cups. Scoop out batter into muffin cups filling each to the top.
- OPTIONAL: Add a piece of chocolate to the top if desired. You can do chocolate inside & on top for a more chocolatey treat!
- Bake on centre rack for 18-20 mins.
- Let muffins cool completely in the muffin tray. This is essential as the muffins will continue to cook and firm up as they cool. If you find the muffins start to collapse while cooling. Cook for an additional 2-5 mins next time.
STEP 9: SHARE & ENJOY!
CAN I MAKE IT DAIRY FREE & VEGAN?
YES! In fact, it is very easily done now a days with so many dairy free options out there! I have listed all of the dairy free options above in the ingredients section (changing these would allow these muffins to be vegan too).
CAN I FREEZE SOURDOUGH DISCARD BANANA MUFFINS?
ABSOLUTELY! If you can get them to last long enough without everyone gobbling them up!
TO FREEZE: Once fully cooled simply place in an airtight container and freeze. I am sure they would last a good month, however, I literally have never had them longer than a week even when I double the recipe! My family gobbles them up so fast!
PLEASE RATE & COMMENT
I know you’ll just love these fluffy and moist, gluten free, sourdough discard banana muffins! Aside from being incredibly delicious, they’ll help you avoid waste and use up all of your sourdough starter discard! If you try it, please add a rating onto the recipe below or at the bottom of the post as it helps Google recognize the recipe & my website which will help show it to more people. I’d love to see our community grow! ♡
Now let’s get baking!


Gluten Free Sourdough Banana Muffins
Equipment Needed
- 12 Muffin Cups
- Stand Mixer optional
- Hand held blender or food processor optional
INGREDIENTS
Dry Ingredients
- 185 g Crazy Good Gluten Free All-Purpose Flour see my recipe or amounts needed in notes below
- 7 g Baking Soda (1 tsp)
- 5 g Baking Powder * corn & gluten free
- 5 g Chia Seeds I use whole seeds
- 5 g Psyllium Husk (whole)
- 5 g Flax Seeds (ground)
- ½ tsp Cinnamon optional but yummy!
- ¼ tsp Nutmeg optional but yummy!
- ⅛ tsp Sea Salt or Kosher Salt
- 50 g Chocolate Chunks or chips * can use dairy free
- 60 g Cane Sugar
- 85 g Butter, softened * see note below for dairy free & vegan options
Wet Ingredients
- 2 large Bananas (about 250g)
- 167 g Greek Yogurt (plain) * see note below for dairy free & vegan options
- 3 g Pure Vanilla Extract (1/2 tsp)
- 3 g Apple Cider Vinegar (1/2 tsp)
- 100 g Gluten Free Sourdough Starter * no older than 1 week in refrigerator
INSTRUCTIONS
- Preheat Oven to 350°F (177°C) on convection (aka fan).
MIX DRY INGREDIENTS
- In a medium bowl, sift together flours, starches, baking soda & baking powder.185 g Crazy Good Gluten Free All-Purpose Flour, 7 g Baking Soda, 5 g Baking Powder
- Whisk in chia seeds, psyllium husk, flax seeds, cinnamon, nutmeg & salt. Set aside.5 g Chia Seeds, 5 g Psyllium Husk, 5 g Flax Seeds, 1/2 tsp Cinnamon, 1/4 tsp Nutmeg, 1/8 tsp Sea Salt
CREAM TOGETHER BUTTER & SUGAR
- In the bowl of a stand mixer with a paddle (or hand held mixer) cream butter, sugar, vanilla & apple cider vinegar together.60 g Cane Sugar, 85 g Butter, softened, 3 g Pure Vanilla Extract, 3 g Apple Cider Vinegar
COMBINE
- Add dry ingredients to butter mixture. Mix on low with paddle attachment.
COMBINE WET INGREDIENTS
- Using a hand held blender or food processor, blend together bananas & greek yogurt until smooth. Or use a potato masher to blend by hand.2 large Bananas, 167 g Greek Yogurt (plain)
- Add Sourdough Starter Discard to wet ingredient & gently stir (can also be active starter).100 g Gluten Free Sourdough Starter
COMBINE WET & DRY INGREDIENTS
- Add wet ingredients to dry ingredients in the stand mixer bowl. Mix on medium-high speed for 5-10 mins until smooth. OPTIONAL: Add chocolate chips or chunks & gently stir in.
REST
- Let batter rest covered for 30 minutes. This is an important step! See notes.
BAKE
- Line muffin tray with muffin cups. Scoop out batter into muffin cups filling each to the top. Bake on centre rack for 20-22 mins.

- Let muffins cool completely in the muffin tray. This is essential as the muffins will continue to cook and firm up as they cool. If you find the muffins start to collapse while cooling, cook for an additional 2-5 mins next time.

Notes
- 46g Sweet Rice Flour
- 37g Brown Rice Flour
- 37g Sorghum Flour
- 37g Potato Starch (not Potato Flour)
- 56g Tapioca Starch (aka Tapioca Flour)
- Substitutes:
-
-
- Dairy free yogurt (e.g. oat or coconut yogurt – my recipe coming soon)
- Dairy free butter or use light oil like avocado or melted coconut oil (decrease amount slightly with oil to 3/4 total = 64g)
-
- If you don’t have a convection oven, you may need to increase the temp by about 25°F (15°C) or increase the bake time about 25% (4-5 mins or so).




14 Responses
Yesss! You are teaching me about the magical trinity of discard, sourdough starter maintenance, And my convection oven! This is a 1 stop site. I’m a Crohnie form MN, 10 years gf. Fantastic info here, thanks for sharing all of it! Your simple repetitive gf SD instructions on Youtube have been most helpful in understanding the SD process. Much appreciation !
Amanda, you just made my day! Thank you for your kind words. I am so thrilled that I could help! Lovely to meet you virtually and welcome to the Turmeric Me Crazy community ♥︎!
These are so incredibly moist & tasty! My family can’t tell they are gluten free. Thanks for the recipe.
You’re so very welcome ♡
Best muffins ever!! Melt in your mouth… if you get a chance to eat one before the kids gobble them up!! Love these recipes.
Thank you so much Jenny! I’m SO happy that your kiddos love them ♡!
These are absolutely delicious. The only thing that bothered me was calling it discarded sourdough. I have to say that these are yummy enough to make them the starring attraction. Next time I have the local neighbors over for coffee and a snack this is going to be my go to. They are that good. 🙂
How kind of you to say Jim! Thank you so much. I’m so happy that you love them.🙏🏻
These sourdough banana chocolate chip muffins are really tasty! A great snack or with meals!
Thanks Richard! I appreciate the kind feedback.
These muffins are so good! I can’t believe that it’s gluten free.
Oh good! I’m so happy to hear you loved them 😍.
Thank you for this delicious recipe. This one is a keeper!
I’m so glad you think so! Thank you for the kind words 🙏🏻.