...but no more!

Search
Close this search box.

...but no more!

How to make Coconut Flour at home – 2 ways!

Easily make your own coconut flour in 3 quick & easy steps from fresh homemade coconut meal! Making your own coconut flour has many benefits. It can be cost-effective, allow you to control the quality of your ingredients, result in fresher products, be customizable to your preferences, and be more environmentally friendly. So next time you're in the mood for some coconut-based cooking or baking, consider making your own coconut products at home. Let us show you how!

Hi, I'm Trish

It’s so lovely of you to visit my world kitchen! My families dietary needs were enough TURMERIC ME CRAZY, but NO MORE! 

Follow us on your social

NEVER MISS A RECIPE!

Get updates on latests recipes from TurmericMeCrazy straight to your inbox!

Coconut is a versatile ingredient that can be used in a variety of dishes, from curries to cakes and even chocolate. Not only is it delicious, but it also contains a host of health benefits, including healthy fats, fibre, and essential minerals. Making your own coconut flour is SO easy and has several advantages. We’ll show you how to make a low fat & full-fat version of coconut flour!

When we make these coconut products at home, we literally waste nothing! Everything gets used.

WHY YOU'LL LOVE IT!

Making your own coconut products can be much more cost-effective than buying them at the store. Store-bought coconut products can be quite pricey, and making them at home can save you a significant amount of money in the long run. Especially if you are buying organic and looking for products that are free from additives & gums!

Additionally, if you live in an area where fresh coconuts are readily available, you can save even more by using fresh coconut flesh to make your own coconut milk, coconut milk powder & coconut flour.

When buying coconut milk and coconut milk powder at the store, you may have noticed that they all contain either chemical additives, processed ingredients & or emulsifiers. Making your own gives you control over what is in your coconut milk!

When you make your own coconut products, you have complete control over the quality of the ingredients you use. You can choose to use organic, non-GMO coconuts and avoid any additives or preservatives or emulsifiers that may be found in store-bought products. This means you can ensure that your coconut products are as healthy and natural as possible.

Coconut products made at home will be much fresher than store-bought products, which may have been sitting on the shelf for months. Fresh coconut products will have a better flavour and aroma, and will also retain more of their nutritional value. Trust me, when see how easy it is to make & you taste this homemade version, you’ll never buy store bought again!

When you make your own coconut products, you can customize them to your liking. For example, you can adjust the thickness & fat content of your coconut milk to suit your recipe, or you can make flour with a finer or coarser texture depending on your needs. This level of customization is not possible with store-bought products.

Making your own coconut products can also be more environmentally friendly than buying them at the store. When you make your own products, you can avoid the packaging waste that comes with store-bought products. Additionally, by using fresh coconuts, you can avoid the carbon footprint associated with shipping canned or packaged coconut products long distances (if you are lucky enough to live where you can get fresh coconut).

This recipe is:

COCONUT meal VS COCONUT milk powder vs COCONUT Flour?

These coconut products are all made in different ways from the white fleshy part of a coconut.

what is coconut mEAL?

Coconut meal is the left over fibrous content from making coconut oil and or coconut milk. Much of the fat content in the coconut has been removed when squeezing or pressing the coconut to make milk or oil. This makes coconut meal lower in fat content and when used to make coconut flour, the resulting flour is a bit lighter than full fat coconut flour (see above). 

Easily make your coconut flour from the left over coconut meal after making coconut milk. Give it a try and I promise, you'll never buy store bought again!

What is COCONUT MILK POWDER?

Coconut milk powder is a fine, white powder commercially made through the spray-drying process of raw unsweetened coconut cream.

Making coconut milk powder at home involves a process of drying out fresh coconut milk & blending until it becomes a fine powder. Much like dairy milk powder is dehydrated milk, coconut milk powder is dehydrated coconut milk. Much of the healthy fats in the milk are retained in the powdered form. 

Bear in mind that coconut milk powder is dried coconut milk. It isn’t the same as coconut flour which is often using in baking and comes from the defatted meat of the nut. Coconut milk powder is dehydrated coconut milk, retaining much of the fat (or good saturates!) found in the milk. 

Easily make your own incredibly creamy & delicious coconut milk, coconut milk powder, coconut cream lovely plant based milk products, from just organic shredded coconut! Let us show you how! It's 100% natural coconut milk products with no additives, preservatives, emulsifiers or gums! Give it a try and I promise, you'll never buy store bought again!

What is COCONUT flour?

Coconut flour is made from dried, ground coconut meat and is a natural byproduct of coconut milk production. Once the coconut meat has been blended with water & pressed to remove most of the fats (coconut milk production), the left over “pulp” aka coconut meal, is then used to make coconut flour. This “defatted coconut” flour has a lower fat content as most of the oil has been extracted before grinding into a powder.

There is also full-fat coconut flour, in which the dried meat of the coconut is ground into a powder. This type of coconut flour contains more coconut oil and therefore can oxidize and go rancid. Which is why I like making it myself when I need it. When I make coconut milk, I use the “pulp” to make coconut flour & then bake with it. 

Easily make your coconut flour from the left over coconut meal after making coconut milk. Give it a try and I promise, you'll never buy store bought again!

USES OF COCONUT flour - Baking tips

Coconut flour is gluten free and is often used in baking. It has a gritty texture so make sure to sift thoroughly before adding to your baking.

Coconut flour can be used as a substitute for wheat in recipes, however, only up to 20-25% of the weight of regular wheat flour in the recipe. Coconut flour contains no starch and retains a lot of liquid, so if you use to much it will tend to make your baking flat & dense as it will steal all of the moisture. If you aren’t sure, it is best to use coconut flour in recipes that are developed to be used with coconut flour.

what does COCONUT flour taste like?

Coconut flour has a soft, powdery texture and a very distinct coconut aroma and it lend this flavour to baking. It tastes a bit nutty & sweet, although milder than shredded coconut.

health benefits OF COCONUT flour

Here are some potential health benefits associated with consuming coconut flour:

  1. High in fibre: Coconut flour is an excellent source of dietary fibre, with up to 5 grams of fibre per tablespoon. Fibere has been shown to help regulate blood sugar levels, improve digestion, and promote satiety, which may aid in weight management.

  2. Low glycemic index: The glycemic index (GI) is a measure of how quickly a food raises blood sugar levels. Foods with a high GI can cause spikes in blood sugar levels, which can lead to insulin resistance and diabetes. Coconut flour has a low GI, making it a suitable option for people with diabetes or those looking to manage their blood sugar levels.

  3. Gluten-free: Coconut flour is naturally gluten-free, making it a safe option for people with celiac disease or gluten sensitivity.

  4. Rich in healthy fats: Coconut flour is high in healthy fats, including medium-chain triglycerides (MCTs), which are believed to have various health benefits, such as boosting energy levels and aiding in weight loss.

  5. Rich in protein: Coconut flour is also a good source of protein, with up to 4 grams of protein per tablespoon.

  6. Nutrient-dense: Coconut flour is rich in vitamins and minerals, including iron, potassium, and magnesium, which are essential for maintaining good health.

It is important to note that coconut flour is also high in calories and should be consumed in moderation as part of a balanced diet.

Easily make your own incredibly creamy & delicious coconut milk, coconut milk powder, coconut cream lovely plant based milk products, from just organic shredded coconut! Let us show you how! It's 100% natural coconut milk products with no additives, preservatives, emulsifiers or gums! Give it a try and I promise, you'll never buy store bought again!

MATERIALS LIST - diy Coconut Flour

  1. Blender – I use a Vitamix but you can use any blender or even a food processor
  2. Baking Sheet
  3. Parchment Paper
  4. Air-Tight Container

INGREDIENTS

  1. Coconut “pulp” – left over from making coconut milk

HOW TO MAKE COCONUT flour - 2 ways

1. using left over coconut pulp (low fat version)

3-steps to make fresh coconut flour from leftover coconut pulp after making coconut milk:

  1. Spread the pulp on a baking sheet and bake at a low temperature (around 150°F or 65°C) until it is completely dry – about 45-60 mins.
  2. Then blend it into a fine powder using a blender or food processor.
  3. Store coconut flour in an airtight container in a cool, dry place for up to several months.
     
  1.  

2. From fresh coconut or unsweetend coconut flakes

3-steps to make fresh coconut milk from fresh coconut or unsweetened coconut flakes (or shredded):

  1. Preheat your oven to 350°F (180°C).

  2. Crack open the coconuts and remove the white flesh from the shells. Use a sharp knife to separate the flesh from the brown outer skin.

  3. Cut the coconut flesh into small pieces and spread them out on a baking sheet.

  4. Place the baking sheet in the preheated oven and bake for about 10-15 minutes, or until the coconut is dry and lightly toasted.

  5. Remove the coconut from the oven and let it cool completely.

  6. Once the coconut is cool, or if using coconut flakes (start here) add it to a blender or food processor and blend until it becomes a fine powder.

  7. Place a fine-mesh strainer or cheesecloth over a bowl and pour the blended coconut into the strainer.

  8. Use a spoon or your hands to press the coconut flour through the strainer, removing any large pieces or lumps.

  9. Store the coconut flour in an airtight container in a cool, dry place for up to several months.

  1.  
Enjoy these easy & delicious gluten free bagels with your Sunday morning latte! The best part is you absolutely can not tell they are gluten free. I promise! They are free from xanthan gum, guar gum & commercial yeast! These tasty bagels are traditional Canadian Montreal style, slightly sweeter (they are boiled in water sweetened with Canadian maple syrup or honey) and a little smaller smaller than New York style bagels. They are slightly crispy on the outside and chewy on the inside. These gluten free bakes are incredibly tasty with the perfect chewiness you've come to expect from a high quality bagel! If you're gluten free, dairy free, or vegan and miss eating bagels, you're going to love this recipe! Sourdough bagel recipe, gluten free sourdough bagels, gluten free vegan sourdough bagels, gluten free vegan, gluten free bagel recipe, gluten free bagels

Want more delicious recipes & how to's at your fingertips?

Get updates on our latest posts & recipes from TurmericMeCrazy straight to your inbox!

By clicking subscribe you are consenting to receive emails from TurmericMeCrazy. I will only email you monthly with new recipes & updates. No spam I promise!

PIN THIS diY COCONUT flour RECIPE for later

Easily make your coconut flour from the left over coconut meal after making coconut milk. Give it a try and I promise, you'll never buy store bought again!

Have a burning question? Please feel free to contact me anytime in the comments below or privately on my contact page.

PLEASE RATE & COMMENT

I sure do hope you try this coconut flour recipe at home. I promise, you’ll love it and won’t believe how easy it is! If you try it, I’d be ever so grateful if you’d please add a comment & a rating onto the recipe below or at the bottom of the post ♡. This will help Google recognize it and help my website grow.

Thank you once again for your readership & support.

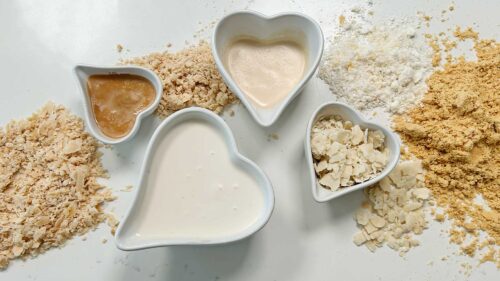
Now let’s make some coconut milk!

please share this coconut milk recipe ♡!

Easily make your coconut flour from the left over coconut meal after making coconut milk. Give it a try and I promise, you'll never buy store bought again!

Homemade Toasted Coconut Flour

Dramatically improve the flavour of your coconut flour by using toasted coconut! Zero waste with this way of making toasted coconut milk then using the meal to make lovely coconut flour.
5 from 1 vote
Please COMMENT if you love this recipe!
Prep Time: 5 minutes
Cook Time: 15 minutes
Total Time: 20 minutes
Servings: 200 grams

Equipment Needed

Author: Trish
Cost: $1

INGREDIENTS
 

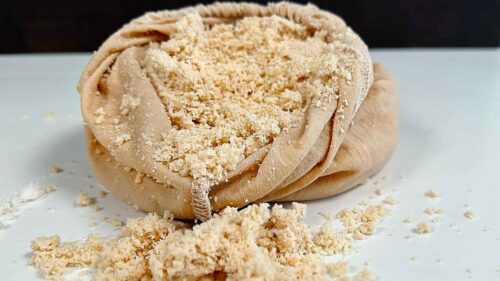
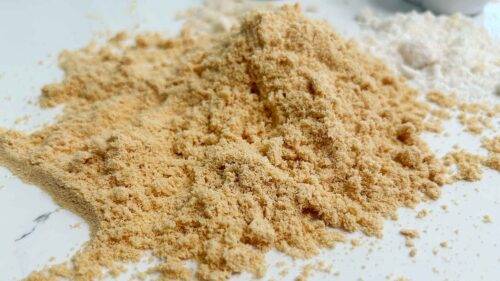
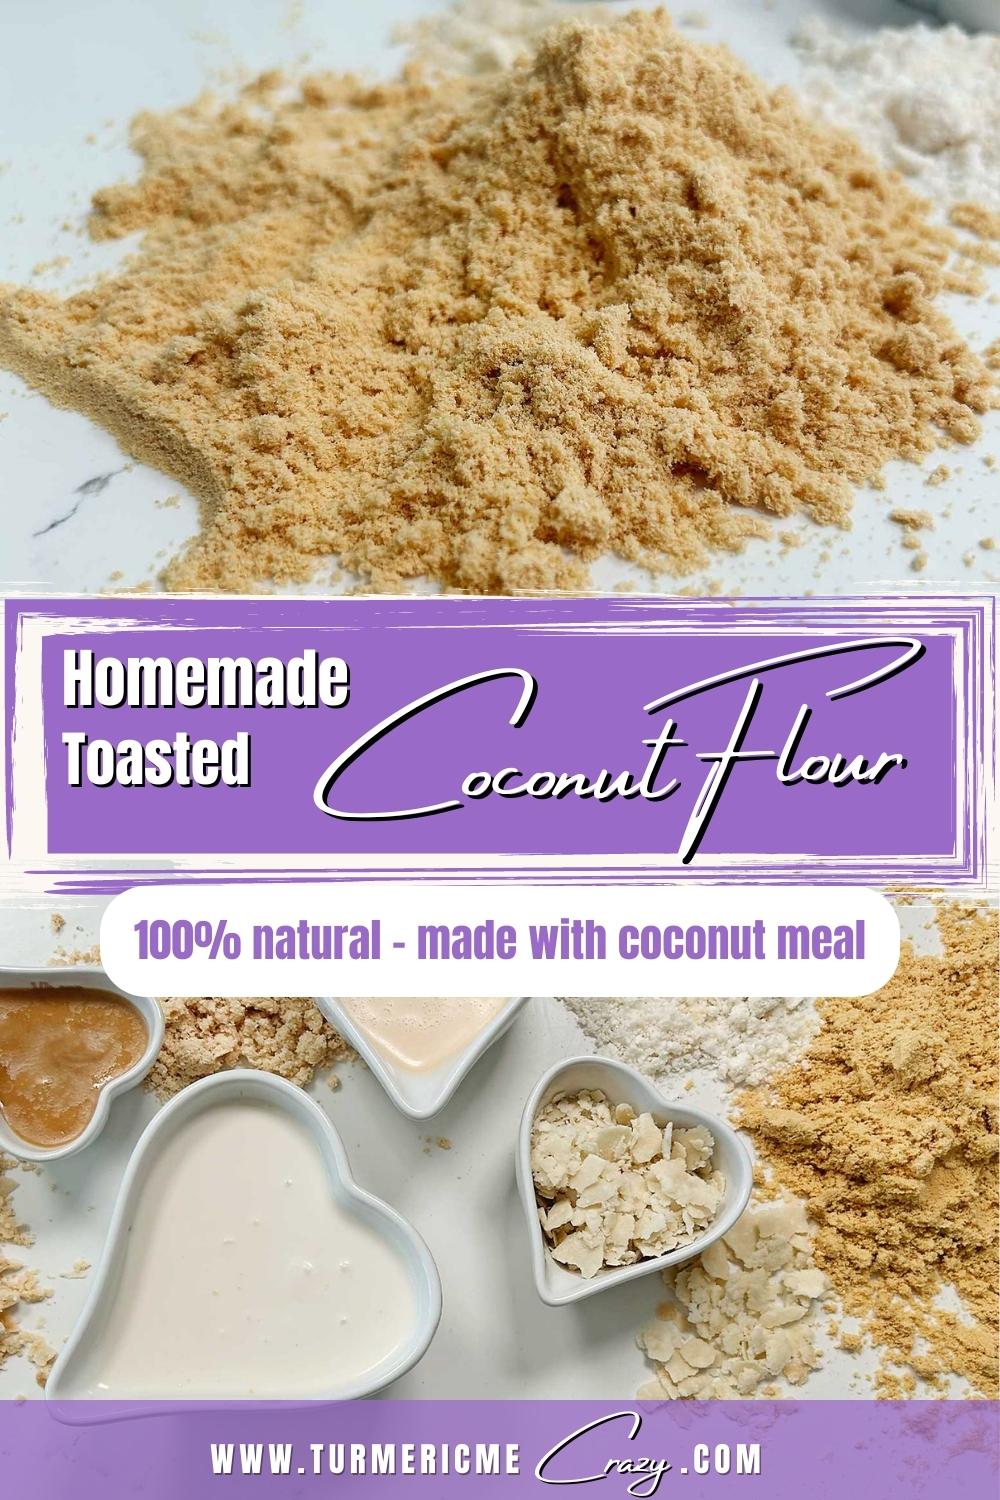
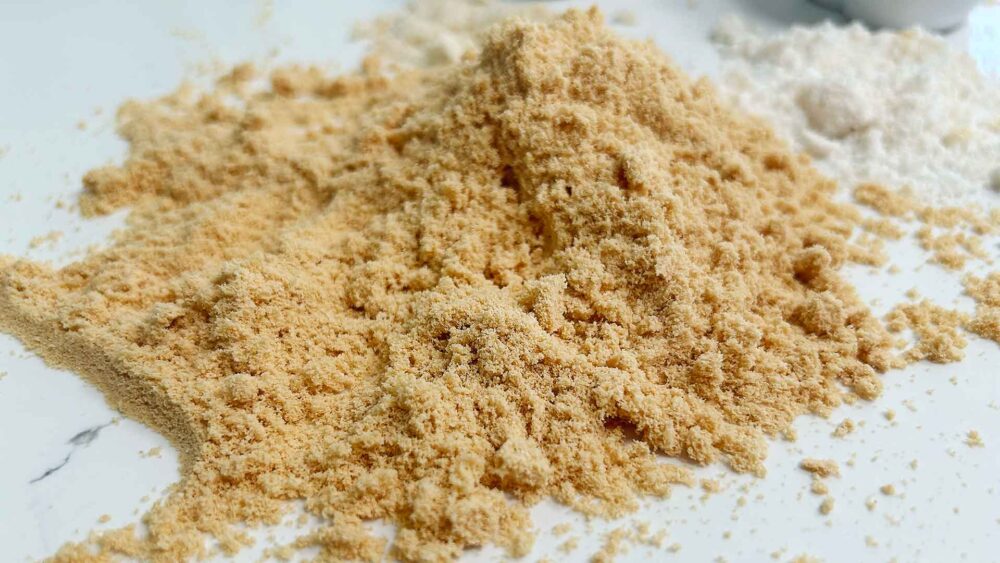
  • 200 g Coconut Meal left over from making toasted coconut milk or cream

INSTRUCTIONS

TO QUICK DRY

  • Pre-heat oven to 325°F convection (163°C fan).
  • Spread shredded coconut over a baking dish lined with parchment paper.
  • Bake coconut on middle rack for 15-20 mins until it is completely dry.
  • Open oven 1/2 way through and gently stir the coconut with a spatula to help it dry evenly.
  • Cool completely. Then blend in a high speed blender for 2-3 minutes until reaches a fine powder. You can sift once and blend a second time if you want a finer powder. Store in an airtight container for up to 6 months.

TO SLOW DRY & DEHYDRATE

  • Pre-heat oven to 170°F convection (76°C fan) or dehydrate setting.
  • Spread shredded coconut over a baking dish lined with parchment paper.
  • Bake coconut on middle rack for 1-3 hours until it is completely dry.
  • Open oven 1/2 way through and gently stir the coconut with a spatula to help it dry evenly.
  • Cool completely. Then blend in a high speed blender for 2-3 minutes until reaches a fine powder. You can sift once and blend a second time if you want a finer powder. Store in an airtight container for up to 6 months.

Notes

The longer you bake the coconut with the quick dry method, the darker it will become but watch it closely as it browns VERY fast! The darker you toast the coconut, the stronger the flavour profile it creates. So depending on your taste & what you're using it for, you may want to toast it for less time or more time.

Nutrition

Nutrition Facts
Homemade Toasted Coconut Flour
Serving Size
 
35 g
Amount per Serving
Calories
20
% Daily Value*
Fat
 
0.7
g
1
%
Saturated Fat
 
0.7
g
4
%
Sodium
 
10
mg
0
%
Carbohydrates
 
2.7
g
1
%
Fiber
 
1.7
g
7
%
Sugar
 
0.3
g
0
%
Protein
 
0.7
g
1
%
* Percent Daily Values are based on a 2000 calorie diet.
Tried this recipe?Please comment to let us know how you liked it!!

ARE WE CONNECTED YET?

For more delicious, allergen free whole foods recipes, baking, gluten-free how to’s, …and lots of love and support, follow me on YOUTUBE, INSTAGRAM, PINTEREST, & FACEBOOK.

Want to make GLUTEN FREE SOURDOUGH?

Still don’t have a gluten free sourdough starter? No worries! I’ve got you covered! Just go to my intuitive guide to making a gluten free sourdough starter & start making yours from scratch today!

This incredibly easy to follow video series is a daily follow along that will show you how to make a gluten free sourdough starter from scratch! I'll also show you how to make a wheat sourdough starter from scratch! With this starter, you can create all sorts of incredible bakes that are vegan (no eggs, no dairy), allergen-friendly, refined sugar-free, oat-free, gum-free, soy-free, and nut-free! Please follow along with me as I share with you my intuitive approach to building & maintaining a sourdough starter, whether it's gluten free or not! sourdough baking, sourdough starter, gluten free sourdough starter, glutenfreesourdough, gfvegan, gfvbaking
Play Video about This incredibly easy to follow video series is a daily follow along that will show you how to make a gluten free sourdough starter from scratch! I'll also show you how to make a wheat sourdough starter from scratch! With this starter, you can create all sorts of incredible bakes that are vegan (no eggs, no dairy), allergen-friendly, refined sugar-free, oat-free, gum-free, soy-free, and nut-free! Please follow along with me as I share with you my intuitive approach to building & maintaining a sourdough starter, whether it's gluten free or not! sourdough baking, sourdough starter, gluten free sourdough starter, glutenfreesourdough, gfvegan, gfvbaking

make GLUTEN FREE SOURDOUGH bread!

Would you like to make a Gluten Free Sourdough Loaf? You’ll love how easy making this bread becomes with my FREE BAKING TIMELINE & follow-along videos. I sure hope that this helps give you some ease in your gluten free sourdough journey!

Leave a Reply

Your email address will not be published. Required fields are marked *

Recipe Rating


Hi, I'm Trish

It’s so lovely of you to visit my world kitchen! My families dietary needs were enough TURMERIC ME CRAZY, but NO MORE! 

Follow us on your social

NEVER MISS A RECIPE!

Get updates on latests recipes from TurmericMeCrazy straight to your inbox!

i'm SO excited to have you!

Photograph-of-Blog-writer-Trish

Welcome to our community of

support

MORE MOUTH WATERING RECIPES...

MORE MOUTH WATERING RECIPES...

MORE RECIPES...