Whether you’re looking to optimize your kitchen pantry organization and storage, upgrade your closet organization, or enhance the beauty of a space, these gorgeous floating shelves will revolutionize how you utilize space in your home. From selecting the right materials to installing and finishing, together lets transform that ordinary storage into organized brilliance! We’ve even got a detailed instructional video to make things smooth and easy!
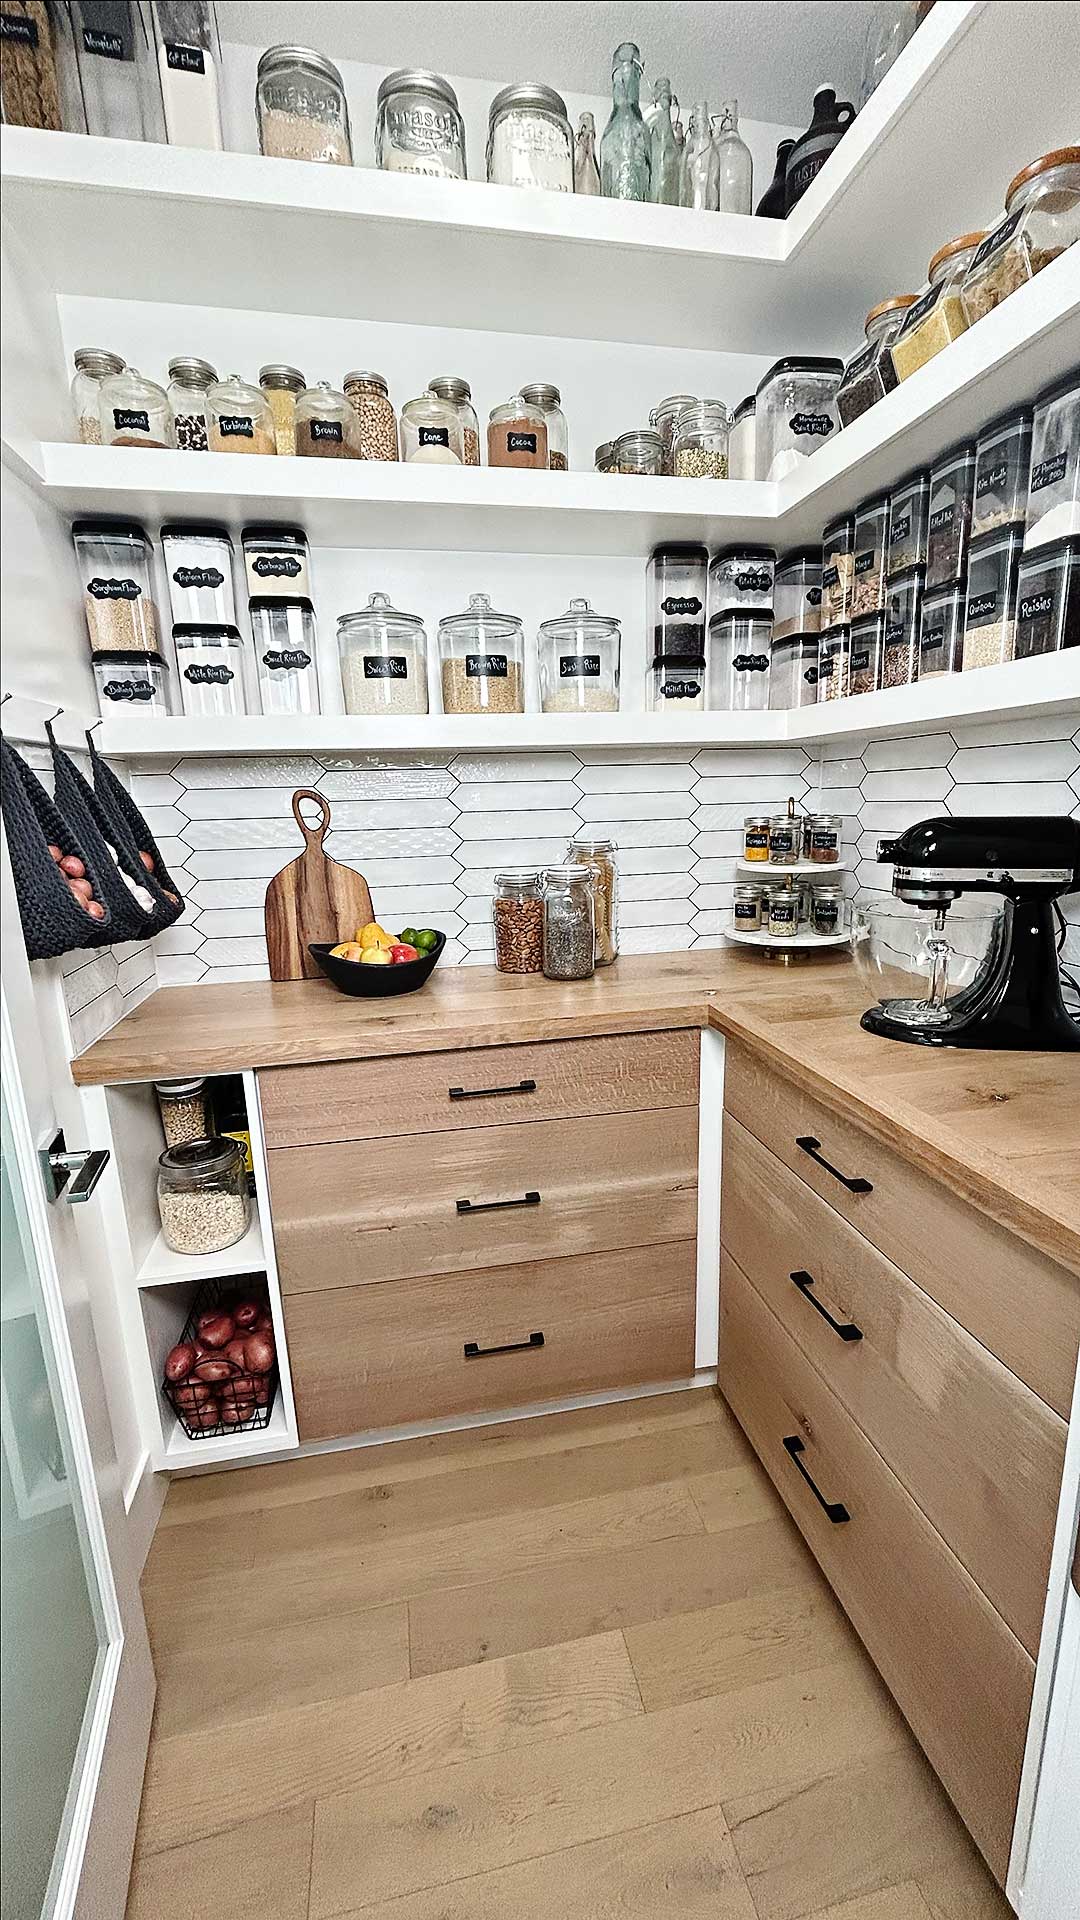
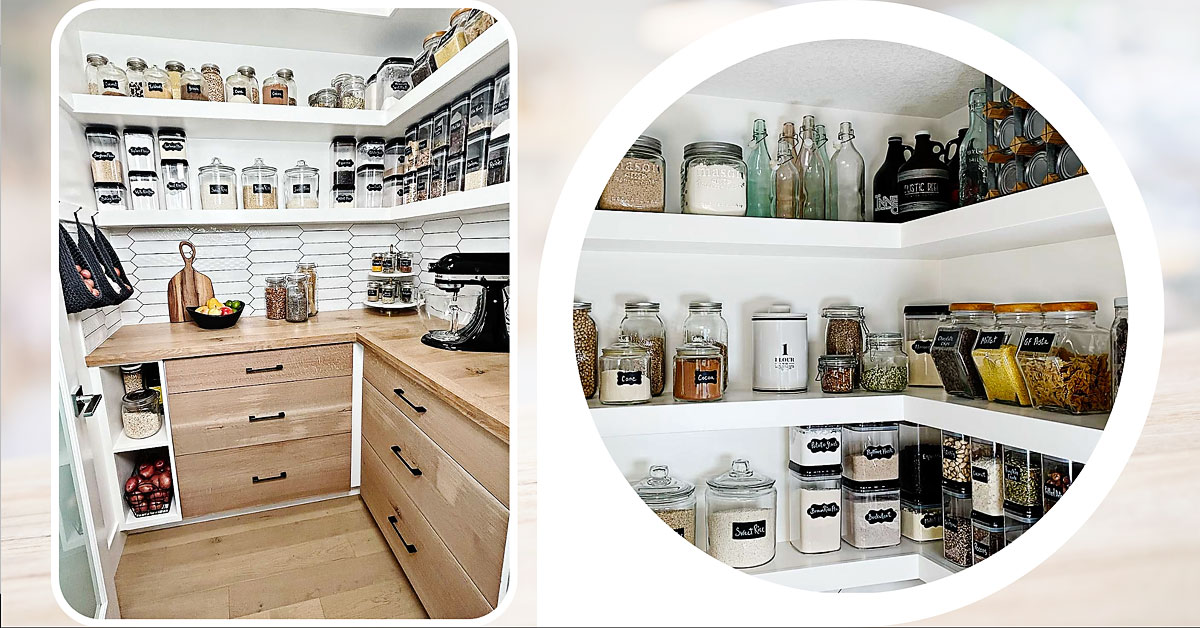
Aren’t these floating shelves just stunning? We truly couldn’t be happier with the final result. We just love everything about these floating shelves, from their gorgeous visual appeal to their absolutely incredible functionality, these shelves have truly transformed our pantry! So lets get started and show you how we made them!
what do I need to be able to build these?
Our list of tools and supplies is quite extensive. In our how to video we do our best to let you know when and where you can use alternate tools or have the lumber store do things for you.
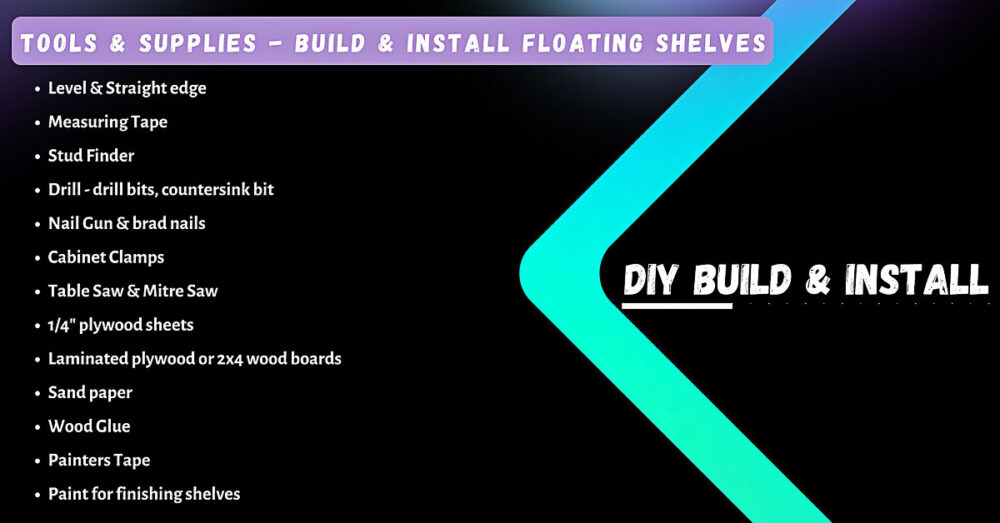
Steps to build floating shelves
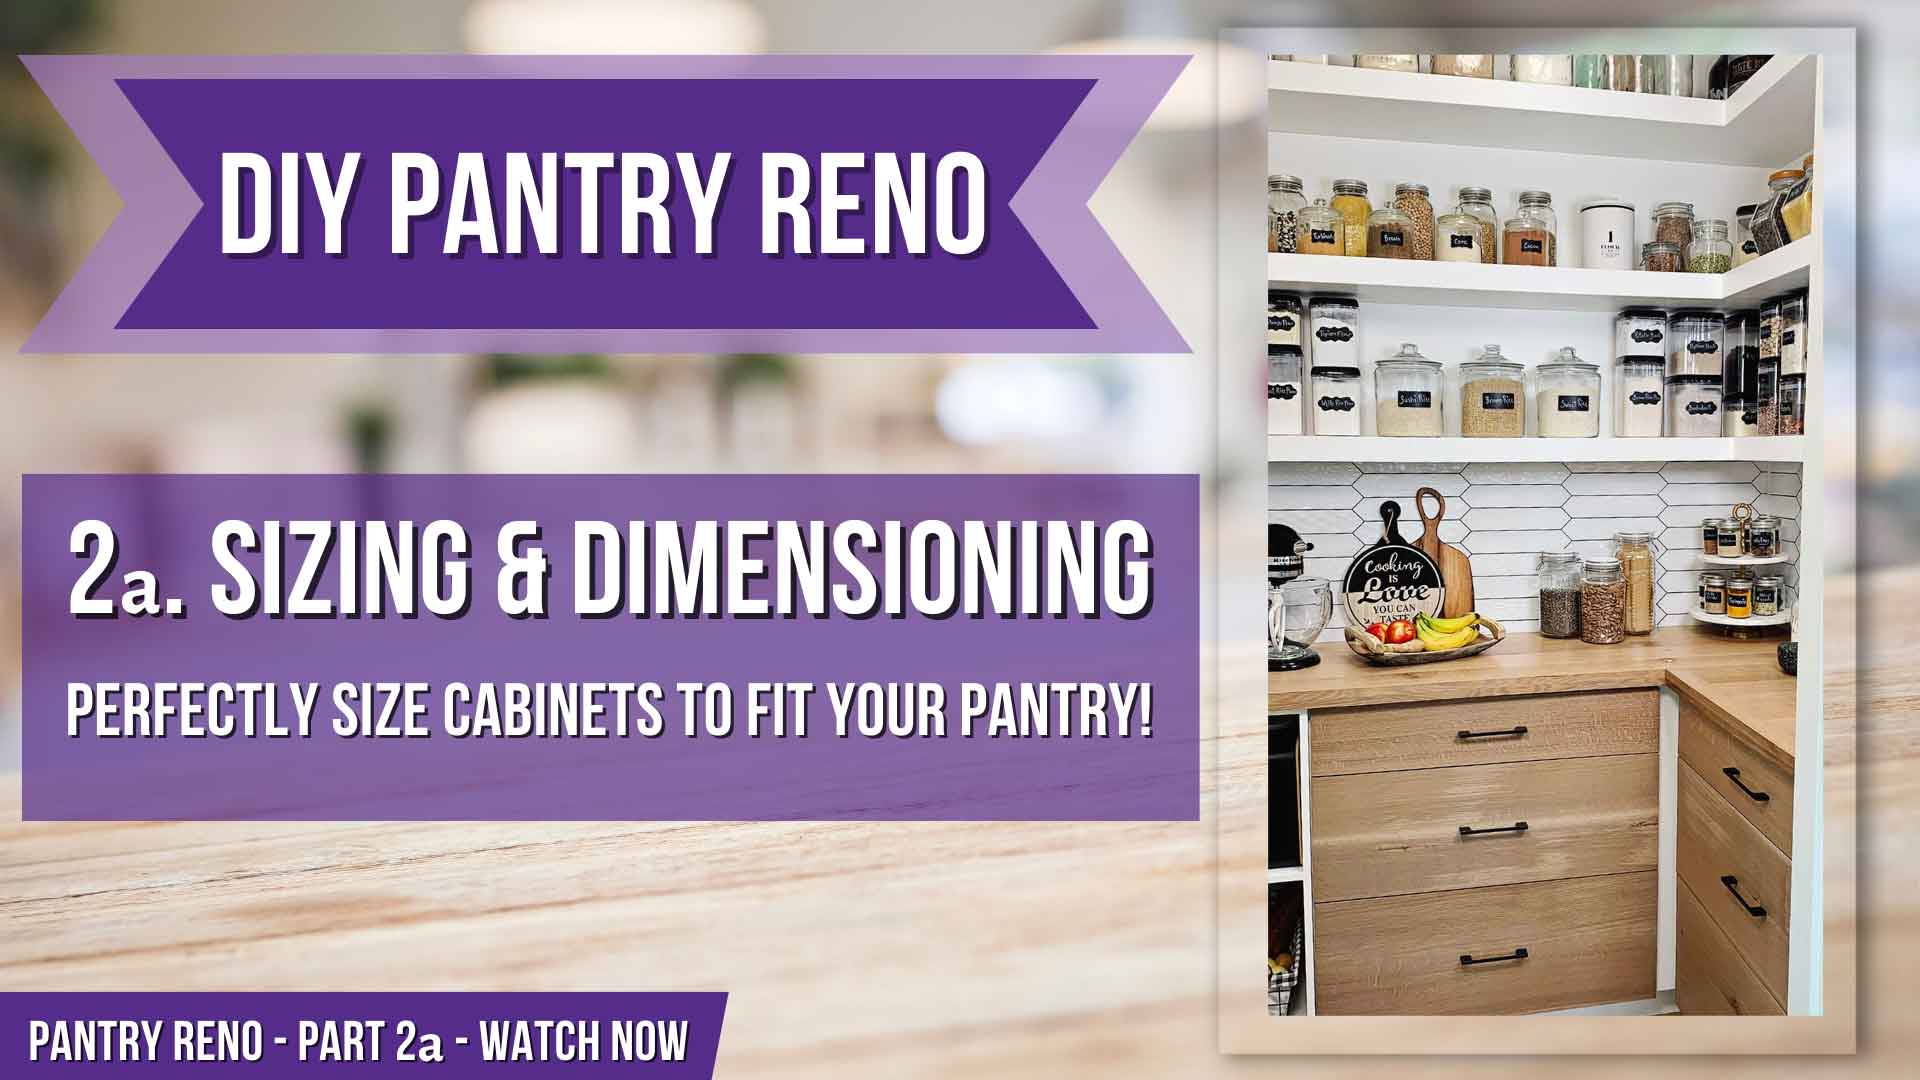
Refer to your sizing and dimensioning plans from our planning guide video. This is where all of your base measurements were calculated & recorded. Then just follow along with us!
1. Planning
Our follow along videos will walk you through absolutely everything you need to know to build your own floating shelves from scratch! So let’s get planning!
2. Build the Frames for Floating Shelves
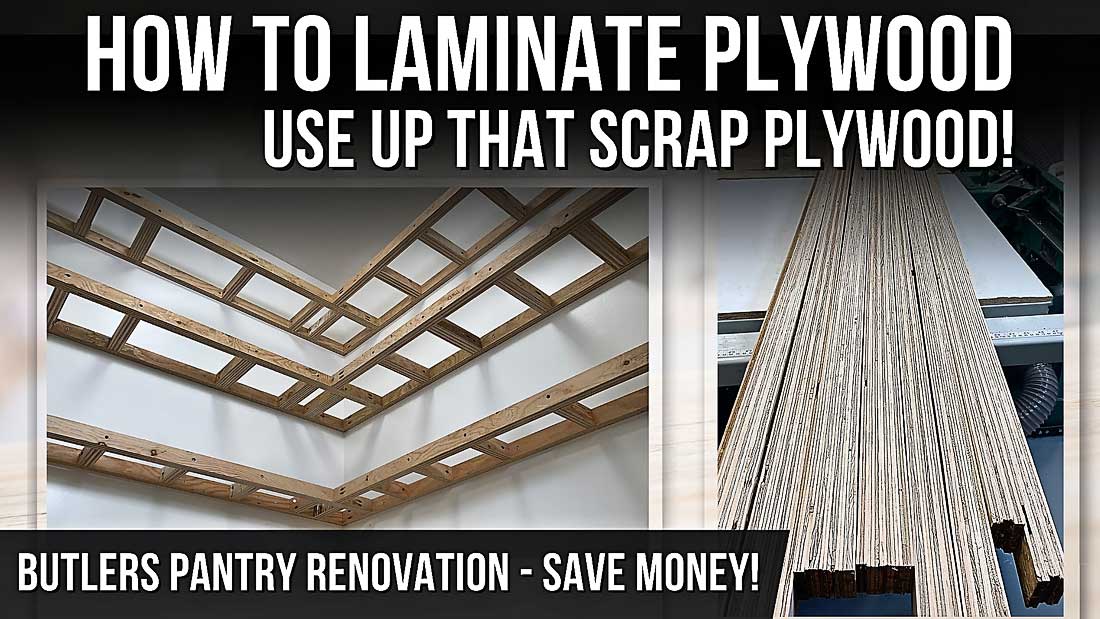
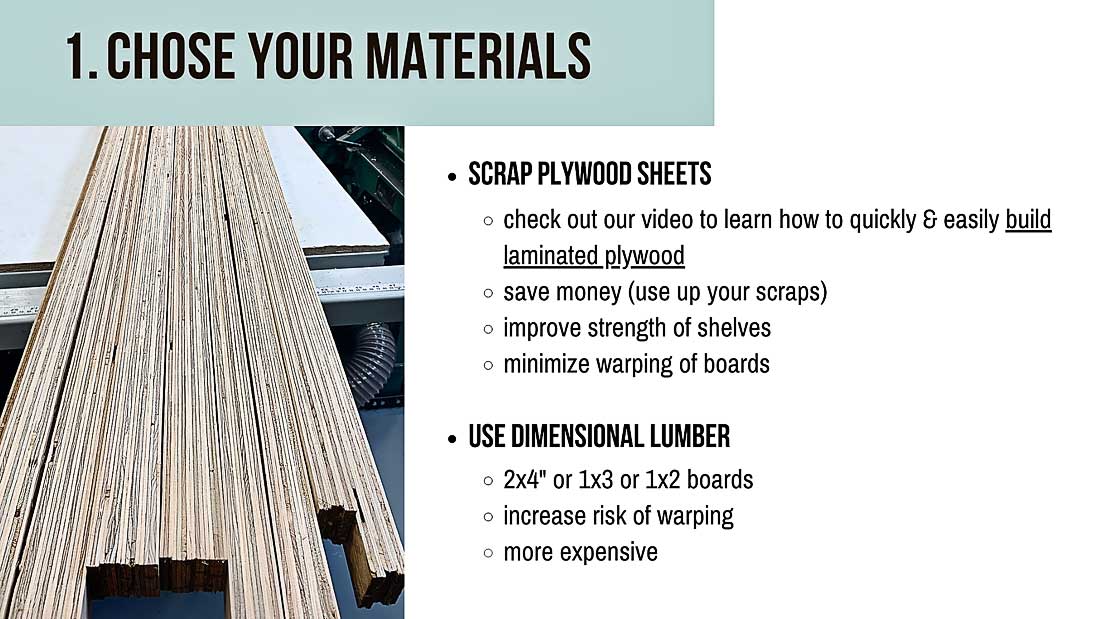
Here we will show you how to easily build a simple ladder box frame to support your floating shelves. We’ll also include all of our tools, tips and tricks to make it as quick and easy as possible. Including a video tutorial on how to laminate plywood!
3. Add Finishing Fronts to Shelves
We’ll show you how to make your floating shelves look perfectly finished and professional!
4. Finishing your Shelves for a Professional Look
Time to finish our floating shelves for a perfect professional look and feel!
5. Finish Extra Wall Braces if Needed
Now time to finish the extra wall braces if you needed them. Here we will show you how!
STEP BY STEP GUIDE to build floating shelves
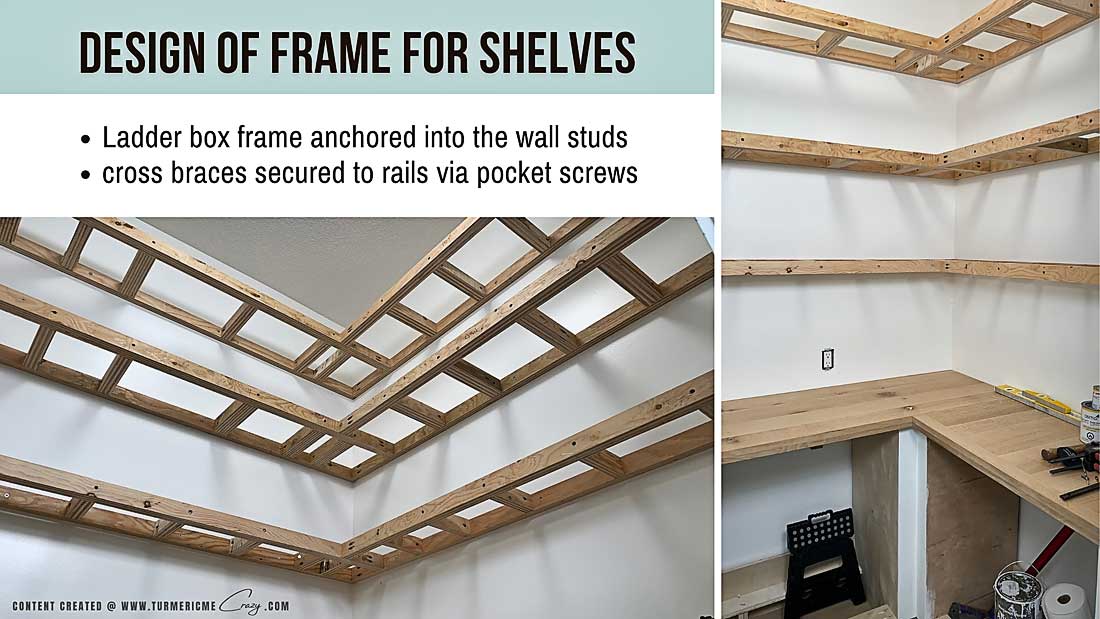
Before you start, refer to your sizing and dimensioning plans from our planning guide video. This is where all of your base measurements were calculated & recorded.
- Decide on Proportions of Shelves
- decide on # of shelves
- decide proportions and consider:
- all equal distance apart vs varying?
- ensure appealing to the eye – golden rule
- what will you store on shelves – heights?
- what will you have on your countertop? Max height?
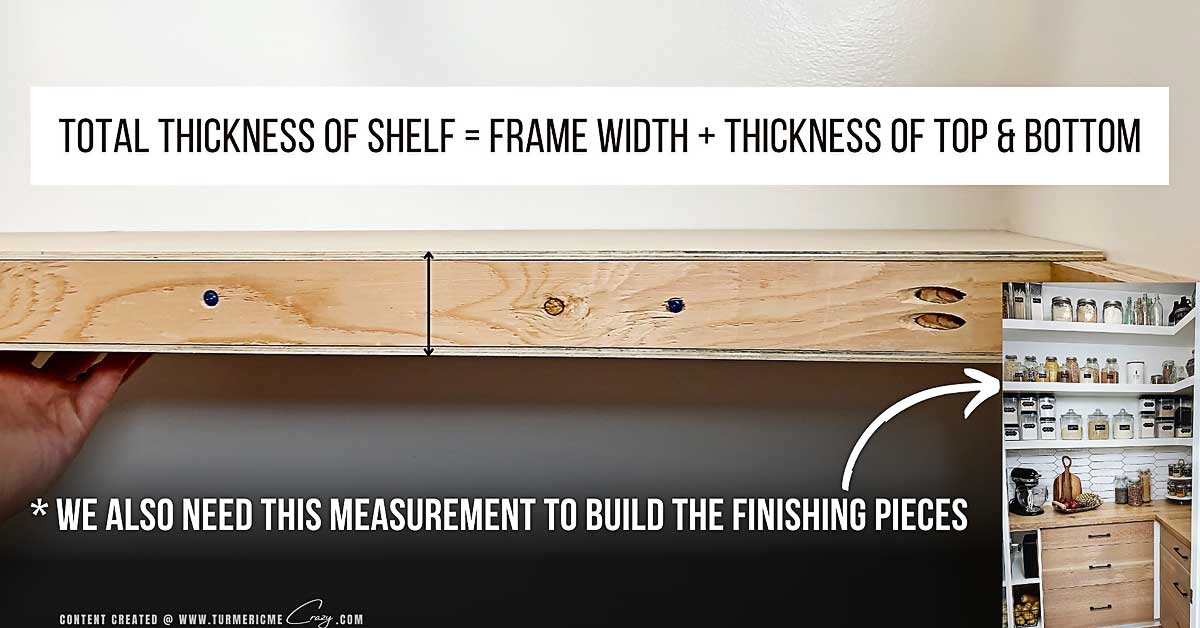
- how thick will the final shelf be?
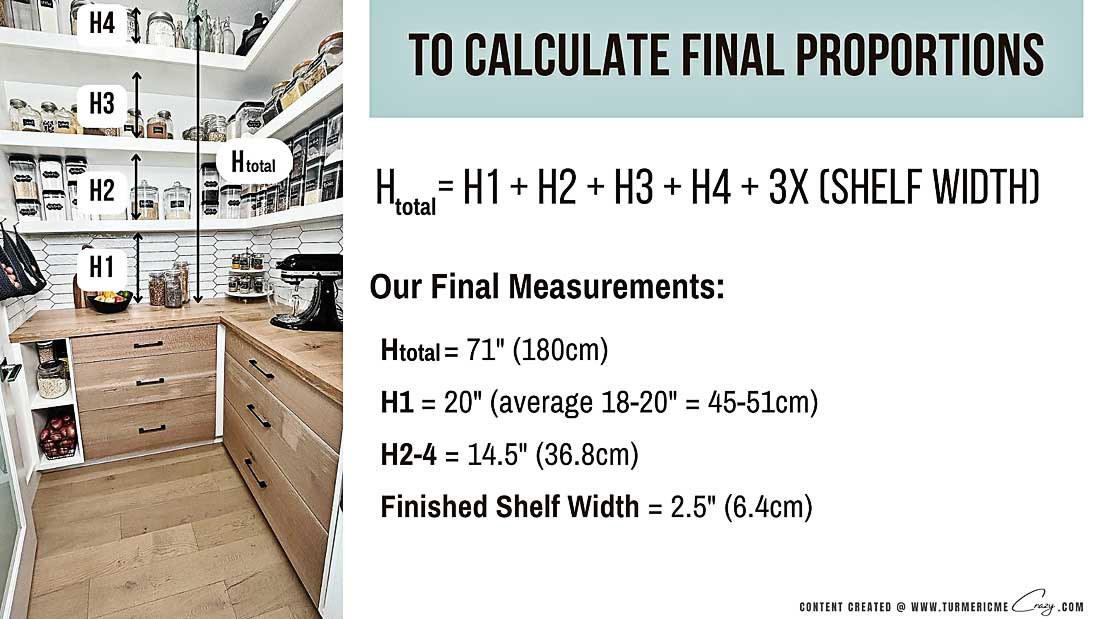
- Calculate Final Proportions
- H = Total Height (distance between countertop & ceiling)
- Total available spacing between the shelves depends on thickness of each shelf
- total thickness of shelf = frame width + thickness of top & bottom

- Decide on Heights of Shelves
H1 = Distance between countertop & 1st shelf
ensure can fit all appliances etc. Min 15″ Max 20″
we chose 20″ (average 18-20″ = 45-51cm)

- Decide on Depth of Shelves
D1 = depth of the 1st shelf
should be no more than 10”
we chose 9.25″ for maximum functionality
D2-3 = depth of the 2nd and 3rd shelves + others
average depth 11.25″-12” (large enough to hold most dish ware & consistent with average upper cabinet depth)
- we chose 12.25″ for max functionality
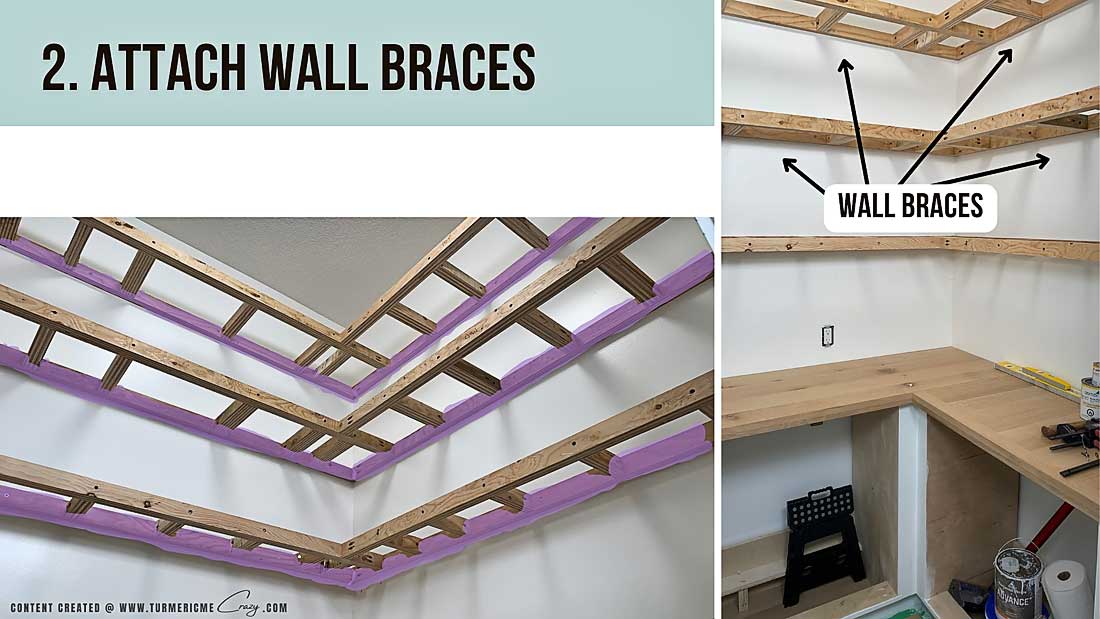
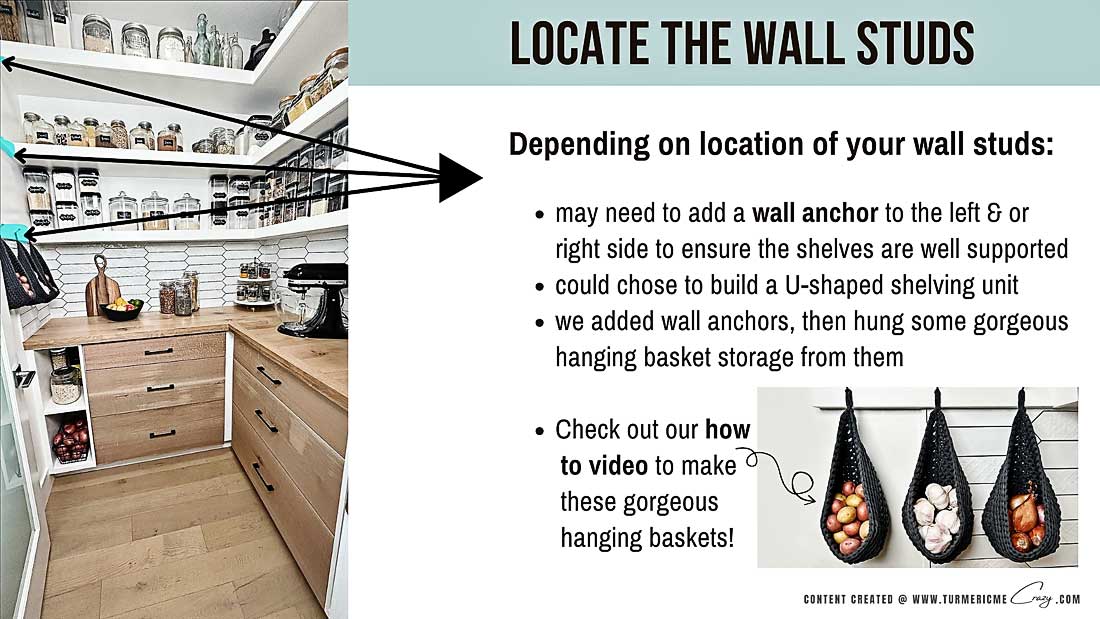
To Attach the Wall Braces:
- Measure and cut pieces for your wall braces. We used 2″ wide x 1.5″ thick x length of shelf
- Secure the wall braces into the studs in the wall with screws.
- Locate your wall studs

- Locate your wall studs
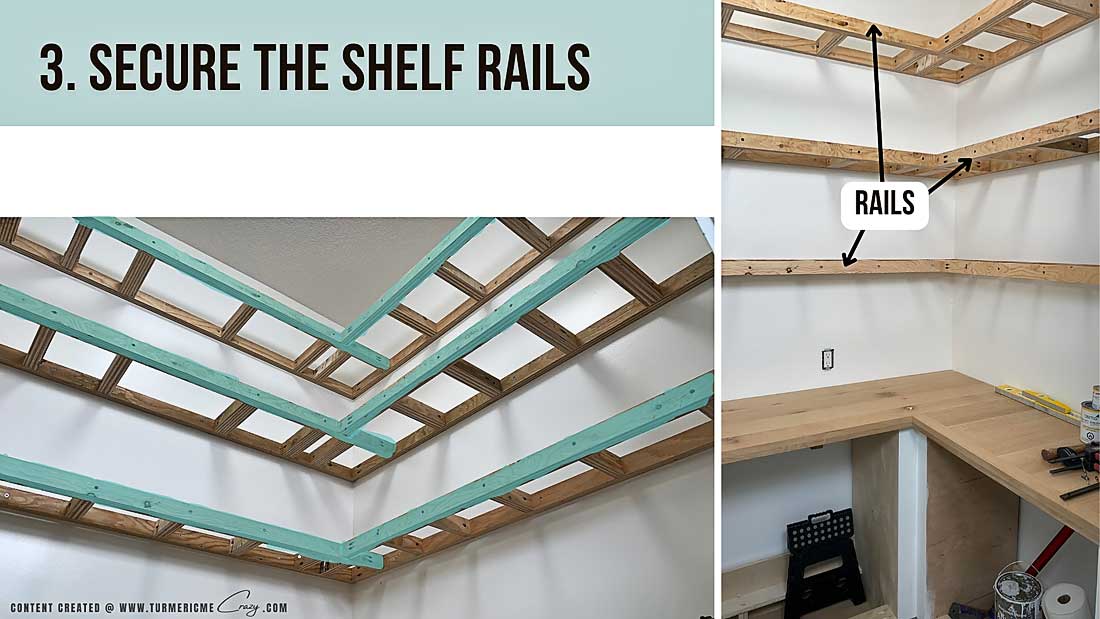 To Secure the shelf rails
- Cut the rails to exact length. Ours are 2″ wide x 2″ thick x exact length of shelf.
- We recommend using a pocket hole jig to drill pocket holes into both the fronts and backs of the rails. This makes securing them to the wall braces a breeze!
- Secure rails to wall anchors with pocket screws.
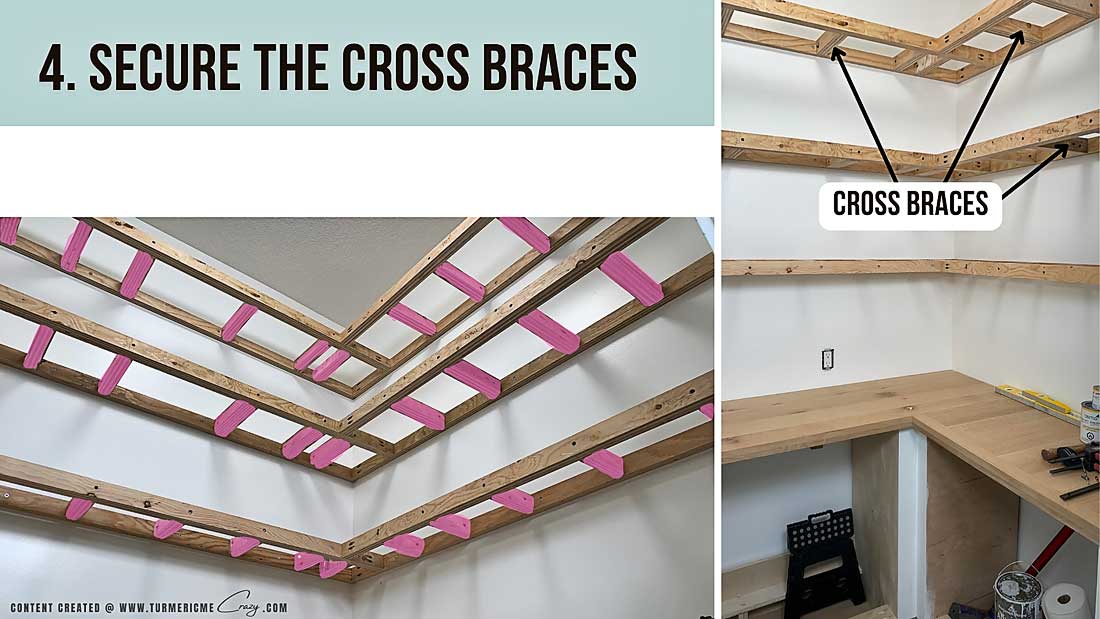 To Secure Cross Rails:
- Measure & cut cross rails after the wall braces and rails are secured.
- Our cross rails were 2″ wide x 2″ thick x the exact width between the wall anchors and the rails.
- Secure with screws on both the front edge (make sure to countersink the hole first) and the inside edge (screw in on an angle with your drill).
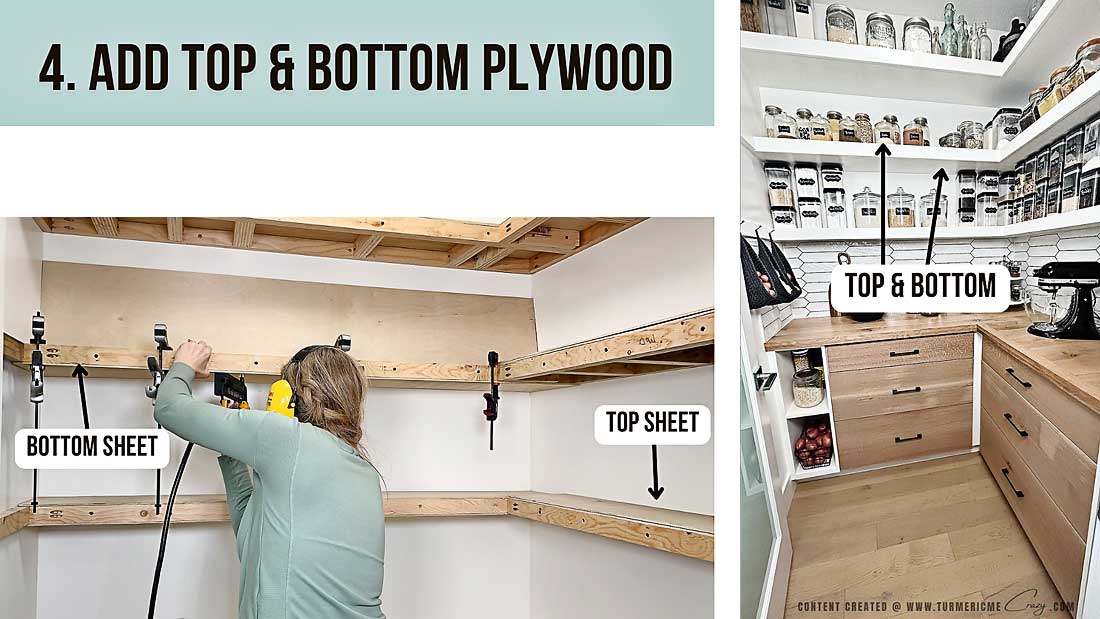 To Add Tops and Bottoms of Shelves to Frame
- Cut 1/4″ plywood sheets to the exact length of shelf
- Add bottom shelf first. Clamp it to the frame and scribe the frame shape with a pencil. Remove clamps and add glue avoiding the scribed area (see video)
- Place bottom under the shelf, clamp and secure with brad nails using a nail gun.
- Repeat for top of shelf and all other shelves.
3. Add Finishing fronts to floating shelves
We highly recommend adding some finishing pieces to the fronts of your shelf frames. This will give them a smooth, finished look that will drastically improve the aesthetic beauty of the shelves! We chose to use pre-primed boards for these pieces.
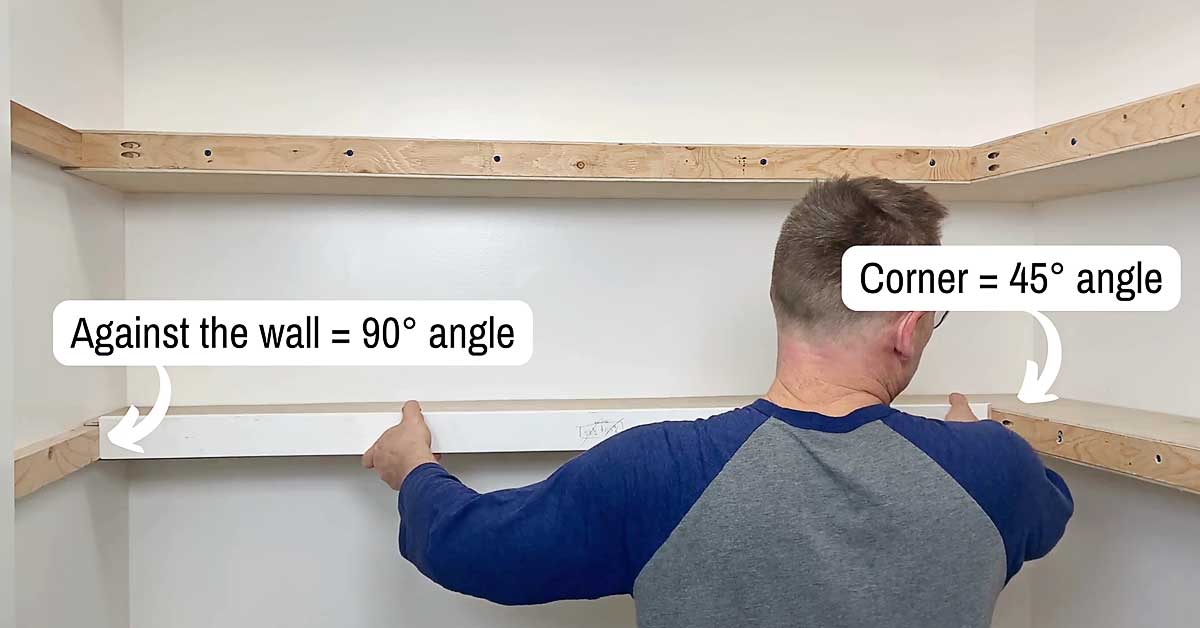
To measure the fronts:
- cut one end at at 45° angle (we used a mitre saw) and the other at a 90° angle (square).
- measure from wall brace on one side to the corner. This length will be equal to the longest edge of the 45° angle to the square edge.
To secure the fronts:
- dry-fit, glue and secure with brad nails.
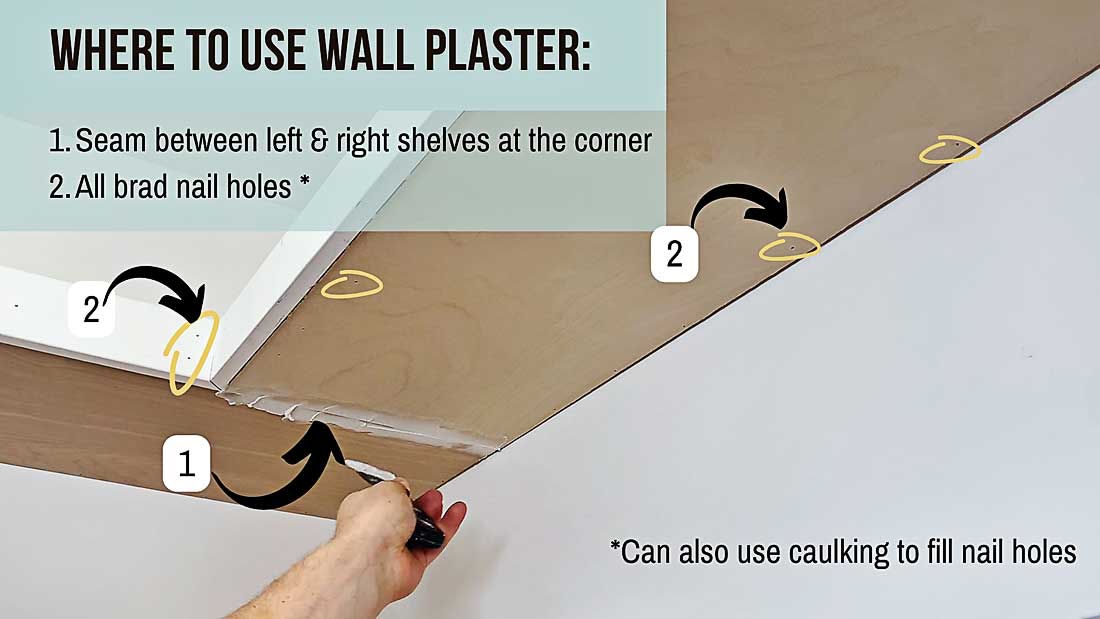
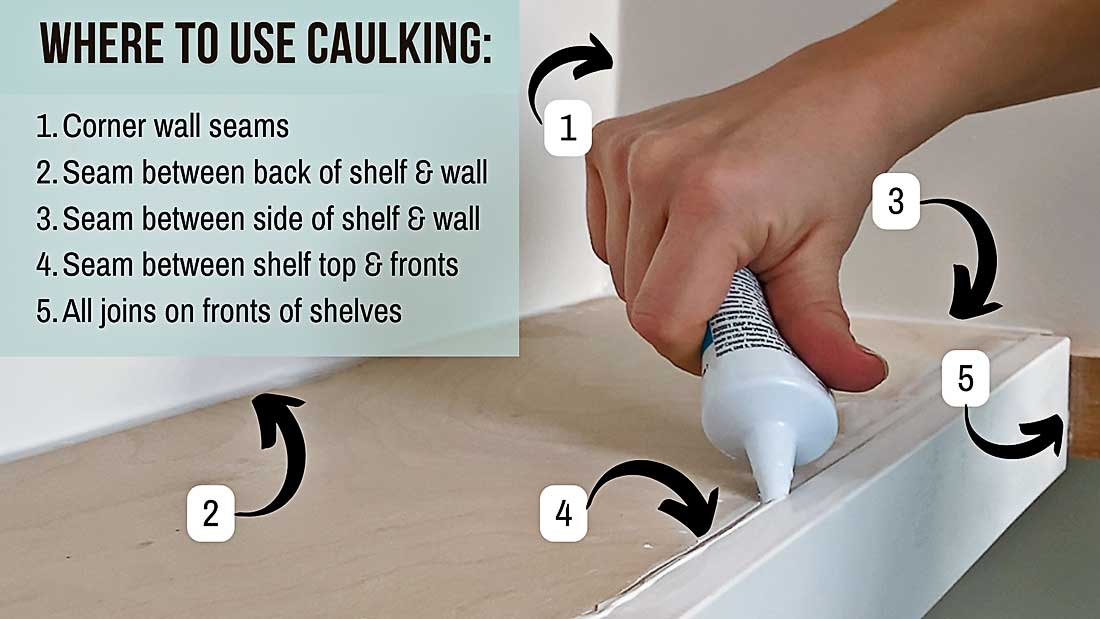
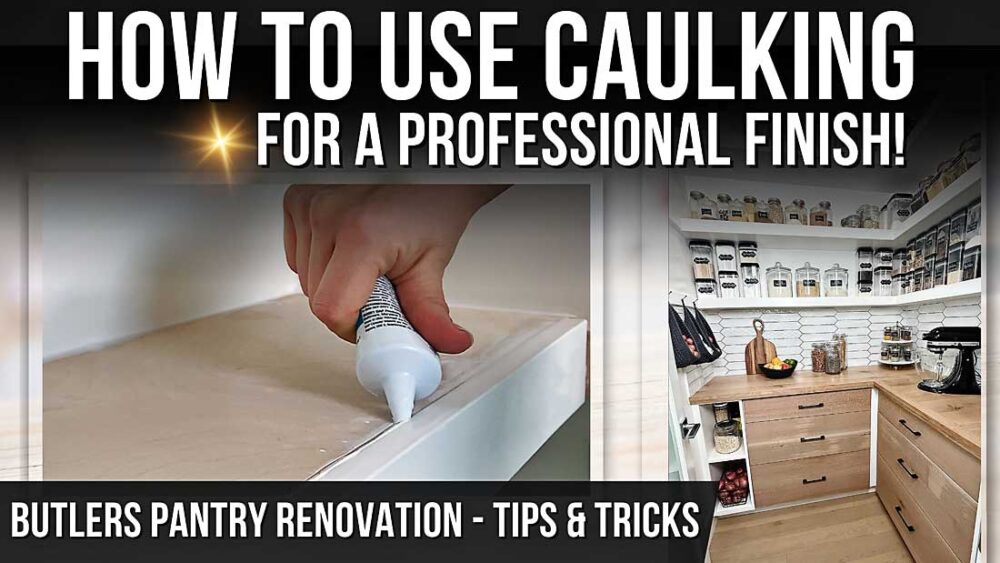
To give your floating shelves a professional finish it is necessary to clean up the joints and edges and make them nice them nice and smooth prior to painting. We like to use wall plaster and caulking to do this finishing. Here are some guidelines for where we use each. See video for more detailed explanation.
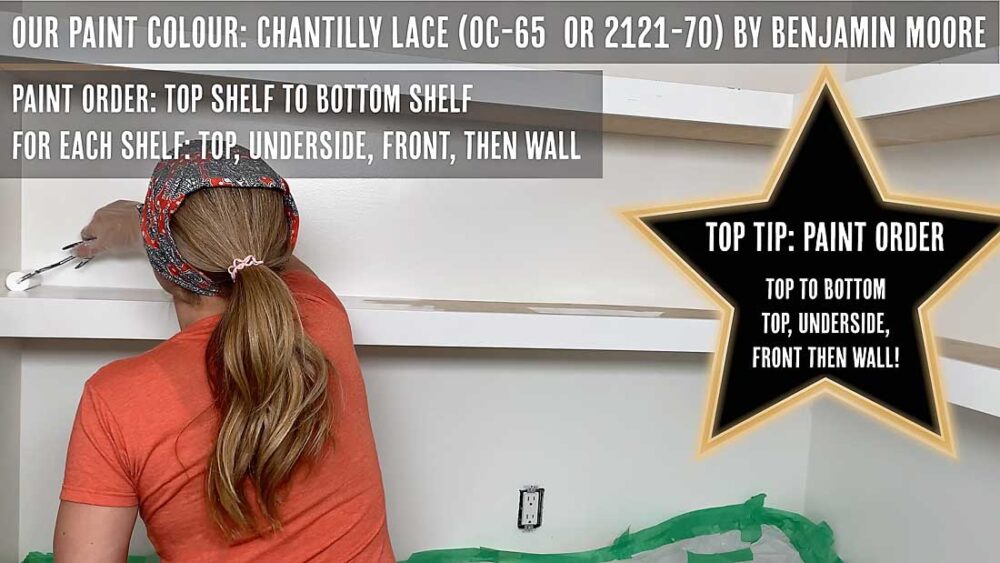
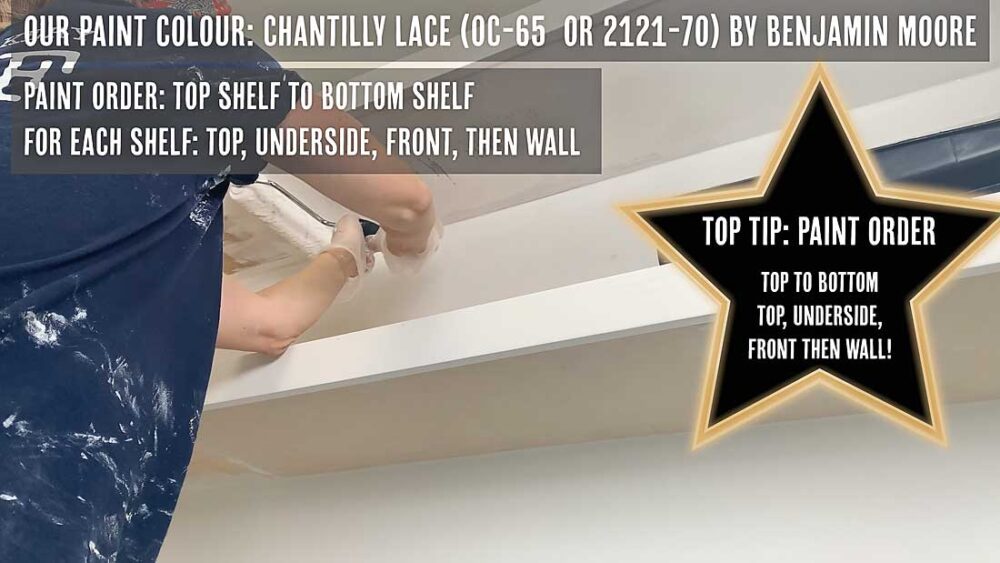
Just chose your favourite colour and give it a good few coats of paint. We highly recommend using a good quality and durable paint, like Benjamin Moore Advance. It will be totally worth the investment as the durability is incredible! We chose a bright white (Benjamin Moore Chantilly Lace: OC-65 or 2121-70) to help lighten and brighten our pantry.
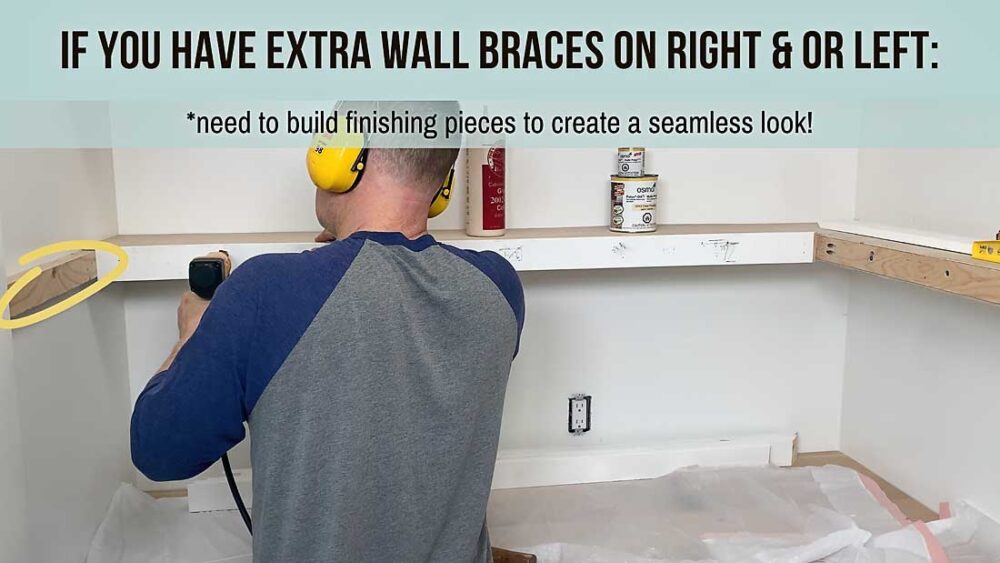
We built a box around each of our extra wall made out of scrap maple. We cut the maple to 1/4″ thick pieces on our table saw and created a box. Then of course we finish the joins and fill the nail holes with caulking.
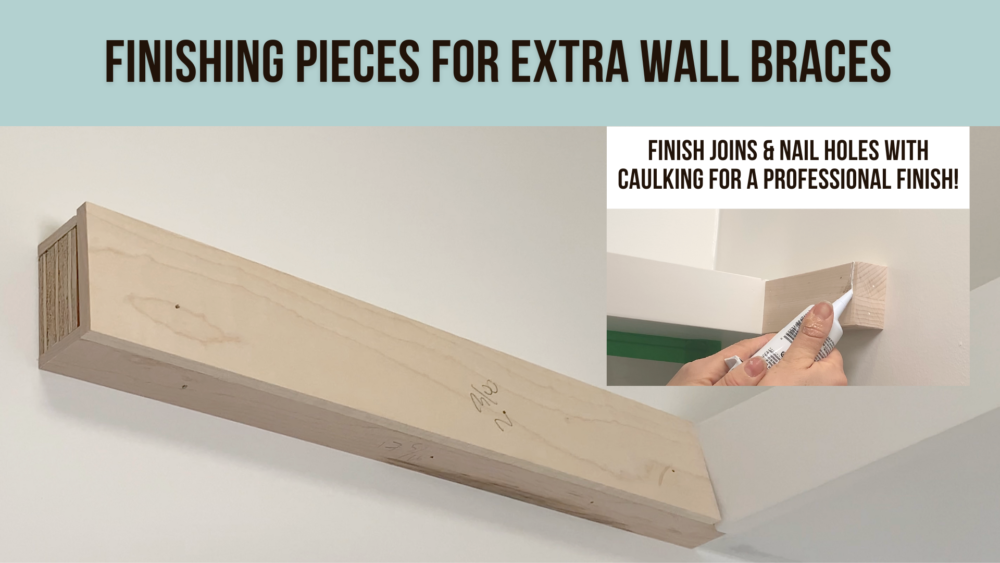
For our tips and tricks to caulking like a professional stay tuned for our video coming soon!
ENJOY YOUR GORGEOUS Floating shelves!
Watch the entire Butlers style
pantry renovation
Still don’t have a plan? Check out our Planning Guide. We’ve worked hard to create a printable PDF file for you to use to help guide you in making your base cabinet for to fit your specifications. There’s even a fill in the blank measurements list to help you get started. We hope you enjoy it!
Subscribe to our YouTube Channel to be notified when our next video goes live!
We are always working hard to get new DIY videos ready for you! Please check back again soon and subscribe to our blog & YouTube Channel to find out when our next videos are released.
Please support us ♥︎
If you’re enjoying our free recipes & DIY projects at TurmericMeCrazy and would like to say thank you, here’s how:
1) Buy us a bag of groceries to help support us and say thanks for all of our hard work ♡.
2) Leave us 5 
3) Subscribe to our monthly updates on TurmericMeCrazy.com & to our YouTube Channel.
3) Consider using some of my affiliate links on my website to buy products or check out my favourite kitchen things links.
Your support will allow us to continue to create free content on our blog & YouTube Channel! Thank you so much in advance 
Want more DIY projects & delicious recipes at your fingertips?
Get updates on our latest posts, DIY projects & recipes from TurmericMeCrazy straight to your inbox!
By clicking subscribe you are consenting to receive emails from TurmericMeCrazy. I will only email you monthly with new recipes & updates. No spam I promise!

