Servings: scones
Prevent your screen from going dark
Equipment Needed
- 1 grater
- 1 Baking pan
- Plastic Wrap optional
INGREDIENTS
- 268 g Crazy Good Gluten Free All-Purpose Flour
- 15 g Psyllium Husk whole
- 20 g Baking Powder corn & aluminum free
- 3 g Sea Salt
- 100 g Cane Sugar
- 80 g Coconut Oil frozen into a ball
- 75 g Vegan White Chocolate * Try making your own!
- 8 g Tapioca Starch OR Arrowroot Powder
- 85 g Frozen Raspberries freeze for 15 mins if picking fresh
- 225 g Coconut Milk room temperature
- 4 g Pure Vanilla Extract
INSTRUCTIONS
MISE EN PLACE
- Get all of your ingredients and equipment ready. Then read through all of the instructions. This will make the process quick & easy!
- Prep the coconut oil: measure out your coconut oil, shape it into a ball and place it in the freezer.
- Coat frozen raspberries in starch. this helps separate the raspberries and prevent them from turning the dough pink.
WHISK & CHILL DRY INGREDIENTS
- Ensure to sift the flour & baking powder, then whisk in cane sugar & sea salt. Place into freezer to cool.
PREHEAT OVEN: 425°F convection (218°C fan)
MIX THE GEL
- Mix room temperature coconut milk & vanilla. Then add psyllium husks and whisk until incorporated. Let rest about 5 minutes (until just thickening).
GRATE FROZEN COCONUT OIL INTO COOLED DRY INGREDIENTS
- Using a cheese grater, grate the coconut oil into the dry ingredients, then mix well with a spoon.
CREATE DOUGH
- Add gel to dry ingredients. Fold gel into the dry ingredients until incorporated fully.
- Kneed the dough with your cool hands for 2-3 minutes until forms a nice ball. Ensure your hands stay cool by rinsing under cool water & drying (if needed).
COVER THE DOUGH & CHILL
- Cover the dough in plastic wrap or in a container with a lid for 15 minutes. This helps develop the flavour & makes the dough easier to work with. It also helps the scones to retain their shape while baking as the fats in the coconut oil will melt slowly & allow the rise to occur.
ROLL OUT THE DOUGH
- Lay out parchment paper or plastic wrap then place chilled dough on top. Cover dough with plastic wrap or parchment paper. Using your hands & or a rolling pin, massage & work it slightly to roll out into 1/4" to 1/2" (0.6cm to 1.3cm) thick.
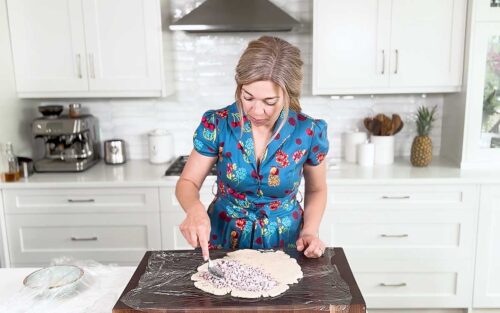
- Using a spoon, spread the frozen raspberries & chocolate over 1/2 of the dough. Try to avoid touching it with your hands.
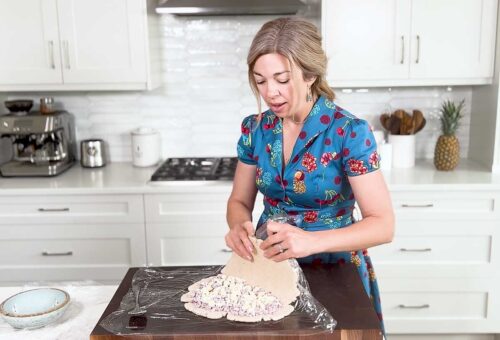
- Using the plastic wrap (or parchment), fold the dough over the raspberries & chocolate & pinch the ends closed.
- Using the plastic wrap (or parchment paper), shape the dough into a ball. If you want the raspberries and chocolate more dispersed throughout work the dough a little longer to ensure they are not just in the centre.

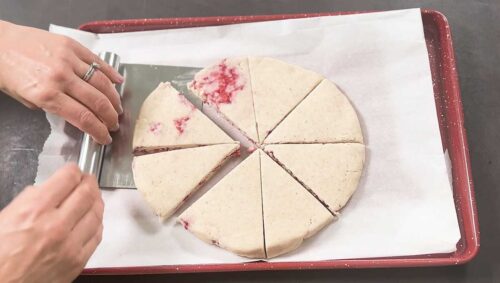
- Using your hands & or a rolling pin, roll the scone dough into a 1" thick and 9" diameter shape. Repair any cracks by gently massaging over the plastic wrap.

- Using a bench scraper or a sharp knife, cut the circle into 8 equal pieces. Then separate each scone by no more than 1/4" (0.6cm). Use a towel to wipe your knife clean in between cuts.
COVER & CHILL 15 MINS
- Cover with plastic wrap & place scones into the fridge for 15 minutes to chill.
BAKE
- Bake for 5-7 mins @ 425°F convection (218°C fan). Here you'll see the initial rise.
TURN OVEN DOWN TO 325°F convection (163°C fan)
- Bake for an additional 10-14 minutes until the tops are nice and golden.
GENTLY REMOVE FROM OVEN & REST FOR 10-15 MINS
- Rest scones on a wire rack. It takes this amount of time to set! Do not try and lift them now or they will fall apart.
- Separate with bench scraper or knife. Ensure to clean your knife in between cuts. Enjoy them warm!
Notes
CAN I USE A DIFFERENT GLUTEN FREE BLEND?
- This recipe has been specifically created with my Crazy Good Gluten Free All-Purpose Flour. I have not tested alternate flours. If you have a question about substituting out one of the flours or starches within this blend please feel free to reach out ♡.
- 66g Sweet Rice Flour
- 54g Brown Rice Flour
- 54g Sorghum Flour
- 54g Potato Starch
- 40g Tapioca Starch
- Crazy Good Gluten Free All-Purpose Flour:
- 1/3 cup + 1 Tbsp (0.23 cups) Brown Rice Flour
- 1/2 cup Sweet Rice Flour
- 1/3 cup + 1 tsp Sorghum Flour
- 1/3 cup Potato Starch
- 1/4 cup Tapioca Flour (aka Tapioca Starch)
- 3 Tbsp Psyllium Husk (whole)
- 1Tbsp + 1tsp Baking Powder
- 1/2 tsp Sea Salt
- 1/2 cup Cane sugar
- 1/3 cup Coconut Oil
- 1/2 cup White Chocolate (chopped)
- 3/4 cup Frozen Raspberries
- 1 Tbsp Tapioca Starch
- 1 tsp Pure Vanilla Extract
- 1 cup - 1 Tbsp Coconut Milk
Nutrition
Nutrition Facts
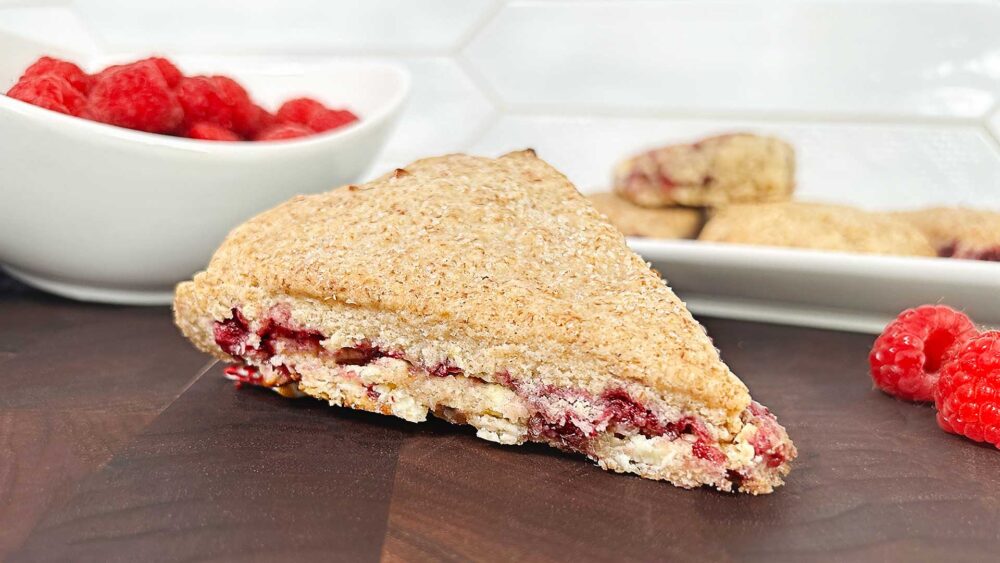
White Chocolate Raspberry Scones - Gluten Free, Dairy Free & Vegan
Serving Size
1 scone
Amount per Serving
Calories
364
% Daily Value*
Fat
9.5
g
15
%
Saturated Fat
7.5
g
47
%
Sodium
780
mg
34
%
Potassium
965
mg
28
%
Carbohydrates
67.1
g
22
%
Fiber
4.5
g
19
%
Sugar
16
g
18
%
Protein
4
g
8
%
Calcium
120
mg
12
%
Iron
1
mg
6
%
* Percent Daily Values are based on a 2000 calorie diet.
Tried this recipe?Please comment to let us know how you liked it!!